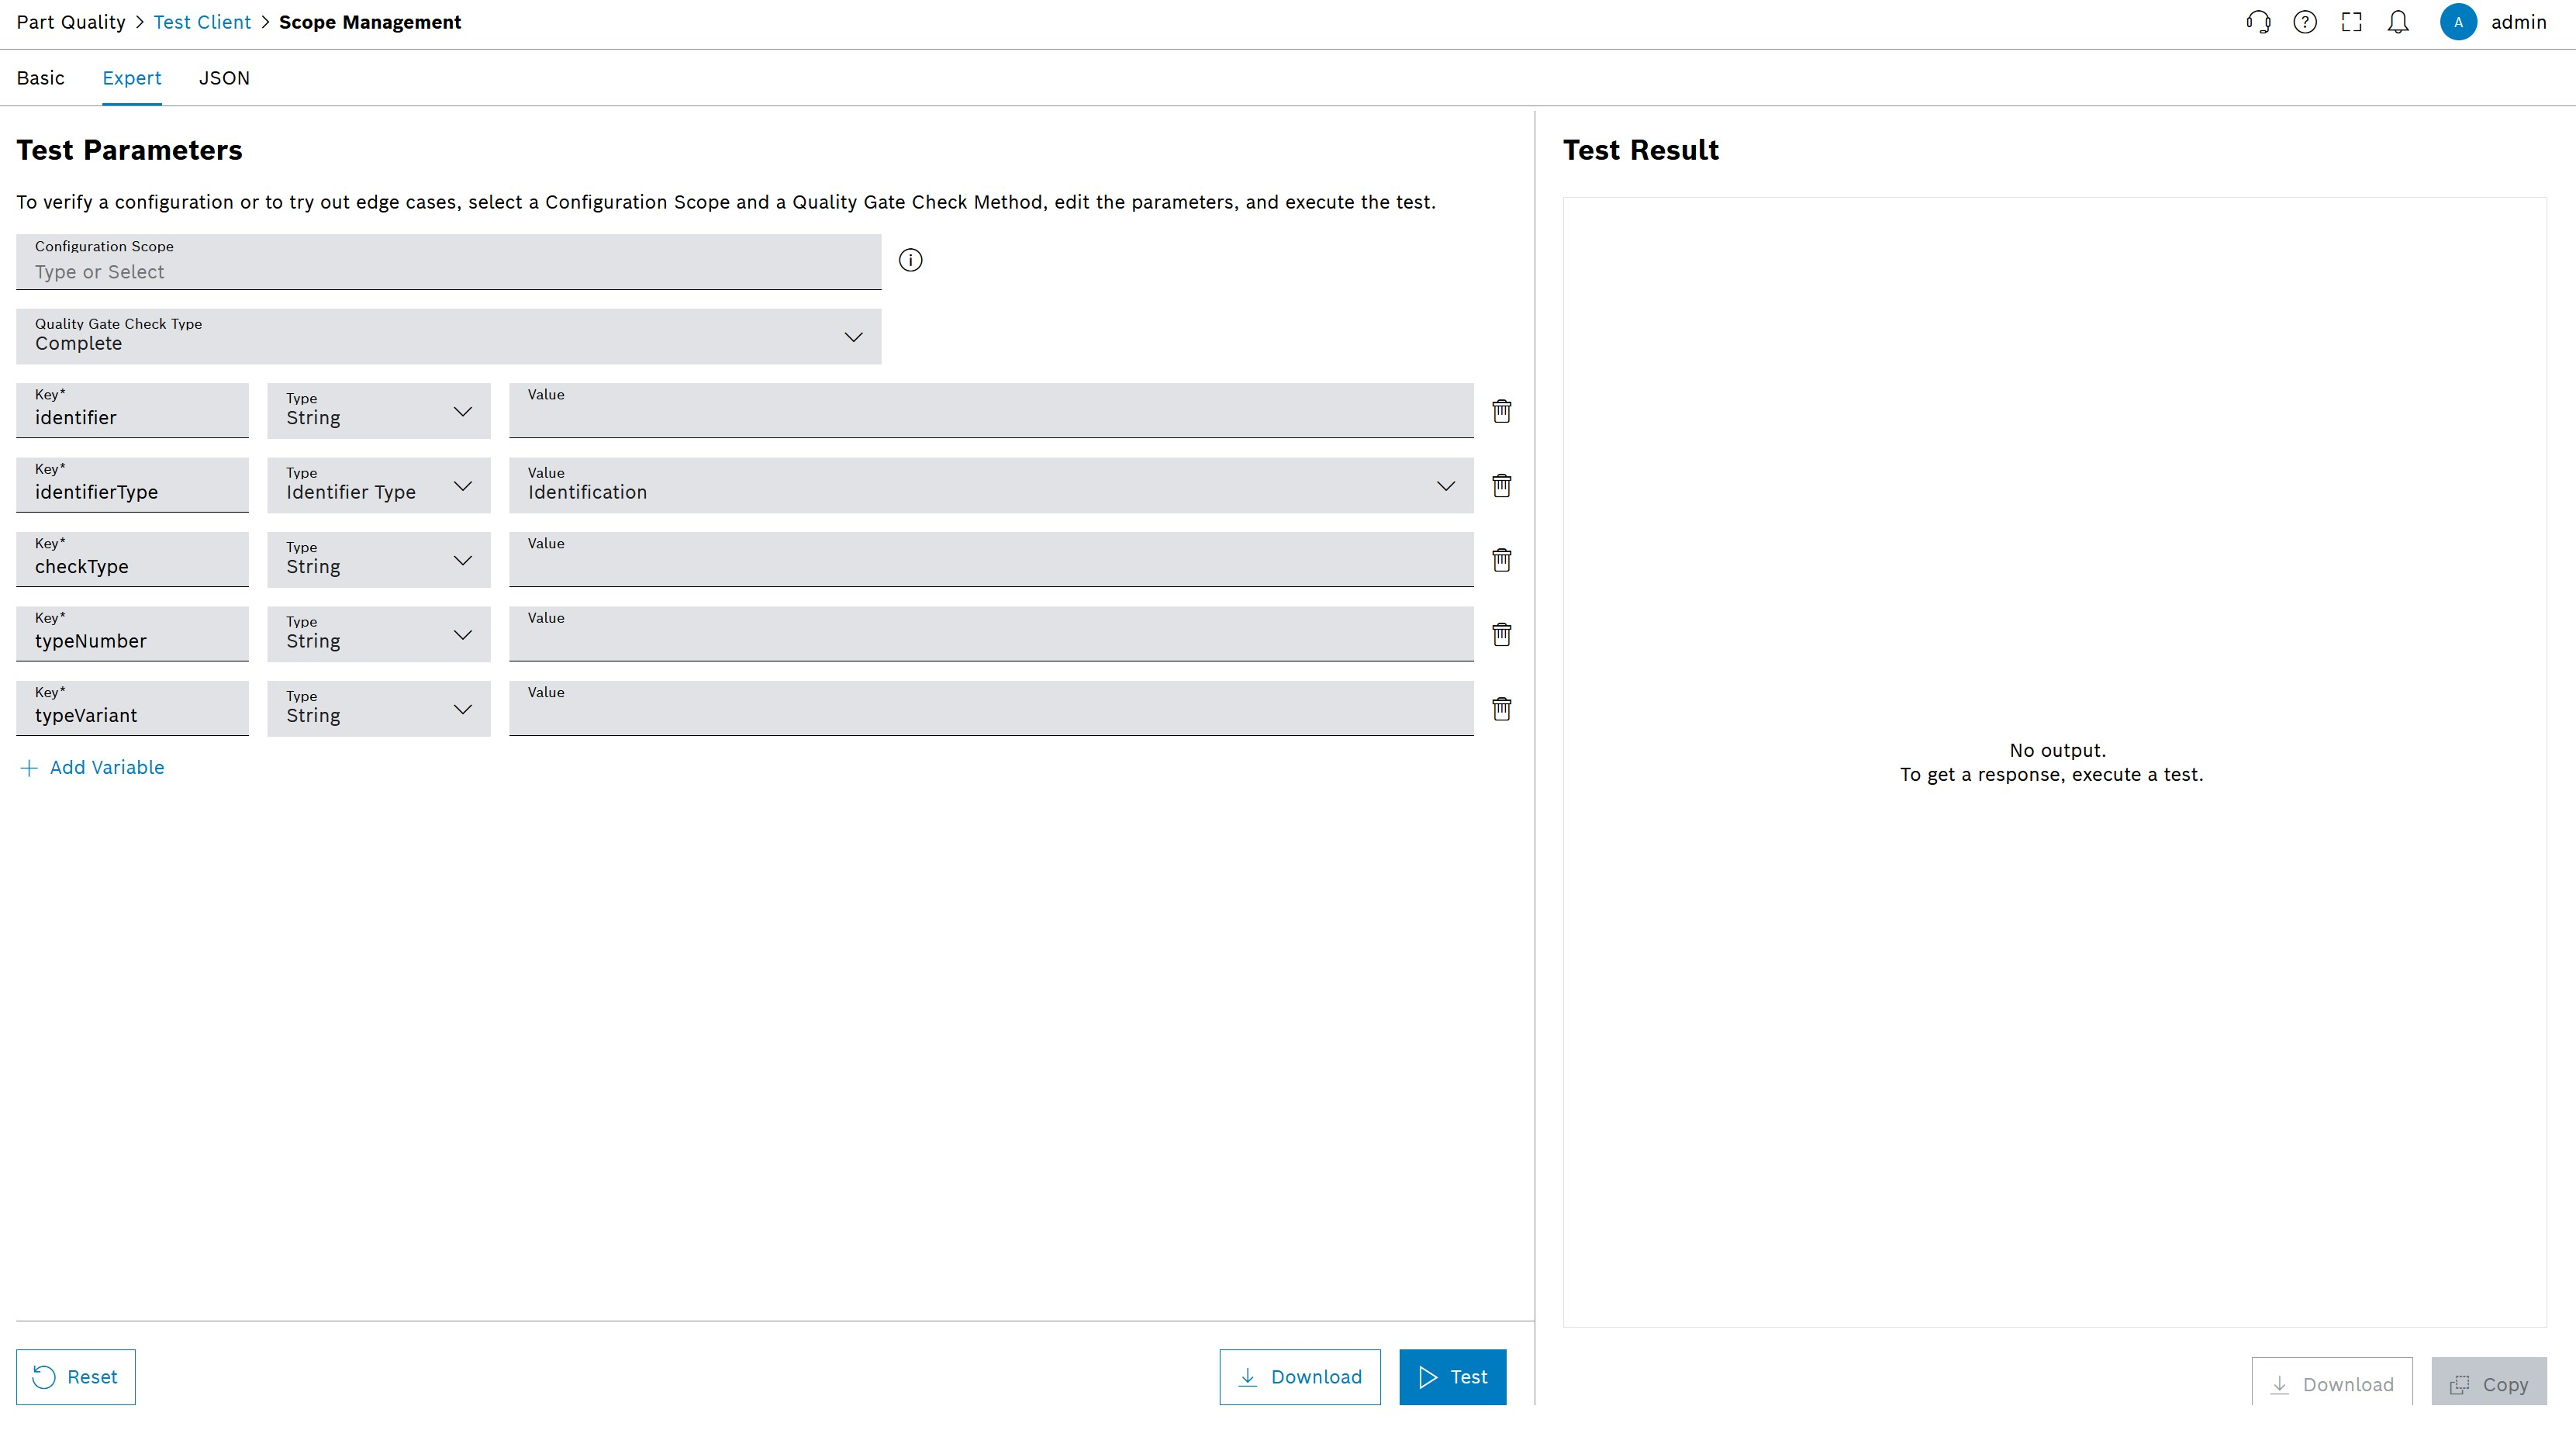
Expert test client
The input in the expert test client is provided via a form. But in difference to the basic test client, the Test Parameter key can be modified, the data type can be adjusted and parameters can be added as well as deleted. The Test Parameters are provided in the form and can be reset and downloaded. The Test Result is displayed in the user interface and can be downloaded and copied to the clipboard.
| Element / Icon | Description | ||
|---|---|---|---|
Configuration Scope |
Enter the Configuration Scope. |
||
Quality Gate Check Type |
Enter the type of Quality Gate Checks
|
||
|
Delete Test Parameter |
||
+ Add Variable |
Add a new Test Parameter. |
||
|
Reset all input fields. |
||
|
Download
|
||
|
Run the Test Client with the current Test Parameters. |
||
|
Copy the Test Parameters to the clipboard in JSON format. |


Conduct a Quality Gate Check
|
This section and the following sections are using the check block lists type of Quality Gate Check as an example. |
Prerequisite
-
Products are stored in the quality database.
-
Import Test Specification(s) has been performed.
Procedure
-
Open Part Quality > Test Client menu entry.
-
Click on the Expert tab.
-
Select the Configuration Scope and the Quality Gate Check Type.
The input fields change depending on the selected Quality Gate Check Type.
-
Enter the Test Parameters in the input fields.
-
Click on
 to run the Test Client.
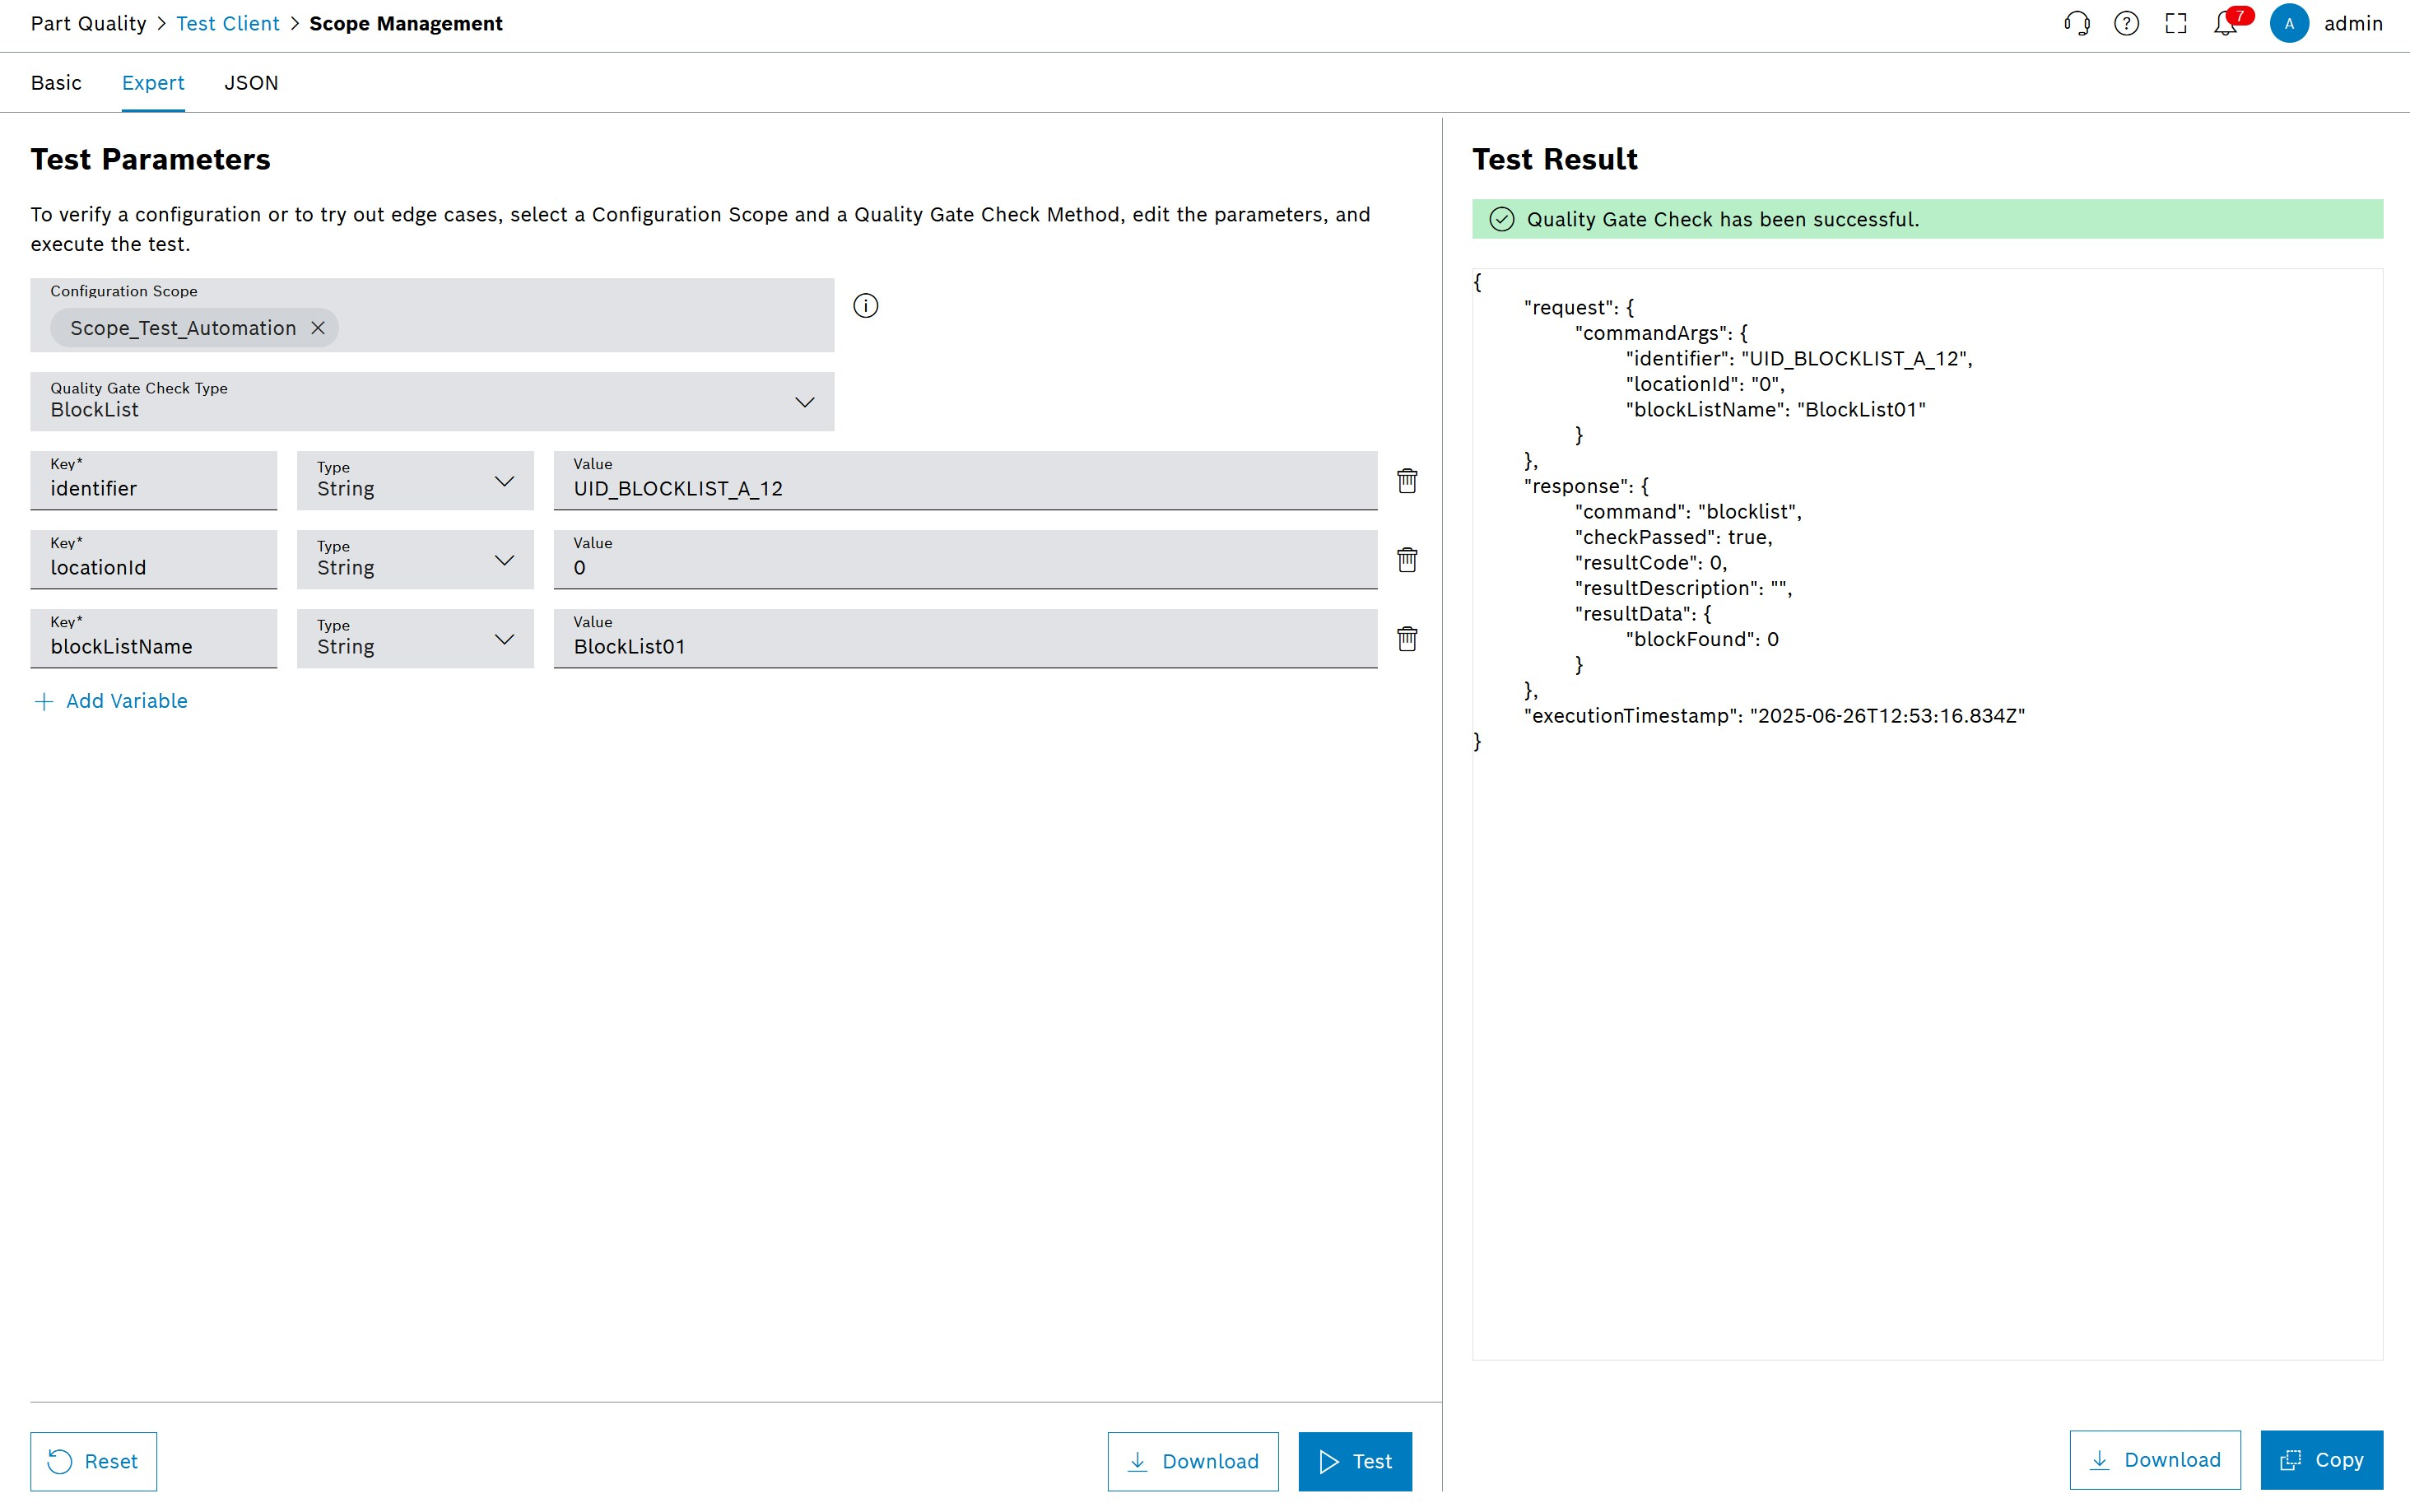
The test result is displayed in the user interface.
|
For better interpretation of the Test Result (response), see Part Traceability’s API documentation. |