Processing of material data
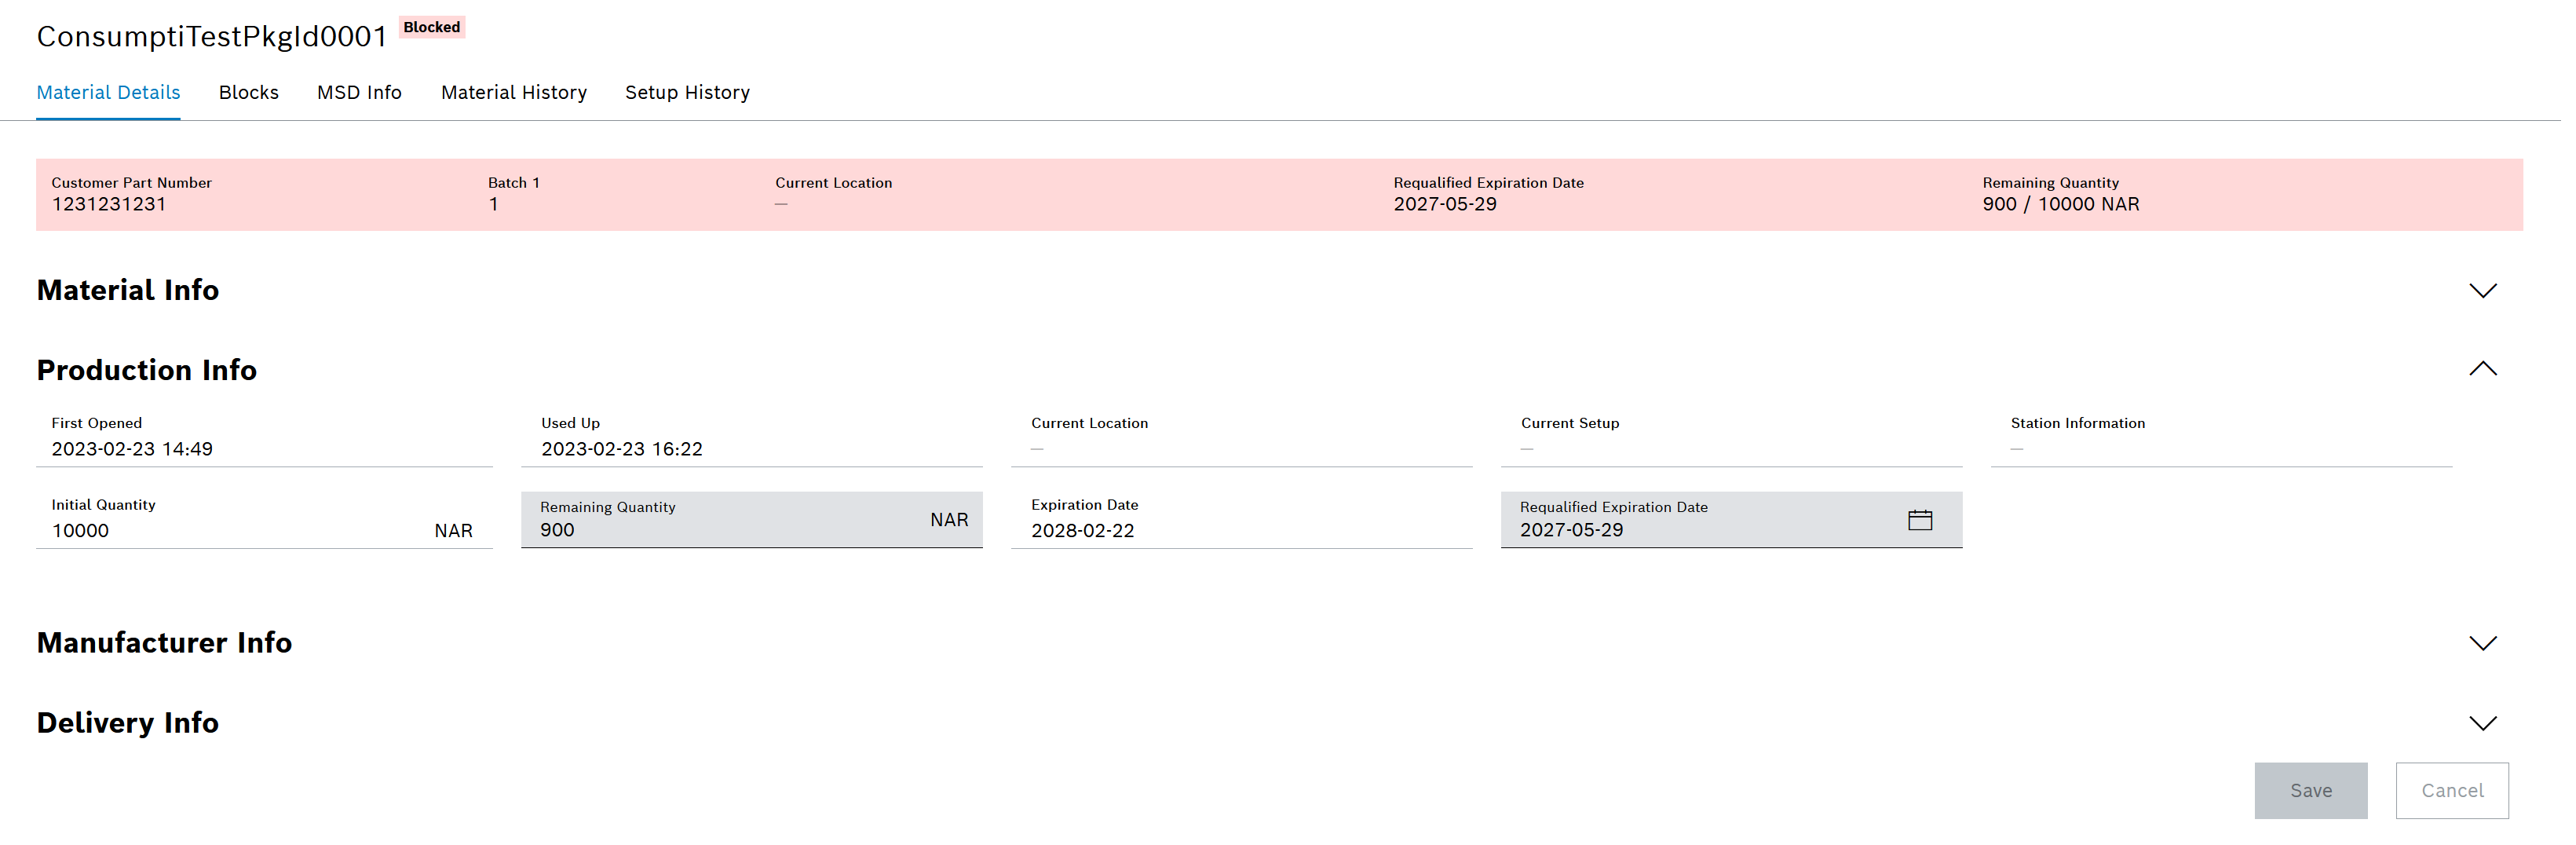
Adjust Remaining Quantity and Requalified Expiration Date
The following data can be adjusted in the Material details tab:
-
Remaining Quantity
The quantity left over from material can be corrected if, for example, defective material has been manually sorted out during production.
-
Re-qualified Expiration Date
The re-qualified expiration date can be adjusted if, for example, the manufacturer of the material provides assurance that the material can also be used after the original expiration date.
Prerequisite
MaterialManagement Expert or MaterialManagement Administrator role
Procedure
-
Search for material using one of the following options:
-
Open the Material details tab: Material Details tab.
-
Expand the Product information category.
-
Make adjustments:
-
Remaining quantity field
-
|
Note the displayed unit. |
-
Requalified expiration date field
-
To save the changes, click Save.
-
The changed data is saved and displayed in the Product information category.
The material header is updated. The original remaining quantity and the corrected remaining quantity are displayed: Material header.
The adjustments are displayed as an event in the Material history tab: Material History tab.
|
To remove the material from the current location: Remove Material from Location |
Remove Material from Location
In the Material details tab, the material can be removed from the current location.
Prerequisites
-
MaterialManagement ExpertorMaterialManagement Administratorrole -
A current location has been specified.
Procedure
-
Search for material using one of the following options:
-
Open the Material details tab: Material Details tab.
-
Expand the Product information category.
-
In the current location field, click
 .
. -
In the dialog, click Confirm to perform the removal.
The change is saved.
The Current location field is updated or deleted in the Product information category and in the material header: Material header
The adjustments are displayed as an event in the Material history tab: Material History tab
|
To adjust the remaining quantity and the requalified expiration date: Adjust Remaining Quantity and Requalified Expiration Date. |

Create manual block
A manual block can be created for a material in the Blocks tab.
|
A manual block is only triggered for the selected material. |
Prerequisite
MaterialManagement Expert or MaterialManagement Administrator role
Procedure
-
Search for material using one of the following options:
-
Call up the Blocks tab: Blocks tab.
-
Click
 in the table header.
 -
Enter the reason for the block in the Add manual block dialog.
-
To create the block, click Add.
The block is displayed in the Blocks tab and is activated.
The color of the material header is highlighted in red: Material header.
The block is displayed as an event in the Material history tab: Material History tab

Edit the description of a block
The reason for each block can be edited in the Blocks tab, regardless of whether the block was created manually or automatically.
Prerequisites
-
MaterialManagement ExpertorMaterialManagement Administratorrole -
At least one block has been created.
Procedure
-
Search for material using one of the following options:
-
Call up the Blocks tab: Blocks tab.
-
To edit the desired block, click
 in the row of the entry.
 -
Enter a description in the Edit block dialog.
An existing description can be supplemented or overwritten.
-
To save the change, click Save.
The changed description is displayed in the Blocks tab.
Removing the Block from the Material
In the Blocks tab, you can remove any block from a material, regardless of whether the block was created manually or automatically. The specified block and the blocking rule are retained and are not deleted.
|
Automated background processes, such as blocking rules, can restore non-manual blocks that have already been removed: Blocking Rules tab. |
Prerequisites
-
MaterialManagement Administratorrole -
At least one block has been created.
Procedure
-
Search for material using one of the following options:
-
Call up the Blocks tab: Blocks tab.
-
To remove the desired block from the material, click
in the row of the block. -
In the Delete block dialog, click Delete.
The block is removed from the Blocks tab.
The event is displayed in the Material history tab: Material History tab.
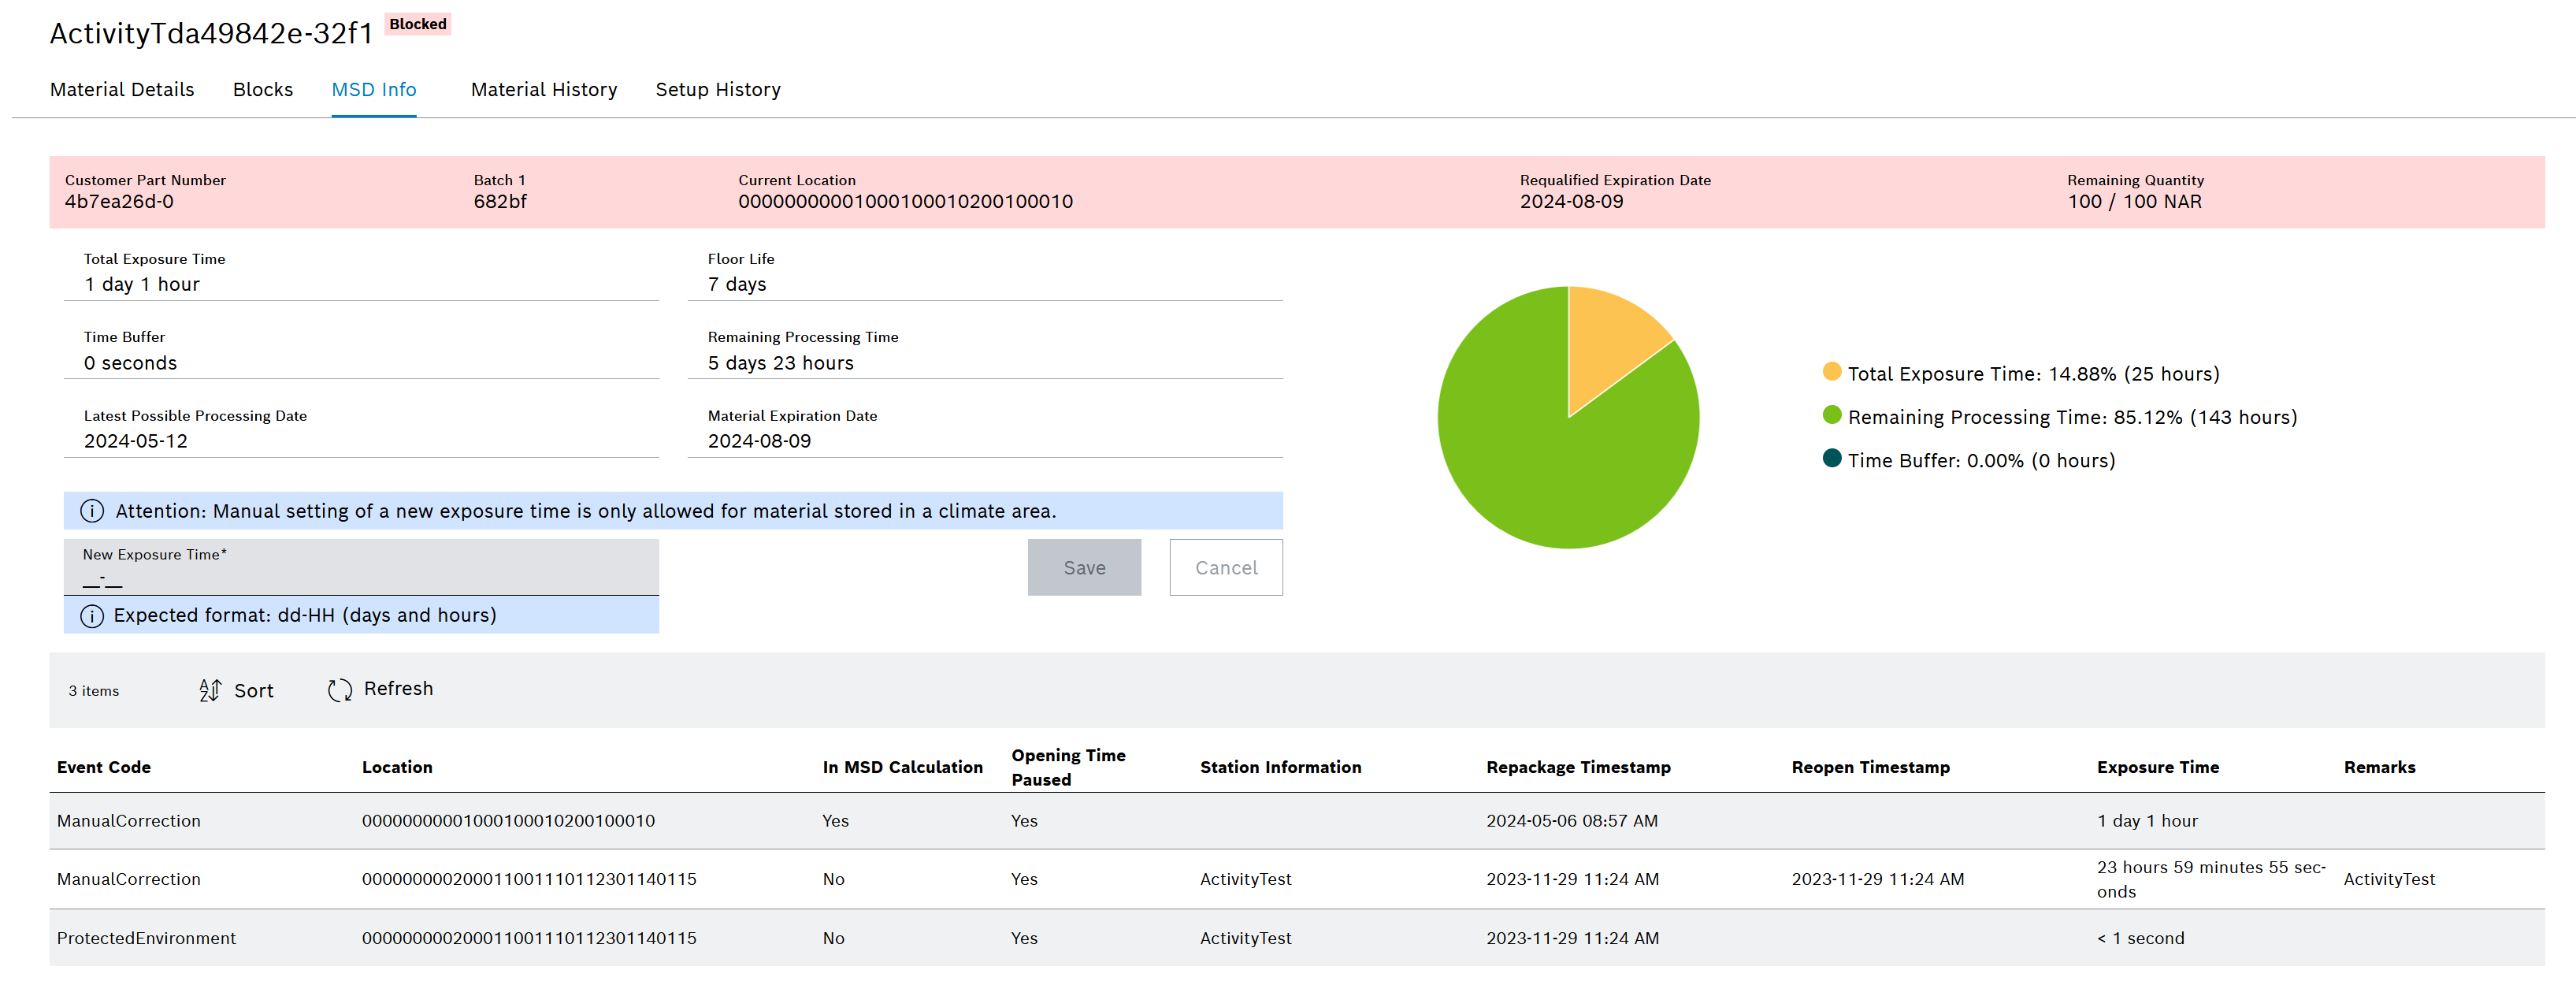
Adjust Exposure Time
In the MSD Information tab, the exposure time of a material that is stored in a protected environment (e.g. dry box) can be adjusted depending on the MSL.
Prerequisites
-
MaterialManagement ExpertorMaterialManagement Administratorrole -
The material is stored in a dry box.
Procedure
-
Search for material using one of the following options:
-
Call up the MSD information tab: MSD Info tab.
-
In the New exposure time field, enter the new exposure time in dd-HH format.

-
To save the changes, click Save.
-
In the dialog, click Confirm to confirm the adjustments.
The new exposure time is saved.
The values in the Total exposure time , Remaining processing time and Last possible processing date fields are adjusted.
The pie chart is adjusted.
The manual adjustment is displayed in the results table and in the Material history tab: Material History tab.