Using schedules
|
Schedules having Active status cannot be edited. |
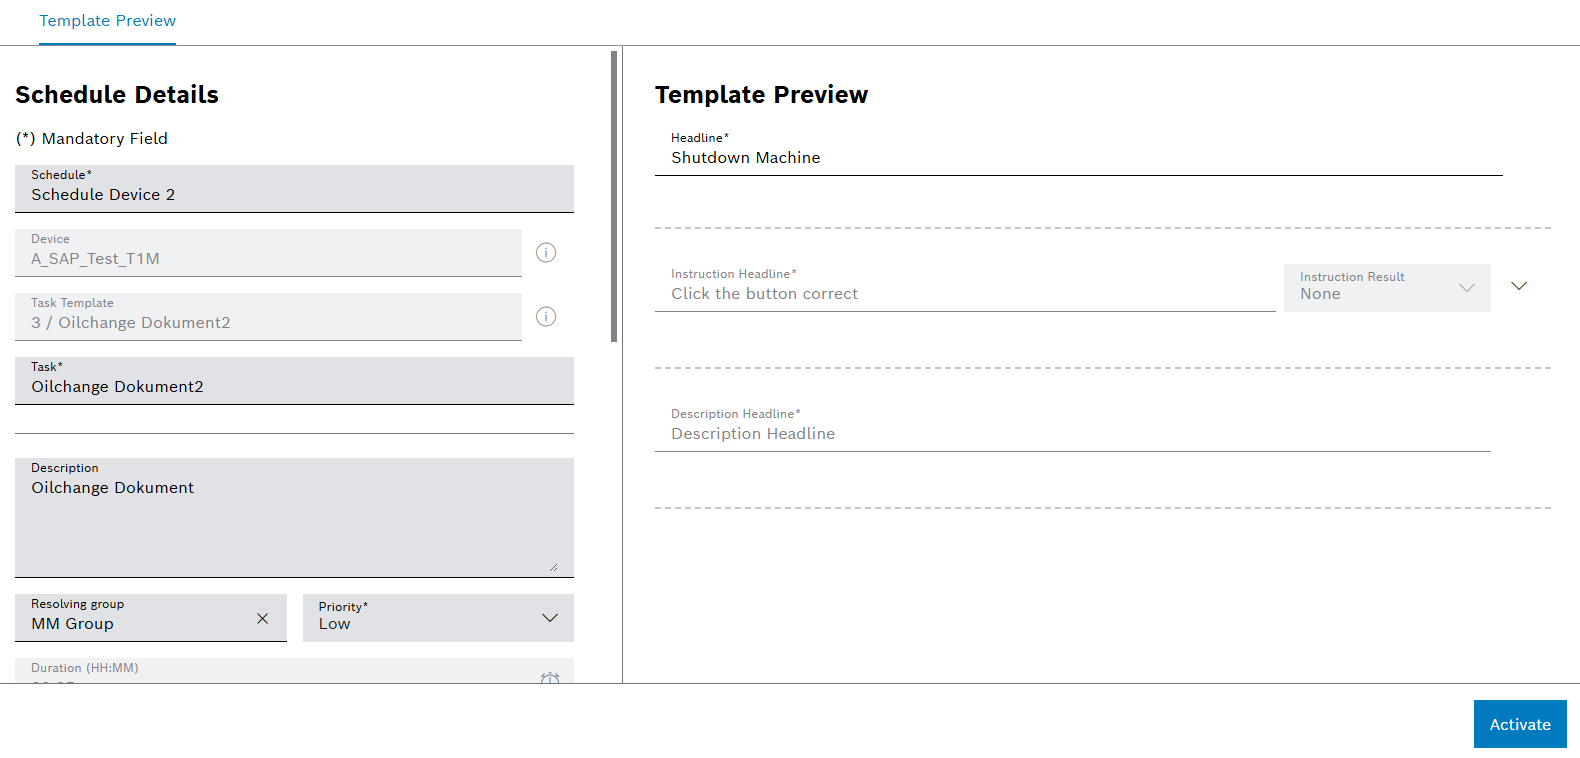
If a schedule is selected from the Schedules menu entry, the detailed view of the schedule opens. It contains schedule details, template preview and a footer.
Tabs
The detailed view contains the following tabs:
-
Readonly preview of the selected task template.
Schedule Details
| Element / Icon | Description |
|---|---|
Schedule |
Name of the schedule. |
Device |
Name of the selected device. |
Task Template |
Name of the selected task template. |
Task |
Name of the upcoming preventive task. |
Descrption |
Description of the upcoming preventive task. |
Resolving Group |
Assigned resolving group for the upcoming preventive task. |
Priority |
Priority of the upcoming preventive task:
|
Duration |
Expected task duration as readonly value from task template. |
Downtime Required |
Downtime required flag as readonly value from task template. |
Trigger |
Trigger typeof the schedule:
|
Created At |
Date and time when the schedule was created. |
Created By |
Person who created the schedule. |
Last Update |
Date and time when the schedule was updated. |
Status |
The schedule status:
|
Actual Start |
Date and time of execution. |
Footer
| Element / Icon | Description |
|---|---|
Save |
Save schedule details changes. |
Cancel |
Cancel any change to the schedule details. |
Activate/Deactivate |
If the status of the schedule is Inactive, change the status of the schedule to Active. If the status of the schedule is Active, change the status of the schedule to Inactive. |
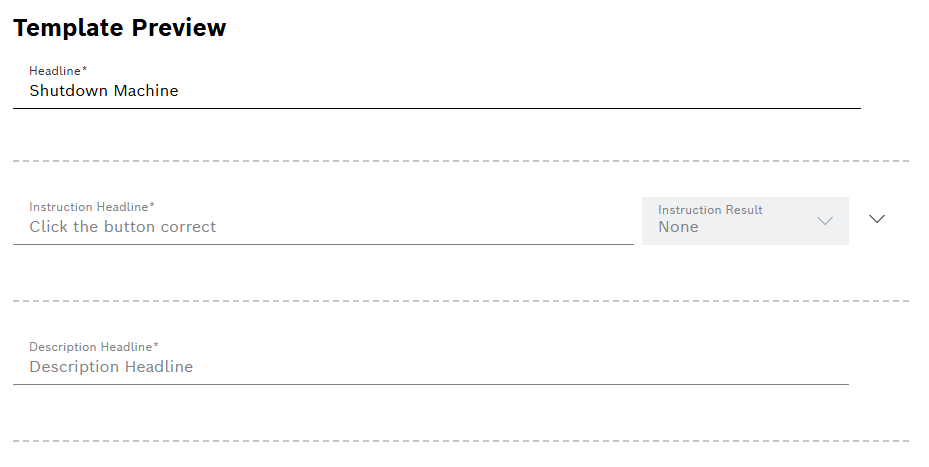
Template Preview
The template preview tab contains information related to the selected task template within the schedule.
Create or configure a schedule for a machine task template
Prerequisite
User or Administrator role
Procedure
-
Open the Maintenance > Schedules menu entry.
-
Create a schedule with
 .
.Or:
Select a schedule.
-
Enter the name of the Schedule.
-
Filter devices by selecting one or more Facilities or scan the QR code.
Or:
Select the Device from the drop-down list.
-
Select Task Template for which the schedule is valid.
The selected task template is shown as readonly in the template preview on the right.
-
Enter name of the preventive Task.
-
Enter Description of the preventive task.
-
Select Resolving Group.
-
Select the Priority.
Duration and Downtime Required are displayed for information purposes and can only be edited in the task template.
-
Select the execution type for the schedule in the Trigger drop-down list:
Calendar : The preventive task is created continuously at a set time.
For example, the preventive task can be created every Monday.
Continuous : The preventive task is created continuously.
For example, the preventive task can be created every 3 days, regardless of the days of the week.
-
To select a timezone, click on
 and choose Timezone from the drop-down list.
 -
Select Every and Frequency.
The Every and Frequency fields are used to set how often a preventive task is created. * Select the frequency of execution with the Every field. * Select the unit from the Frequency drop-down list.
-
Select Initial Due Date.
The due date specifies when the preventive task is to be created with the schedule for the first time.
-
Select the Execution Time Range.
The execution time range specifies the period before the initial due date in which the preventive task can be started.
-
Create a schedule or confirm its changes with Save.
The schedule is displayed in the Maintenance > Schedules menu entry and the first preventive task is created. As soon as the preventive task is resolved, the next preventive task is created with the defined schedule.