Process part
Part processing in Rework Control consists of the following steps:
-
Define further part handling (see steps below).
It is possible to go through all steps of the process. However, the customer does have two different use cases for further processing of the part:
Evaluate and edit part information
-
 Open Search & Act > Parts Information > Overview.
 -
Select Part Type and Part Status.

-
If necessary, enter the Type Number and ResFileName.


-
If you want to add a comment, open
Search & Action > Comments. -
Click Add Filter.
-
In the Add Comment dialog window, enter a comment in the text field.
-
Click Save.
Further processing
Define customer-specific action
Marry Part with a Workpiece Carrier
-
To marry a part to a workpiece carrier, open
Search & Act > Customer-Specific Actions. -
Click on Marry Part with Workpiece Carrier.
The part is data-technically married to the workpiece carrier..
Separate Part from a Workpiece Carrier
Prerequisites
-
The MappedTraceID configuration parameter is selected under the Client Settings Menu Item, General Tab.
-
The mapped TraceID corresponds to the current Part ID.
-
A barcode scanner is configured and connected under the Hardware Settings Menu Item, General Tab / Hardware Settings Menu Item, Serial Tab / Hardware Settings Menu Item, Balluff tab.
-
The part to be separated is not in a supermarket.
-
The part is a single part and not a group.
Procedure
-
To separate a part from a workpiece carrier,
select Search & Act > Customer-Specific Actions. -
Click Separate Part from Workpiece Carrier.
The part is data-technically separated from the workpiece carrier.
Change Error Codes
Prerequisites
-
Trace data is available for the current part.
-
There are error codes in the trace data.
Procedure:
-
To change the error code of a part, open
Search & Act > Customer-Specific Actions. -
Click Change Password.
-
In the Change Error Codes dialog window, select the desired error code from the list of error codes from the quality data.
-
Click Save.
The error code has been changed.
Change components: Remove component from part
Prerequisite
-
The part is a group.
Procedure:
-
To remove a component from a part,
select Search & Act > Customer-Specific Actions. -
Click Change Component.
-
In the Modify Component dialog window, select the parts to be removed and move them to the Disassembled Parts field.
-
Click Save.
The component has been data-technically removed from the part.
Change components: Add new components
-
To add a new component, select
Search & Act > Customer-Specific Actions. -
Click Change Component.
-
In the Change Component dialog window, click Add New Component.
-
Enter the parts data and click Add.
If the parts data entered is valid, it appears in the Dismantled Parts field and can be added to other parts.
-
Click Save.
The component has been data-technically added to the part.
Change Product Variant
-
To adapt the product variant of a part, open
Search & Act > Customer-Specific Actions. -
Click Change Product Variant.
-
In the dialog window, select the new Type Variant and click Save.
The product variant has been adapted.
|
The customer can specify which type variants a product can accept. |
Create Empty Workpiece Carrier
Prerequisites
-
A WT ID has been scanned or entered.
-
There is a route list for the line number of the WT ID.
-
No part data is loaded.
Procedure
-
To create an empty workpiece carrier, select
Search & Act > Customer-specific Actions. -
Click Create Empty Workpiece Carrier.
A data record for an empty workpiece carrier is created in Line Control.
Send a Part for the Microsection Inspection
Prerequisite
-
A Workpiece Carrier data record exists.
Procedure
-
To send the part for the microsection inspection, select
Search & Act > Customer-Specific Actions. -
Click on Go to Microsection Inspection.
The part is sent for the microsection inspection.
Return a part coming back from the microsection inspection into the process
Prerequisites
-
The loaded part must not be marked as Scrapped.
-
A Box data record exists.
Procedure
-
To feed the part coming from the microsection inspection back into the process, open
Search & Act > Customer-Specific Actions. -
Click From the Microsection Inspection.
The part has been data-technically fed back into the production process.
Define parts handling
-
Open Search & Act > Parts Handling.

You can pre-filter a searched-for cause by entering it in the Cause text field.
-
Select the Cause of the error from the drop-down list.
The action that follows the cause appears in the Predefined Action text field.
-
To define Dependent Actions , continue with Define further processing of the part: Define dependent actions.
-
To complete the parts handling, continue with Define further processing of the part: Code part
Define dependent actions
-
Open Search & Act > Dependent Actions.
-
Click Add Image.
-
Select the desired file in the file system.
-
Click Apply.
-
To check whether a block exists for a Part or WT ID , read in the Part or WT ID with an HAL component.
If a block exists for the part, a message appears in the MatLabelBox text field.
|
Other dependent actions are self-explanatory. For more information, go to the Dependent Actions Area. |
Code part
-
Open Search & Act > Part Coding.

-
To specify the next process to which the part is to be fed, select Next Process.
-
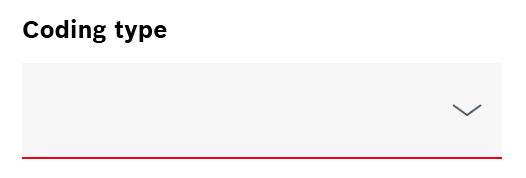
Select a Coding Type.

-
To define the Part Status , select Part Status.
-
If necessary, click Repeat Last Action to perform the same action for the current part as for the previous part.
-
Click Code <n> Selected Parts.
The rework on the part has been completed data-technically.