Material handling
The Material Handling menu helps ensure material replenishment on production lines, especially SMD production lines, and can support just-in-time delivery to production lines when an unplanned request is detected.
The Material Handling menu has the following windows:
-
Line
Lines window -
Creating a material order
Create Material Order window -
Adding material/removing material/handover check
Add Material/Remove Material/Handover Check window -
Mounting a material/unmounting a material
Mount Material window: Add material to a station
Unmount Material window: Remove material from a station -
Transport order history
-
Setup history
Setup History window
Create Material Order window
The Create Material Order window displays the table of all material orders for the selected delivery location on the selected line.

Ordering material
-
Go to the Material Handling menu and in the Lines window, select the line for which you want to create the order.
-
To order material of a specific material type, click on
 in the line of the desired material in the table of the Create Material Order window.
Or:
To create a material order for all materials displayed at a delivery station, click on
in the toolbar of the Create Material Order window.
The order can be filled out and triggered.
Create emergency order
An emergency order can be created to create material orders that may need to be triggered due to unexpected events during production. When an emergency order is created, the section for the reason and additional notes on the form are attached to the log entry that has been created.
-
Go to the Material Handling menu and, in the Lines window, select the line for which you want to create the emergency order.
-
Use
 to create an emergency order.
 -
Order the required material manually on the form or by scanning a material label.
When scanning a material label, the number and quantity of the part are taken from the material label. The information in Station, Machine Position and Settings is also filled in based on the material’s previous setup location. The list of reasons specified in the combo box on the form is configurable.
Configuring Emergency Order Reasons -
Fill out and file the form.
The emergency order has been created.
|
In order to scan material labels, GTL labels and neutral labels in the Order Management ProClient, the parameter UseMatControllLabelParser must be set to |
Add Material/Remove Material/Handover Check window
This window is used to perform inventory management operations. The title of the window corresponds to the menu in Material Handling.
Actions can be performed in the following menus:
-
Material Handling > Add Material
Add materials to the table of materials that can be ordered. -
Material Handling > Remove Material
Delete materials from the table of materials that can be ordered. -
Material Handling > Handover Check
Check whether materials from the table of materials that can be ordered need to be transferred or retained.
Add Material window: add material
In the Material Handling > Add Material menu, materials from the inventory, which is primarily managed by Material Management Service, can be reserved for the line inventory by adding them to the table.
-
Open the Material Handling > Add Material menu.
-
In the Lines window, select the line and station for which you want to add the material in the table of the Add Material window.
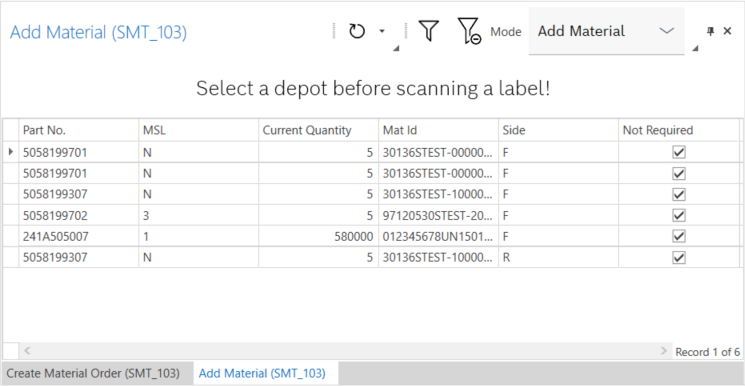
The table in the Add Material window displays the materials available at the selected station.
-
To display the booking time for all materials, click
 to access the Material Filter dialog box.
-
Activate the switch.
-
Confirm the setting with OK.
-
-
Add a new material to the handover by scanning a material label.
If the material is blocked, it will not be added to the handover. It is possible to configure whether or not an error message is displayed in such cases. It is possible to configure that a transport order must first be scanned. If material is scanned without an existing transport order, a pop-up window is displayed. The material can still be added to the list if the user confirms its inclusion. If the user cancels the operation, the window disappears and nothing happens. The same applies to scanning material or transport orders that refer to a different line. If a transport order is scanned, an empty list is first displayed.
The material is added to the station’s handover and appears in the table of the Add Material window.
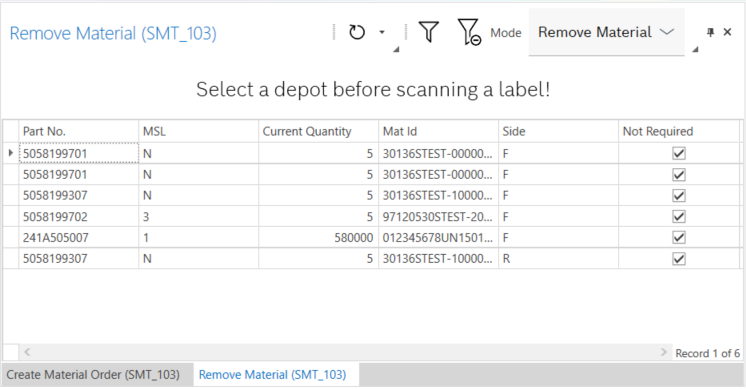
Remove Material window: removing material
It may be necessary to return materials from the production line inventory to the main warehouse or other storage areas to avoid disruption or to avoid the shelf life of some sensitive materials.
-
Open the Material Handling > Remove Material menu.
-
In the Lines window, select the line and station for which you want to remove the material from the table of the Add Material window.
-
To display the booking time for all materials, click
to access the Material Filter dialog box.-
Activate the switch.
-
Confirm the setting with OK.
-
-
Remove a new material from the handover by scanning a material label.
Or:
Right-click on the material to open the context menu and select Remove Material.
The material is removed from the station handover and no longer appears in the table of the Remove Material window.
Handover Check window
In the Handover Check window, you can add and remove materials for the handover.
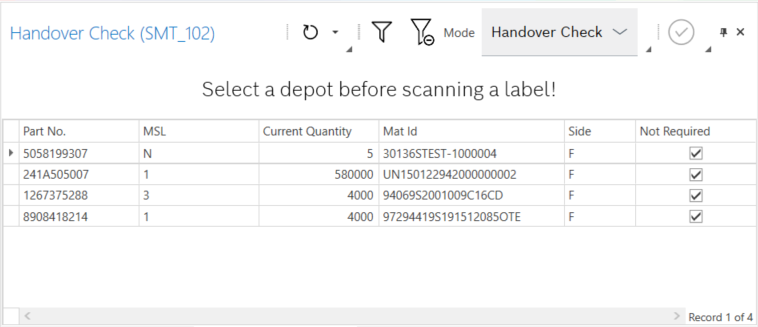
Materials can be scanned at a handover station. The handover station is also the production line inventory. In the Handover Check window, the Order Management ProClient checks whether the materials are required for the current production plan. Materials that are not required can be selected for return to the main warehouse. There are three different ways to scan a material at the handover check station:
-
The material is checked into the handover station and required for production.
-
The material is checked into the handover station and is not required for production.
-
The material is not checked into the handover station.
To perform a check using the Order Management ProClient, click on  .
.
If a scanned material is not available at the current delivery location, it can be added or removed.
Mount Material window: add material to a station
In the Mount Material menu, a station can be loaded directly with material.
-
Open the Material Handling > Mount Material menu.
-
In the Lines window, select the line and station at which you want to mount material.
-
Scan the material to be mounted.
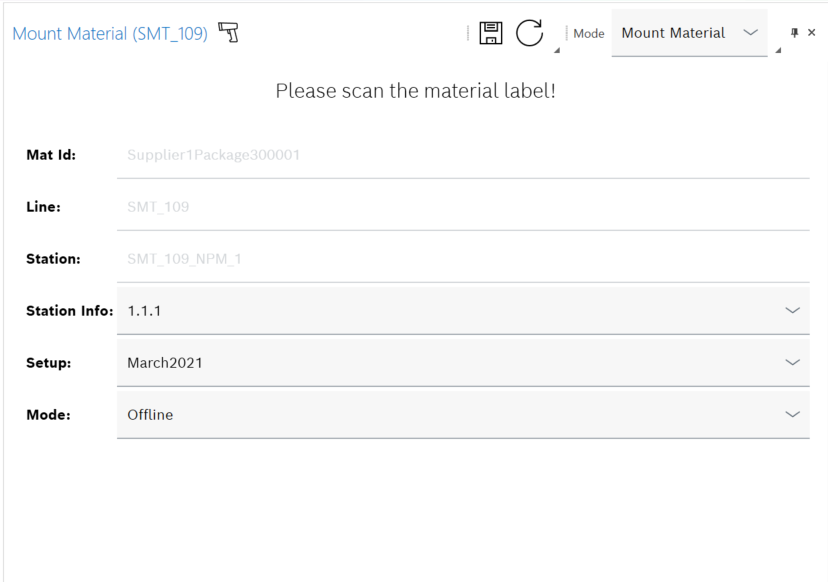
The Mount Material window displays the data of the selected station and material.
-
To edit the data, use
 to activate editing and make changes.
 -
Use
 to save the addition in the Mount Material window.
To cancel the operation, click
 before saving and reply to the prompt in the dialog box with No.
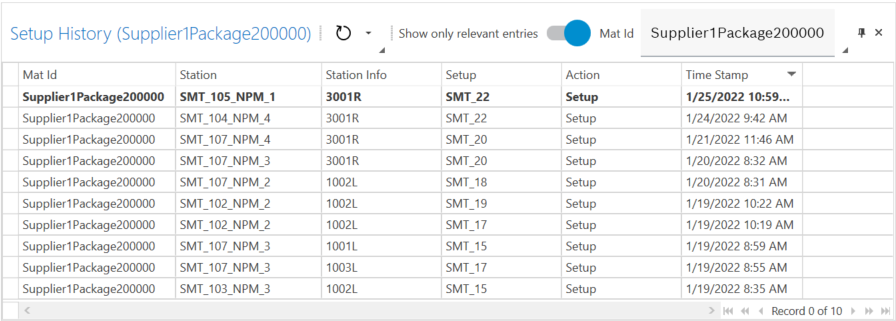
The selected station has been mounted with the material and the table in the Setup History window shows "Mount" in the Action column.
Setup History window
Unmount Material window: remove material from a station
A material can be removed from a station in the Unmount Material menu.
-
Open the Material Handling > Unmount Material menu.
-
In the Lines window, select the line and station at which you want to unmount material.
-
Scan the material to be unmounted.
The material is unmounted from the selected station.
-
Use
to save the removal in the Unmount Material window.To cancel the operation, click
before saving and reply to the prompt in the dialog box with No.
The material has been unmounted from the selected station and the table in the Setup History window shows "Unmount" in the Action column.
Setup History window