Orders
Production orders are created and managed under Order Management > Orders , using three tabs:
-
The Lines tab
Shows all lines included in the Order Management module. Production orders can be edited for these lines in the Orders tab. -
The Orders tab
Shows the created production orders of the selected line and their editing status ( Planned , Released or Active ). -
The Finished orders tab
Shows all production orders from the last 24 hours that have been finished or canceled.
Lines tab
Under Order Management > Orders , the Lines tab is selected to view the line for which orders are to be displayed or edited.
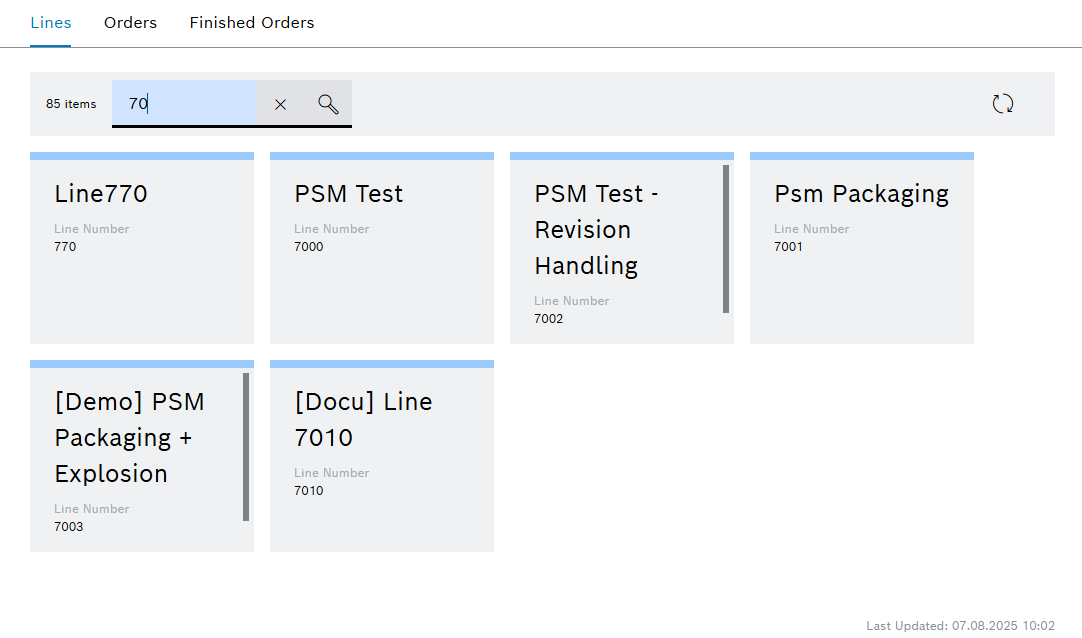
| Element | Description |
|---|---|
|
Filter by lines. Enter the complete line name or part of it. |
|
Refresh the line display. |
|
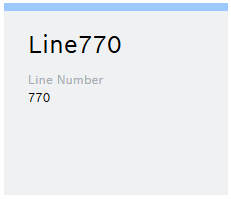
Click on the line which you want to view the orders for in the Orders tab. |
Orders tab
Under Order Management > Orders , the production orders are planned, released for production and enabled in the Orders tab. However, an order can also be rescheduled, paused, canceled or deleted. The status and progress of the orders are visible.
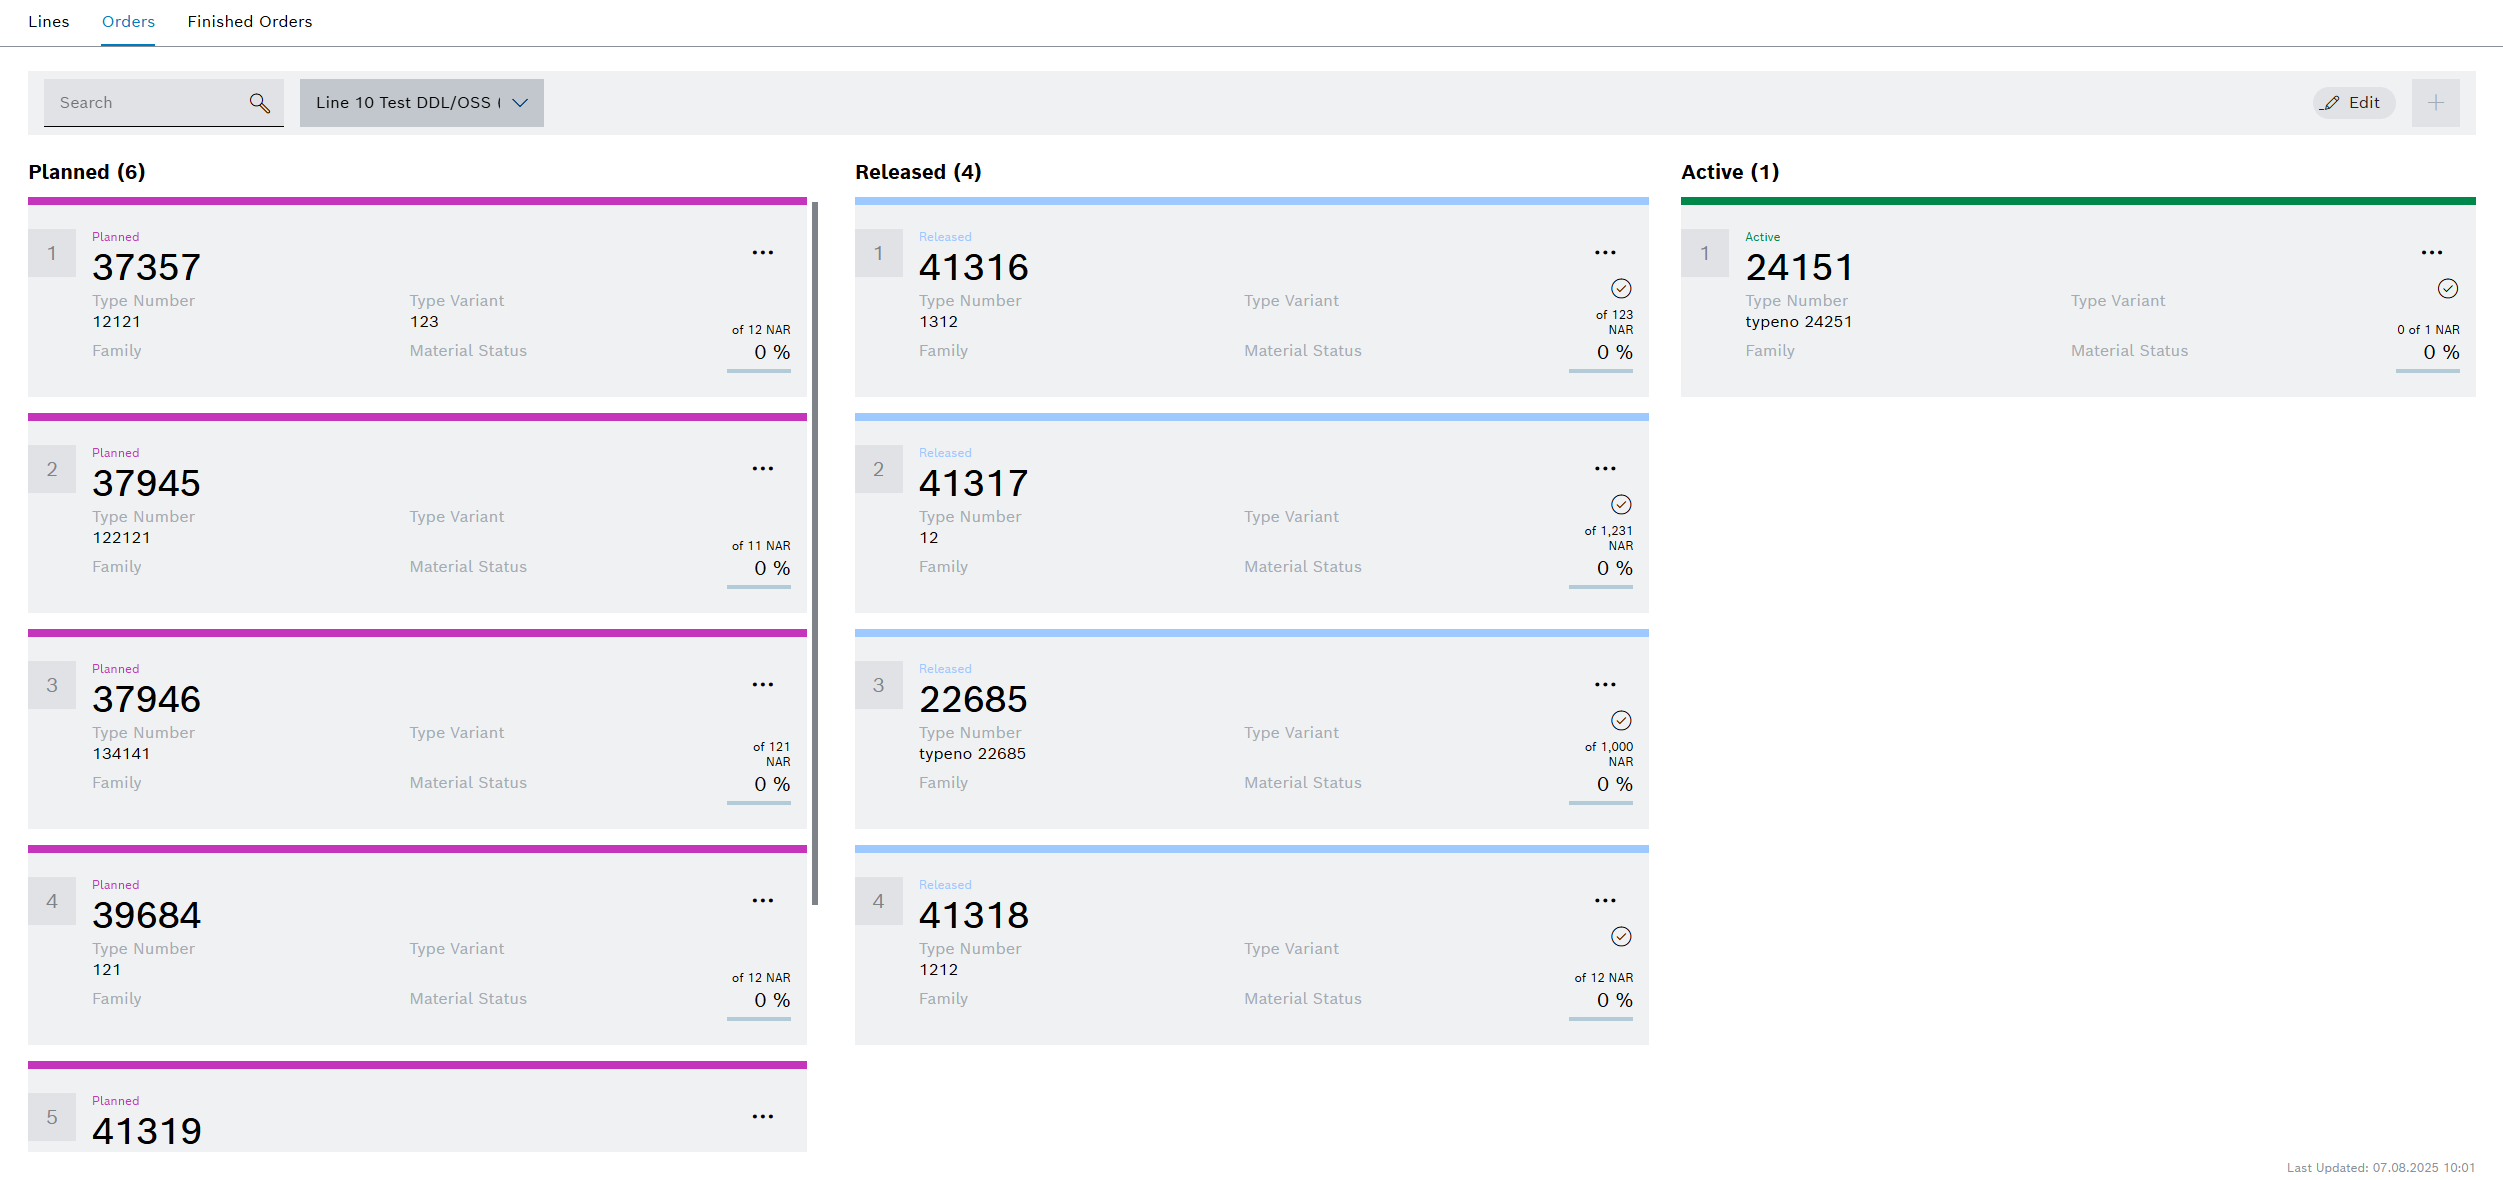
Orders are located in the following three areas:
-
Planned : The order has been created but has yet to be set up or released.
-
Approved : The order is released for production and is waiting to be executed.
-
Active : The order is being executed.
Header
| Element | Description |
|---|---|
|
Filter by orders. Enter the complete order number or part of it. |
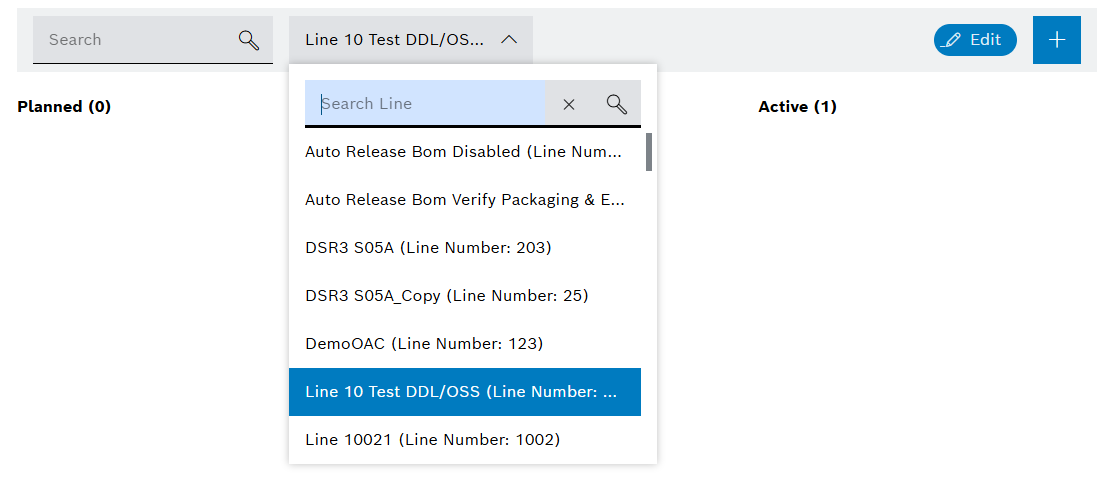
<Search Line> |
Select the line. |
|
Enable or disable orders for editing and for changing the status. |
|
Create a new order. |
Order
| Element | Description | ||
|---|---|---|---|
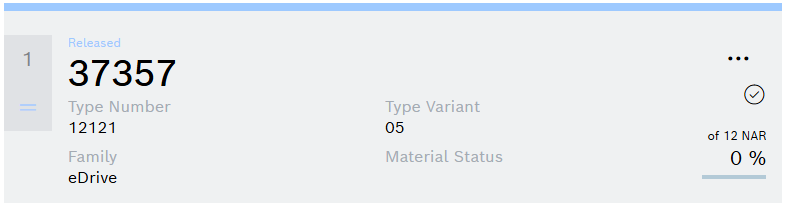
<nnnnn> |
Order number
|
||
<n> in the gray field |
|||
|
Positioner To change the order status or production sequence, drag and drop the order on the positioner in the columns and move in between columns. |
||
|
Options menu Contains the menus to view or edit the production orders. Menus when editing is disabled:
Menus for orders under the Planned status when editing is active:
Menus for orders under the Released status when editing is active:
Menus for orders under the Active status when editing is active:
|
||
|
Indicates that the order is in the Released or Active areas |
||
|
Quantity with quantity unit (default value, NAR = number of articles) to be produced and percentage of parts already produced |


Order details and station counter
Under Order Management > Orders , orders details can be viewed and edited in the Orders tab. The Options menu  can be used to access all the sections in the tab.
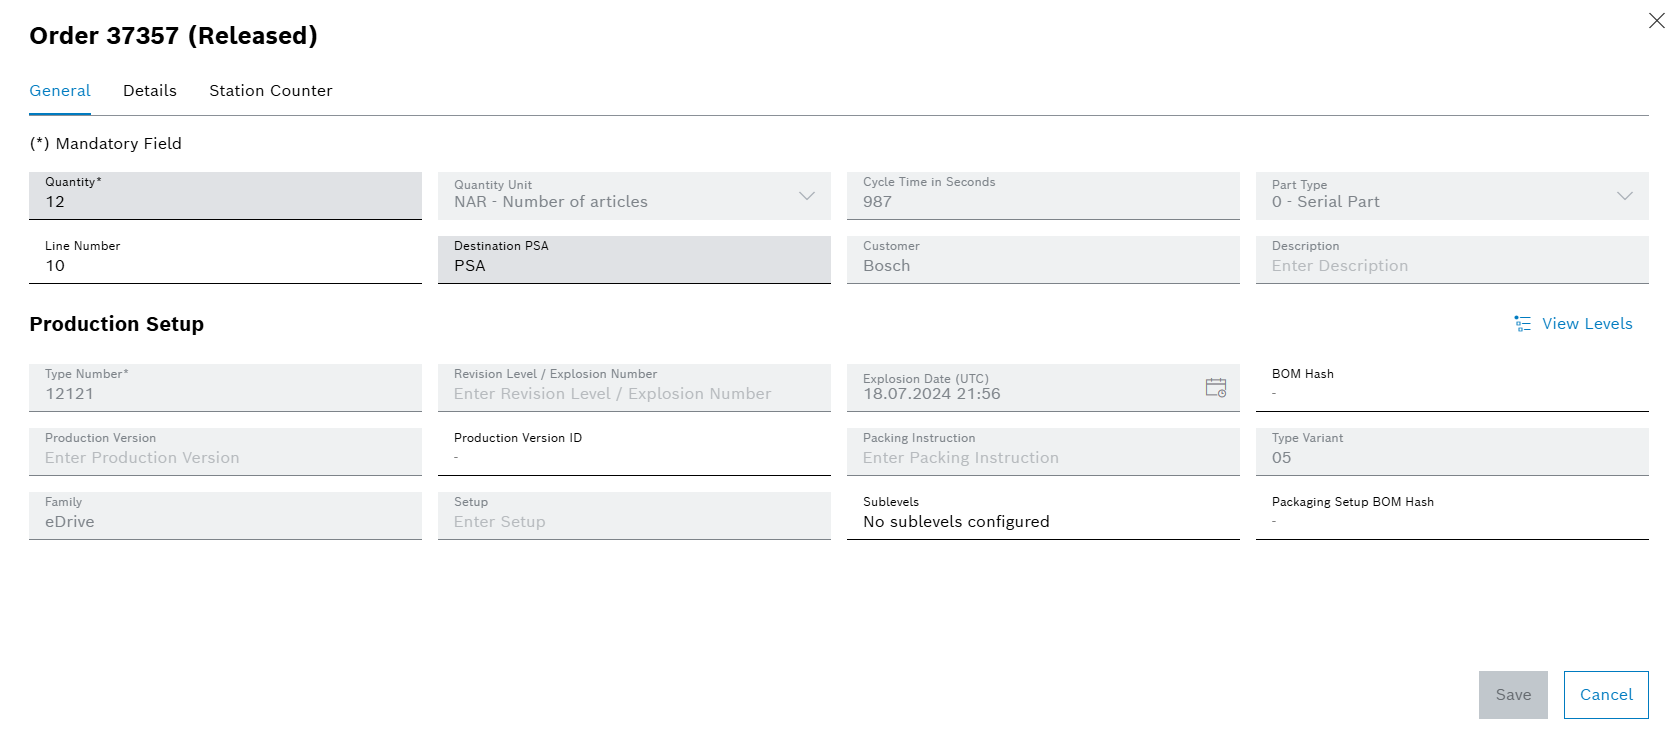
General Tab
| Element | Description | ||
|---|---|---|---|
Quantity |
Quantity to be produced. |
||
Quantity Unit |
Quantity unit (e.g. Number of articles, Meter, Gram etc.). |
||
Cycle Time in Seconds |
Describes time required to produce a single part. This value, multiplied by the order quantity, determines the total order duration. |
||
Part Type |
Describes the part type (serial, repair, calibration etc.). |
||
Line Number |
Production line number |
||
Destination PSA |
Describes the destination PSA (Production Supply Area) for the order. |
||
Customer |
Describes the customer name. |
||
Description |
Production or planning-related comments (maximum of 80 characters). |
||
Type Number |
Describes the part type number. |
||
Revsion Level / Explosion Number |
Describes the revision number for the bill of materials. |
||
Explosion Date (UTC) |
Date and time of the BOM revision. |
||
BOM Hash |
Bill of materials assignment |
||
Production Version |
Describes the production version used to query BOM from the Product Setup Management. |
||
Production Version ID |
Production version identification number |
||
Packaging Instruction |
Describes the packaging instruction for the packaging setup associated with the order |
||
Type Variant |
Describes the variant of the type number. |
||
Family |
Product type family |
||
Setup |
Describes the name of the setup required for production. |
||
Sublevels |
Describes the number of production setup sublevel configured in the order (maximum of 200 sublevels). |
||
Packaging Setup BOM Hash |
Describes the packaging setup hash for the order.
|
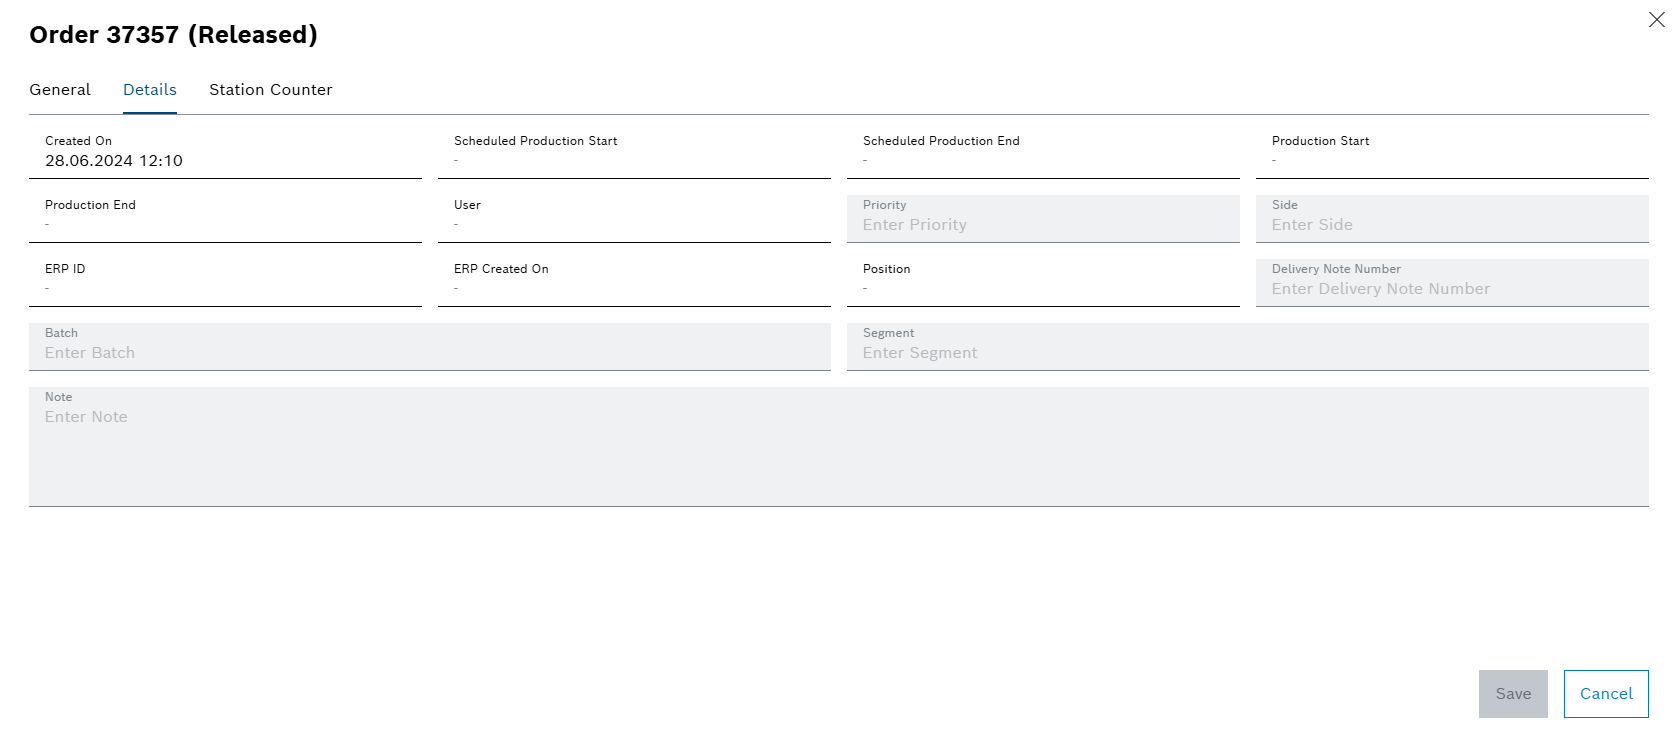
Details Tab
| Element | Description | ||||
|---|---|---|---|---|---|
Created On |
Date of order creation |
||||
Scheduled Production Start |
Planned production start date |
||||
Line |
Describes the line name. |
||||
Scheduled Production End |
Planned production end date |
||||
Production Start |
Date of actual production start |
||||
Production End |
Date of actual production end |
||||
User |
Order Management user |
||||
Priority |
Enter the order priority. Values: 0 … 1000, default value: 500
|
||||
Side |
For insertion machine lines only: Enter the side of the printed circuit board to be tooled (bottom or top). |
||||
ERP ID |
ERP order ID This is entered via the ERP system. |
||||
ERP Created On |
Date on which the order was created in ERP |
||||
Position |
Reference to the order position in the ERP collective order This is entered via the ERP system. |
||||
Delivery Note Number |
Describes the delivery note number for the order. |
||||
Batch |
Batch assigment for the order This is entered via the ERP Connectivity interface. |
||||
Segment |
For insertion machine lines only: Enter segment (top or bottom segment). |
||||
Note |
Enter a comment about the order (maximum of 399 characters). This is entered via the ERP Connectivity interface. |
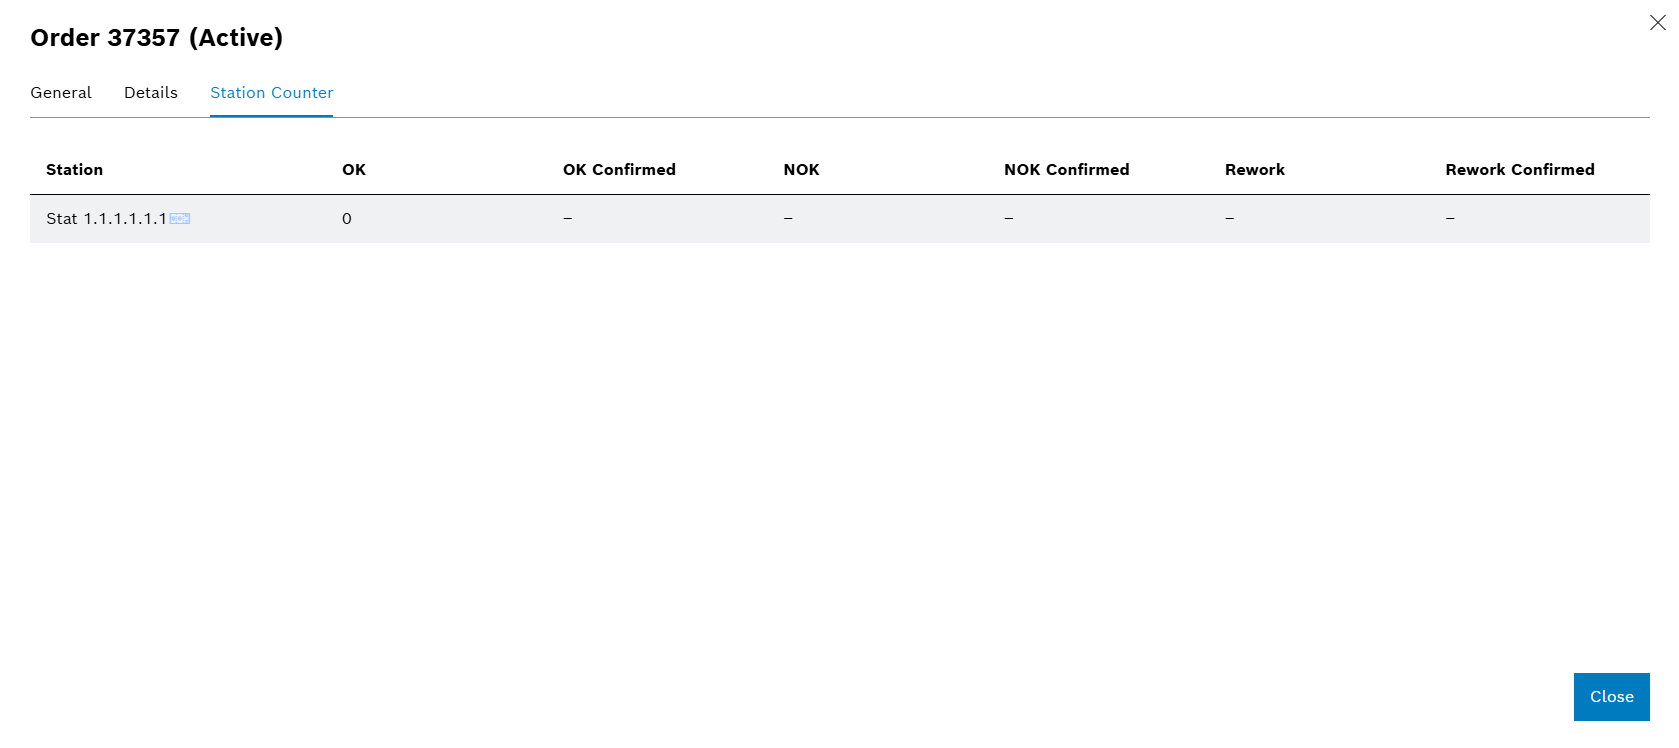
Station Counter Tab
|
The columns can be sorted in ascending or descending order by clicking on an entry in the header. |
| Element | Description |
|---|---|
Station |
Name of station |
IO |
Number of good parts reported by the station |
OK Confirmed |
Number of good parts reported to the ERP system |
NOK |
Number of bad parts reported by the station |
NOK Confirmed |
Number of bad parts reported to the ERP system |
Rework |
Number of repaired bad parts reported by the station |
Rework Confirmed |
Number of repaired bad parts reported to the ERP system |
Individual parts of an order
Under Order Management > Orders , the individual parts of an order can be found in the Orders tab via the Options menu .
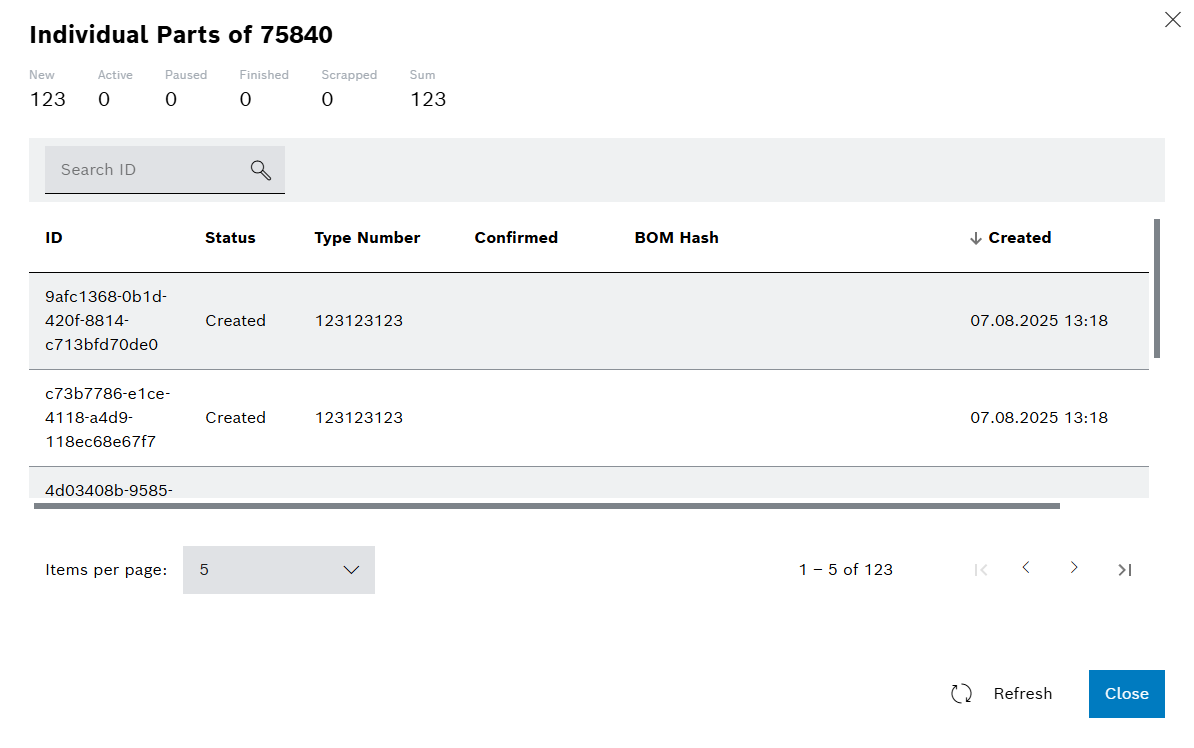
Individual Parts Counter

| Element | Description |
|---|---|
New |
Number of parts in the first station |
Active |
Number of parts in the line |
Paused |
The number of parts for which production has been paused |
Finished |
The number of parts for which production has finished |
Scrapped |
Number of rejects |
Sum |
Sum of the parts that are or have been edited |
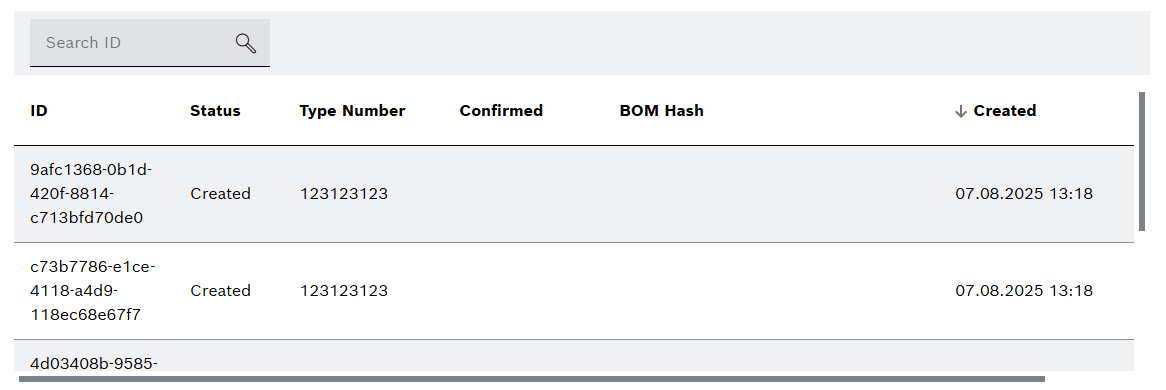
Table
|
The columns can be sorted in ascending or descending order by clicking on an entry in the header. |
| Element | Description |
|---|---|
Search ID |
Filter by individual parts. Enter the complete identification number or part of it. |
ID |
Identification number of the individual part. |
Status |
Status of the individual part (status as described under individual parts counter). |
Type Number |
Individual part type number. |
Confirmed |
The status of the part reported to the ERP system. |
BOM Hash |
Bill of materials designation |
Created |
Date and time at which production of the individual part started. |
Finished |
The date and time at which the individual part was finished. |
Finding and selecting a line
-
Open the Order Management > Orders menu enty.
The Lines tab opens.
-
To find a line, enter the Line Number into the Search field.
-
Click on the line.
The Orders tab opens and shows the orders for the selected line.
|
Alternatively, select a line in the Order Management > Orders > Orders tab in the <Line Number> selection list. |
Viewing order details
-
To find a specific order, enter the order number into the Search field at the top of the orders list.
-
Click on
on the order and select Show Order.
The dialog window.
|
A description of the entries can be found under Order Details and Station Counter. |
Viewing production setup levels
-
To find a specific order, enter the order number into the Search field at the top of the orders list.
-
Click on
on the order and select Show Order.The dialog window opens.
-
Click on
 to display the configured setup levels.
The Production Setup Levels dialog window opens and displays the configured production setup levels of the order.

| Element | Description | ||
|---|---|---|---|
|
Collapse all production setup levels. |
||
|
Expands all production setup levels. |
||
|
Collapses the selected production setup level up in the list. |
||
|
Expands the selected production setup level down in the list. |
||
Type Number |
Type number of the production setup level. |
||
Revision Level / Explosion Number |
Revision number of the BOM corresponding to the production setup level. |
||
Explosion Date (UTC) |
Date and time of the BOM revision corresponding to the production setup level.
|
||
Production Version |
Production version of the production setup level. |
||
BOM Hash |
BOM assignment for the production setup level.
|


Editing production setup levels
-
To begin, select the production line containing the order for which production setup levels are to be viewed. Finding and Selecting a Line
-
Enter the Order Number (or part of it) into the search field at the top of the order list to locate the specific order.
-
Click the edit button in the Orders window to enable editing.
-
Locate the desired order. Click the options menu icon
on the order and select Edit Order to open its detailed view. -
Within the order’s detailed view, click the
 button to enable editing of the production setup levels.
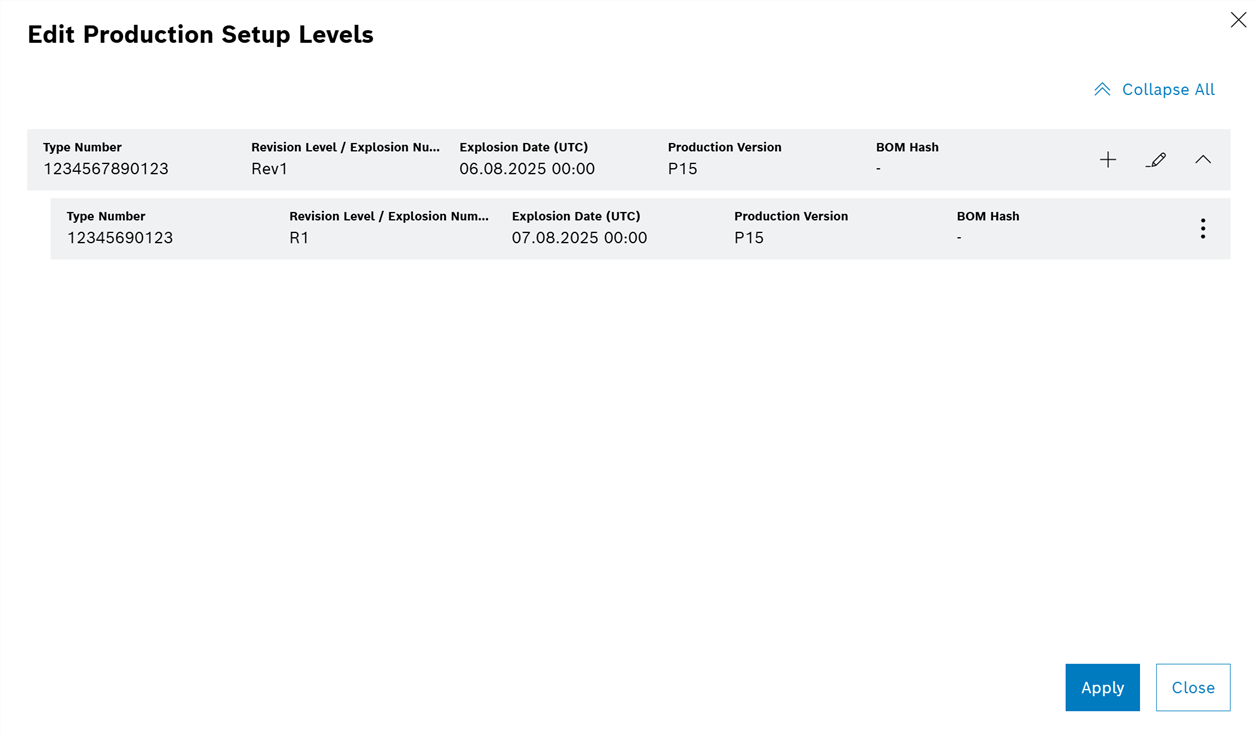
| Element | Description |
|---|---|
|
Collapses all production setup levels. |
|
Expands all production setup levels. |
|
Collapses the selected production setup level up in the list. |
|
Expands the selected production setup level down in the list. |
|
Adds a new the production setup level |
|
Opens the Edit Sublevel dialog to edit the selected production setup level. |
|
Deletes the selected production setup level. |
|
Opens the options menu for the selected production setup level. |
|
Once editing is enabled, it is possible to add, edit, or delete production setup levels. |
Adding production setup levels
-
Select the production setup level to which you want to add a sublevel.
-
Click the Add Sublevel
 button located directly beside the root level (if the selected production setup level is the root level) or from the options menu
  of the selected production setup level.
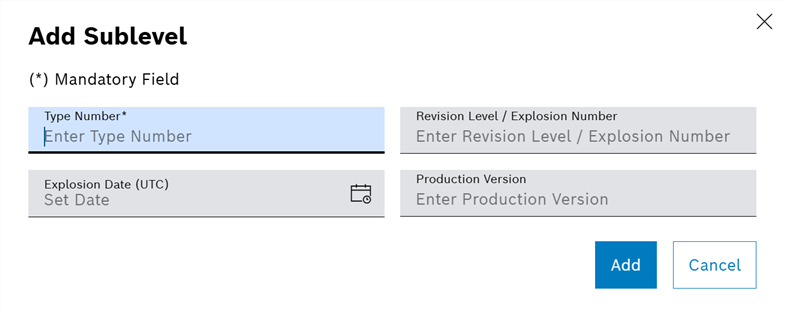
-
Fill in the required fields for the new level.
-
Click Add and then Apply to apply all changes.
-
click Save on the Edit Production Setup Levels dialog to save all changes.
The new production setup level is now added to the order.
|
The first production setup level represents the main production setup level in the order and subsequently, this level cannot be deleted. |
Editing production setup levels
-
To edit an existing production setup level, click the Edit
 button directly beside the root level (if the selected production setup level is the root level) or from the options menu of the selected production setup level.
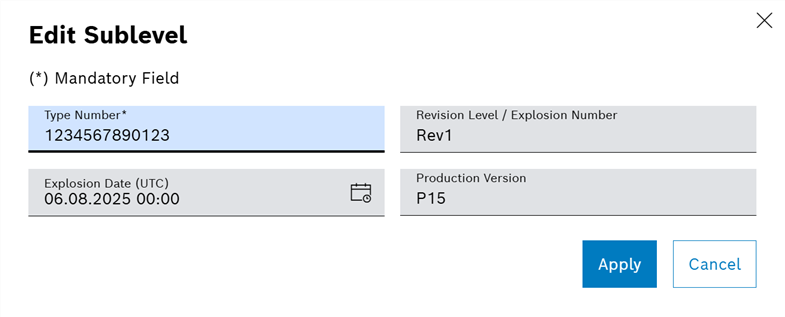
-
Make the necessary changes.
-
Click Apply on the Edit Sublevel dialog and on the Edit Production Setup Levels dialog to save all changes.
Deleting production setup levels
-
Select the production setup level you want to delete.
-
To delete, click the Delete Sublevel
 button from the options menu of the selected production setup level.
 -
Confirm the deletion when prompted.
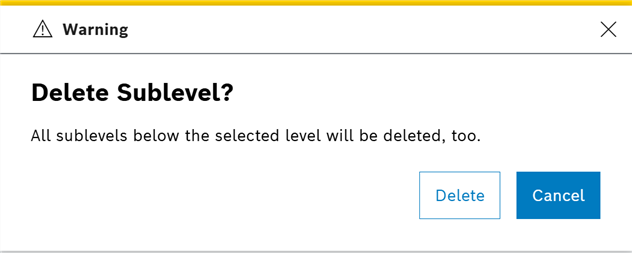
-
Click Apply on the Edit Production Setup Levels dialog to save all changes.
Viewing the station counter
-
Select the line.
Finding and Selecting a Line -
To find the order, enter the order number or parts of the order number in the
 text box in the header.
 -
In the order, open the Options menu by clicking on
and select View order. -
Switch to the Station counter tab.
In the Orders window, the Station counter tab shows the number of good and bad parts and the number of reworked parts.
|
A description of the entries can be found under Order Details and Station Counter. |
View individual parts of an order
-
Select the line.
Finding and Selecting a Line -
To find the order, enter the order number or parts of the order number in the
text box in the header. -
In the order, open the Options menu by clicking on
and select Show Individual Parts.
The Individual parts of <Order number> window displays information about the parts produced.
|
A description of the entries can be found under Individual Parts of an Order. |
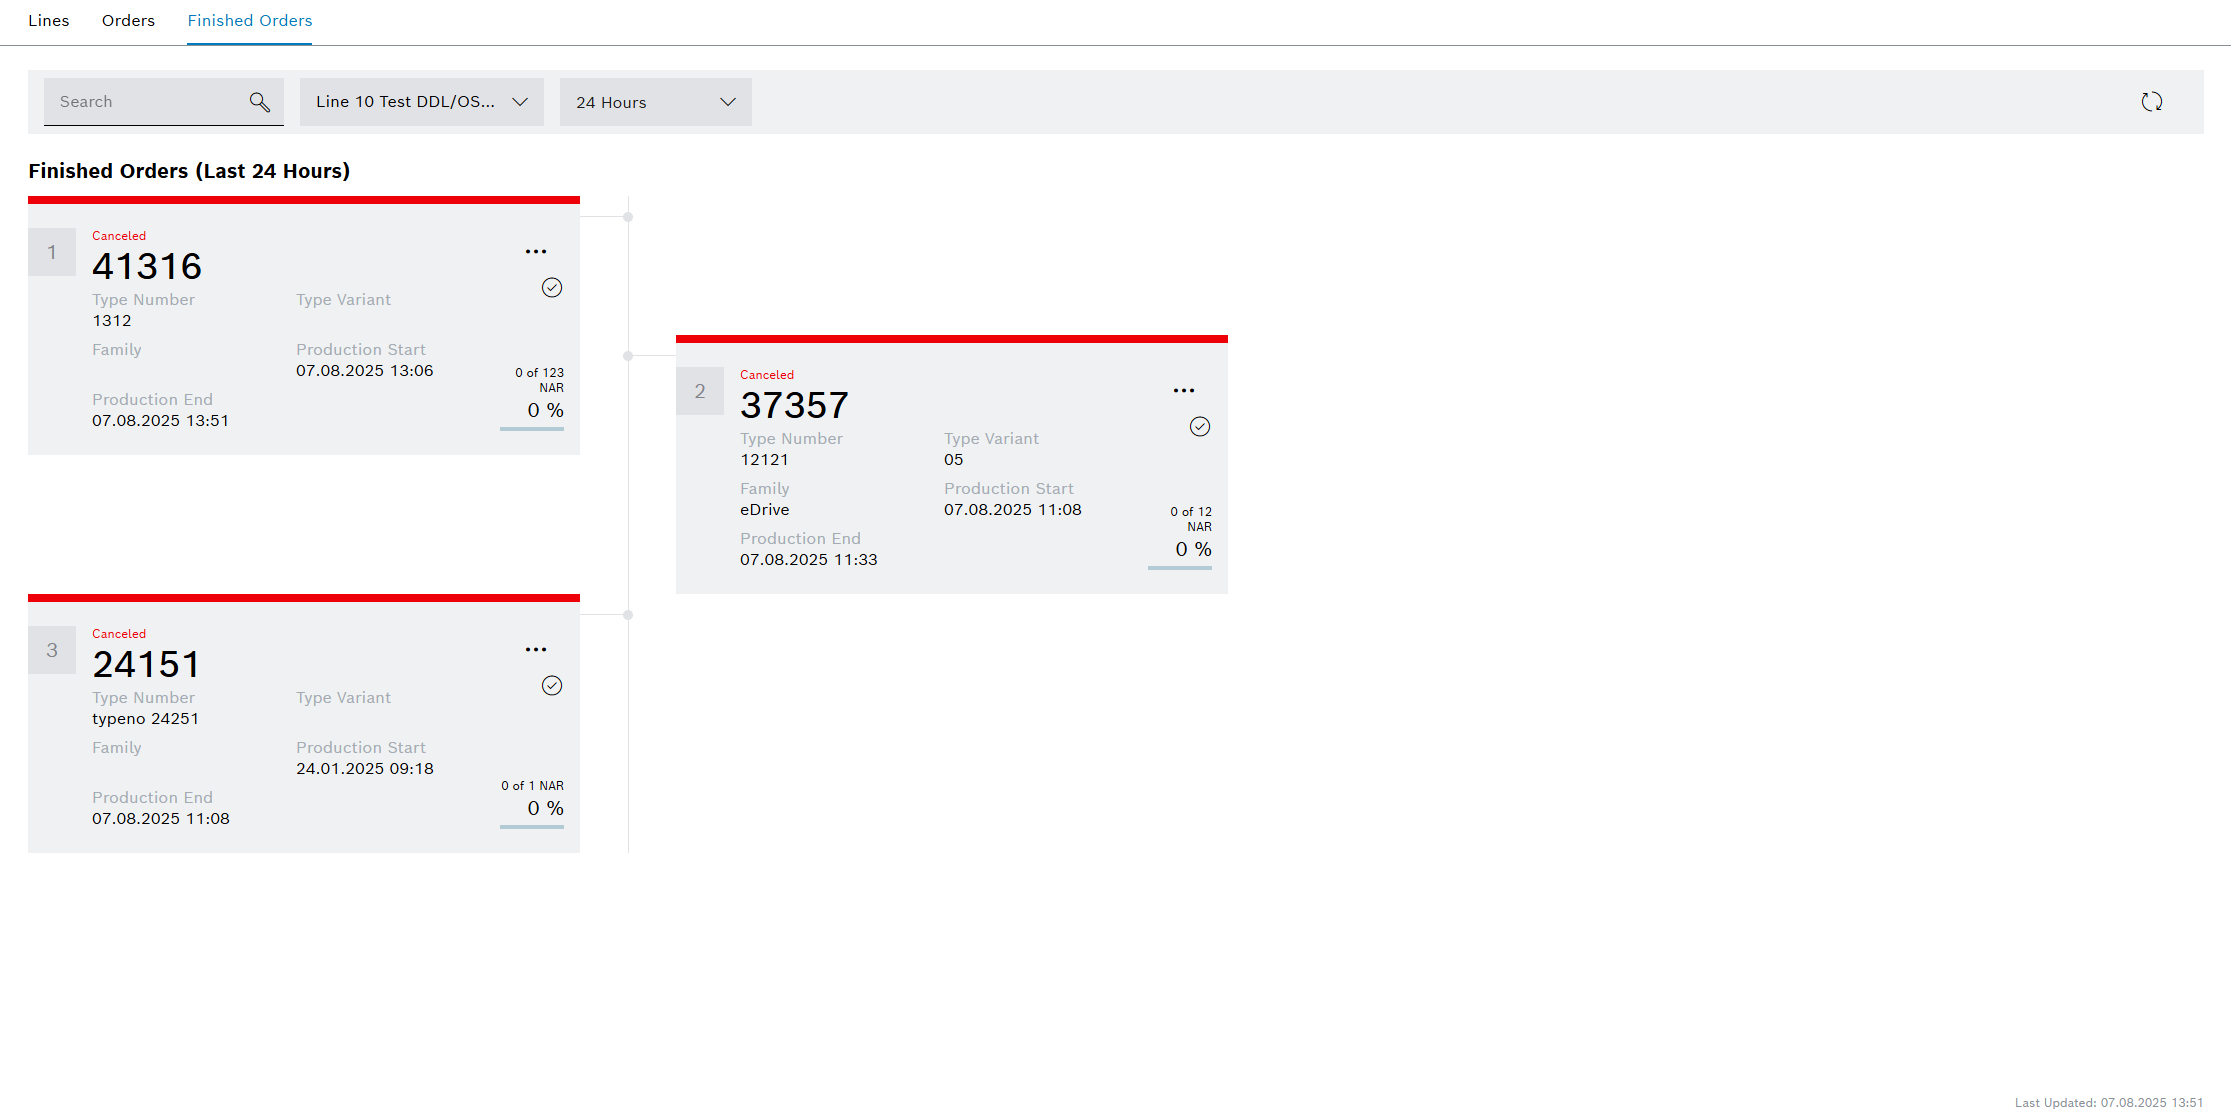
View finished orders
-
Go to the Order Management > Orders > Finished orders tab.
-
Filter by line and time ranges, if necessary.
-
Where necessary, refresh the data using
 in the header.
The finished orders are displayed according to the selected filter criteria. Finished orders are black and canceled orders are red.
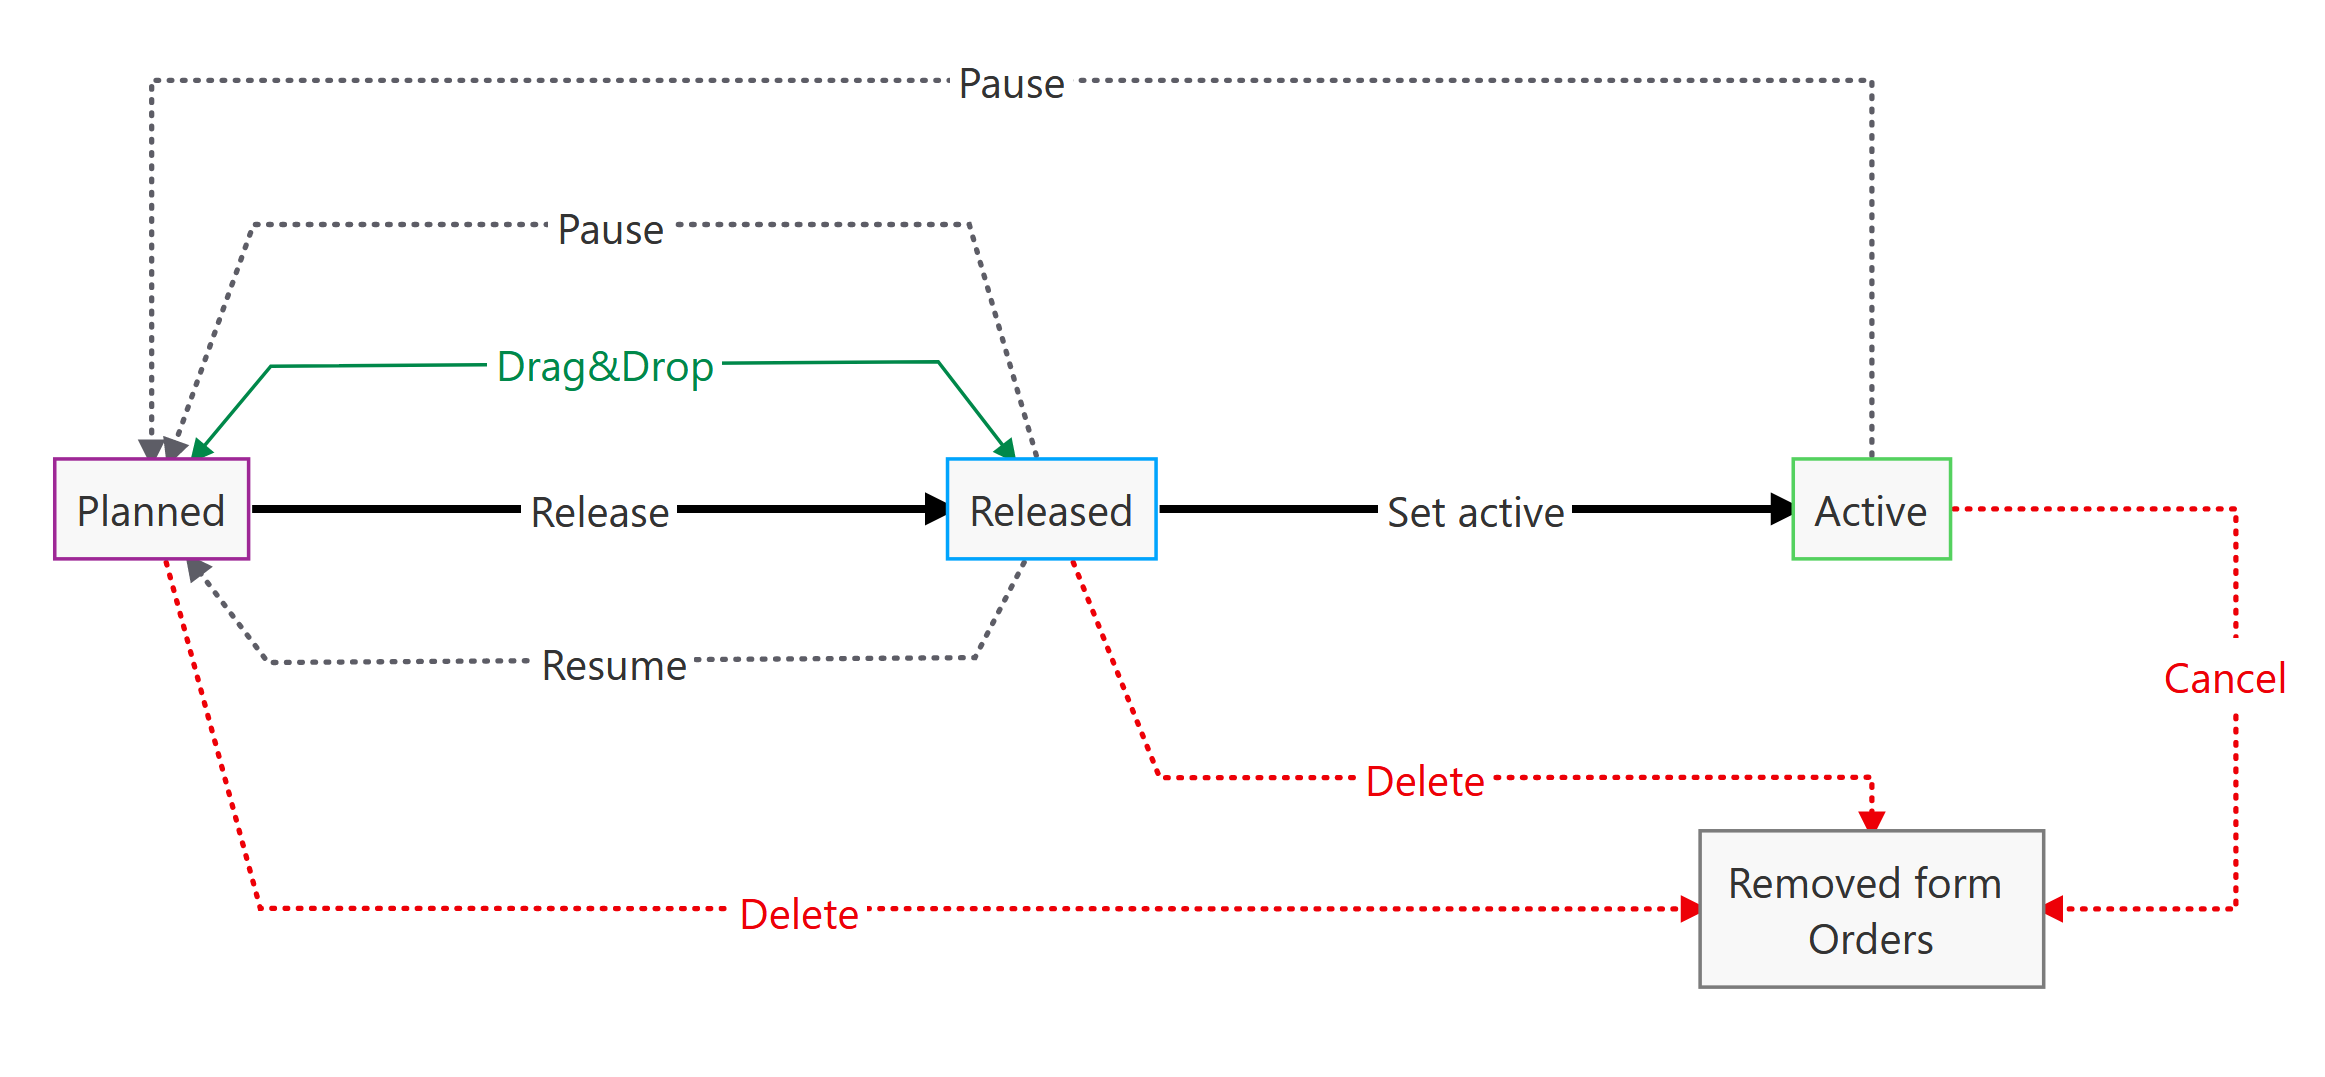
Changing the order editing status
In the Order Management module, the status of an order corresponds to the processing status. To change the status of an order, the order is moved to the desired column: Planned , Released or Active. Within each column, an order’s position defines its processing priority, where the topmost order receives the highest priority.
|
Released orders do not have to be moved to the Active column. The topmost order in the Released column is automatically moved to the Active column after the currently active order has been processed. |
Orders can be planned, released, rescheduled, paused, activated or canceled and deleted.
-
Select the line that belongs to the order.
Finding and Selecting a Line -
To find the order, enter the order number or parts of the order number of the required order in the
text box in the header. -
Activate processing in the header with
 Process.
 -
To change the editing status, go to
 in the order and drag and drop the order into the required column.
Or:
To change the processing status, open the options menu in the order with
and select the desired status.The options menu depends on the status of the order.
Orders Tab -
To prioritize the order within a column, go to
in the order and hold down the mouse button to drag the order upward.
The order is in the selected column at the selected location.
-
To delete an order, continue to Delete order.
-
To pause an active order, continue to Pause order.
-
To cancel an active order, continue to Canceling an Order.
The following table lists the possible statuses of an order and their corresponding numerical values.
| Name | Value | Description |
|---|---|---|
Planned |
1 |
A production order is in this status directly after its initial creation. The majority of the parameters have already been entered by the user. As long as the order is still in this status, all parameters can be changed without the calculated data being retrospectively affected. Orders in this status are not involved in determining the material requisition. |
Fixed |
2 |
The order was released for production. The set parameters can no longer be changed. To change the parameters, the order must be reset to 'planned' status. Orders in this status are involved in determining the material requisition. |
Active |
3 |
Order is currently being manufactured. An active order can no longer be moved to 'planned' status. If the first machine in the line is setting up, the active order is completed automatically. If the type that is to be set up corresponds to the current type, the active order is not completed. If the type that is to be set up corresponds to the subsequent type, the active order is completed and the next order is activated. If no clear decision can be taken, the order remains active and may have to be closed manually. Orders in this status are involved in determining the material requisition. |
Completed |
4 |
Order was finished. The required quantity was produced or the order was finished manually. This kind of order cannot be reactivated or included in planning. Orders in this status are not involved in determining the material requisition. There is one exception: When an order is finished by part of the next order, all of the following stations are taken into consideration in the calculation until the new part has passed through all the stations. |
Paused |
5 |
An active or fixed order was paused. A paused order is no longer taken into consideration for the Material calculation and order activation. |
Canceled |
10 |
The order was canceled and can no longer be continued. |
Create an order
-
Select the line that belongs to the order.
Finding and Selecting a Line -
In the header, click on
 to add an order.
 -
In the Create new order window, go to the Details 1 , Details 2 and Detail 3 tabs to add the required entries.
The priority can only be entered when the order is created.
A description of the entries can be found under Order Details and Station Counter.
-
Click on Save to create the order.
The order appears in the Planned column at the bottom.
-
To release the order, continue to Changing the Order Editing Status.
-
To edit the order, continue to Editing an Order.
Editing an order
-
Select the line that belongs to the order.
Finding and Selecting a Line -
To find the order, enter the order number or parts of the order number in the
text box in the header. -
Enable editing by clicking on
Edit in the header. -
If the order is not in the Planned or Released column, drag the order to this column.
Changing the Order Editing Status -
In the order, open the Options menu by clicking on
and select Edit order. -
You can amend the required entries in the General , Details tabs.
Some information is entered by connected systems and cannot be edited.
A description of the entries can be found under Order Details and Station Counter.
-
Apply changes with Save.
The changes are applied to the order.
Releasing an order
To release an order means to move it from a Planned status to Released, making it ready for production on the shop floor.
-
To find a specific order, enter the order number into the Search field at the top of the orders list.
-
Click on Edit.
Editing the table is enabled.
-
In the Planned column, select the order to be released.
-
Drag the selected order from the Planned column and drop it into the Released column.
-
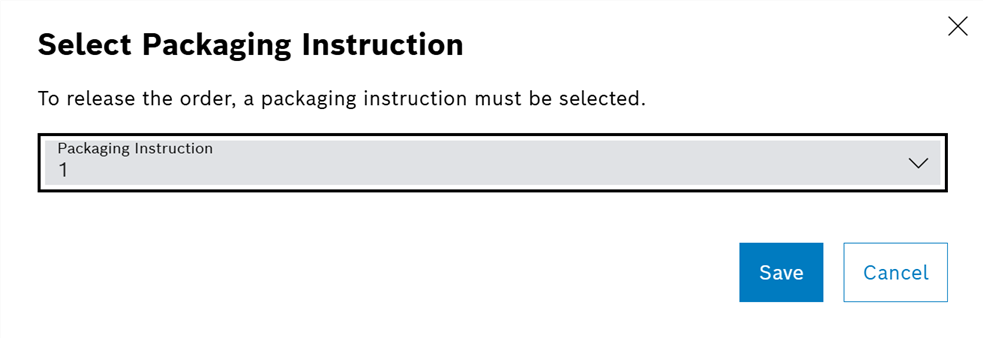
If the BOM Type is set to PSM - Product Setup - Trigger Explosion & Verify Packaging, dragging the order to the Released column will open a dialog window. Use this dialog to select the required packaging instruction before proceeding to release the order.
The order is in the Released column and is continued according to the prioritization.
|
Rescheduling an active order
-
Select the line that belongs to the order.
Finding and Selecting a Line -
Enable editing by clicking on
Edit in the header. -
In the Active column, change the status of the active order first to Released , then to Planned.
Changing the Order Editing Status -
Edit the order as required.
Editing an Order
The changes are applied to the order.
-
To release the order, continue to Changing the Order Editing Status.
Pause an order
Prerequisite
The order is in the Released or Active column.
Procedure
-
Select the line that belongs to the order.
Finding and Selecting a Line -
To find the order, enter the order number or parts of the order number in the
text box in the header. -
Activate processing in the header with
Process. -
In the order, open the Options menu by clicking on
and select Pause order.This option is only available if the Allow pausing of orders setting is active.
The order is removed from the Released or Active column and is displayed in the Planned column with a gray line.
-
To continue production, continue to Stopping an Order Pause.
-
To delete the order, continue to Delete order.
Stopping a paused order
Prerequisite
The order is paused, i.e., the order is in the Planned column and is highlighted with a gray line.
Procedure
-
Select the line that belongs to the order.
Finding and Selecting a Line -
To find the order, enter the order number or parts of the order number in the
text box in the header. -
Activate processing in the header with
Process. -
In the paused order, go to
and drag and drop the order into the Released column.
The order is in the Released column and is continued according to the prioritization.
Canceling an order
|
Canceled orders can no longer be edited and produced. |
Prerequisite
The order is being executed, i.e., the order is in the Active column.
Procedure
-
Select the line that belongs to the order.
Finding and Selecting a Line -
Activate processing in the header with
Process. -
In the Active column, click on
to open the options menu in the order and select Cancel order …. -
To permanently cancel the order, click on Yes in the dialog window.
The order is removed from the Orders tab and is displayed in the Finished orders tab.
Delete an order
Prerequisites
-
Role
PowerUser OrderManagementorAdmin OrderManagement -
The production order is in the Planned or Released columns.
Procedure
-
Select the line that belongs to the order.
Finding and Selecting a Line -
To find the order, enter the order number or parts of the order number in the
text box in the header. -
Enable editing by clicking on
Edit in the header. -
In the order, open the Options menu by clicking on
and select Delete order. -
To permanently delete the order, click on Yes in the dialog window.
The order is removed from the Orders tab and is displayed in the Finished orders tab.