Widgets
Widgets allow relevant module data to be displayed in a dashboard without having to open the modules. This allows all important data to be monitored in a single overview.
The following widget types are available:
-
Event widgets, for example: Latest event, event list
-
Measured value widgets, for example: Measured value monitoring, device monitoring, comparison of latest values, historical measured values
-
Respond to filters, e.g.: Line mode, device status for device group, technical availability by device tag, event list
-
Others, for example: Note
|
Widgets are provided by licensed modules. Widgets are only available if the respective user has the corresponding authorization through the licensed module. |
Adding widgets
-
Click
 in the relevant dashboard.
The edit dialog window appears. -
 .
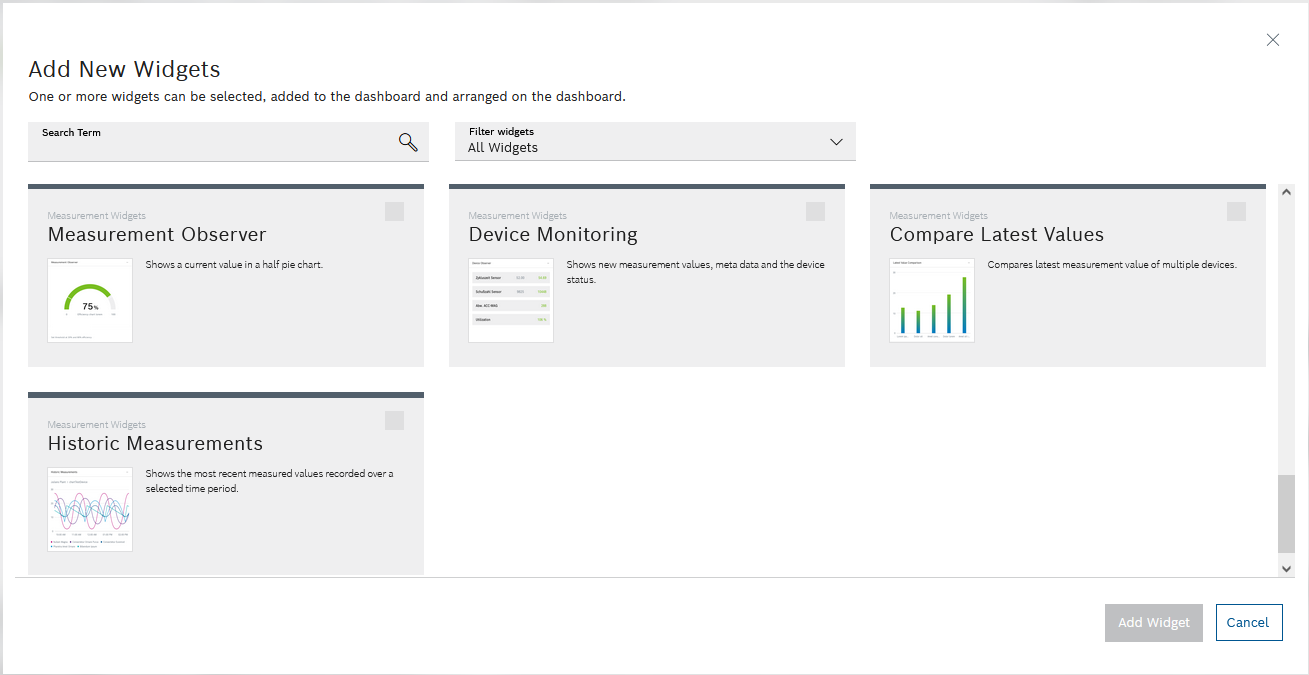
.The Add new widgets dialog window appears.
-
In the Search term text field, enter the name of the widget.
-
Select the type of widget from the Filter drop-down list.
-
Activate the checkbox of one or more widgets.
-
To create the widget, click Add widget.
The widget appears in the dashboard and can be configured.
-
To save the changes to the dashboard. click Save in the edit dialog window.
Your changes have been saved.
Configuring widgets
Depending on the type of widget, different configuration options are available. The suggestions in the input and selection fields are provided by the modules.
-
Click
 in the appropriate widget.
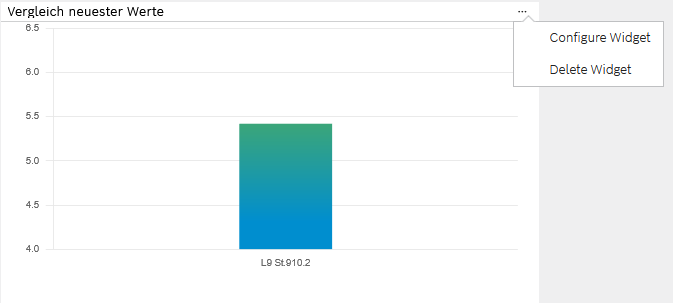
-
Select Configure widget in the context menu.
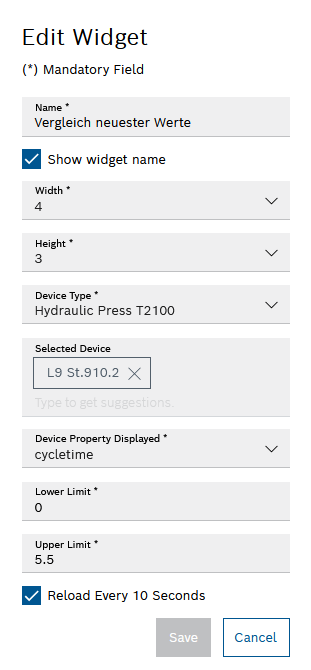
The Edit widget edit dialog window appears.
-
Enter the required properties and parameters.
-
To accept the changes, click Save.
-
To cancel the configuration, click Cancel.
Some widgets contain additional configuration options under Further details.
-
The changes have been accepted.
Change widget appearance
To display widgets appropriately, the layout and position of widgets can be customized in the dashboard.
-
Click
in the appropriate widget.
-
Click Configure widget in the context menu.
The Edit widget edit dialog window appears.
-
In the selection fields Width and Height , select the required values.
-
Click Save in the edit dialog window.
The widget appears in a new size on the dashboard.
|
When you resize a widget in the dashboard, other widgets move accordingly. |
Positioning widgets
To change the position of widgets in the dashboard, you can move the widget in the dashboard.
-
Click
in the relevant dashboard.
The edit dialog window appears and the dashboard position grid becomes visible. -
Drag and drop the widget to the required position.
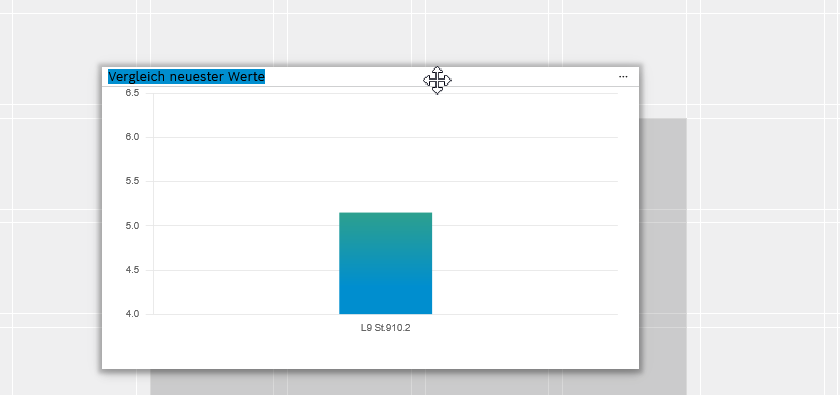
If a widget is dragged to an empty location, it is positioned at that location. If a widget is dragged to another widget, both widgets swap places. This feature is not available on mobile devices.
The widget appears at the required position.
-
Click Save in the edit dialog window.
Die Änderungen am Dashboard sind gespeichert.
