Managing a supermarket
Synchronizing Kanban control cycles with SAP
The Kanban control cycles in the Nexeed Industrial Application System can be synchronized with SAP.
Preconditions
-
Role
Stock Management AdministratororStock Management Logistik Planer -
The Kanban control cycles have been created in the Nexeed Industrial Application System.
Creating or Editing Kanban Control Cycles -
A production service area (PSA) is specified in the Nexeed Industrial Application System.
Supermarket Configuration Area
Procedure
-
Select the Supermarkets menu.
-
If necessary, search for the required supermarket.
-
In the row containing the supermarket, click
 to open the supermarket for editing.
 -
In the Supermarket configuration area, click Synchronize Kanban control cycles.
Kanban control cycles can only be synchronized if no element is selected in the graphical display.
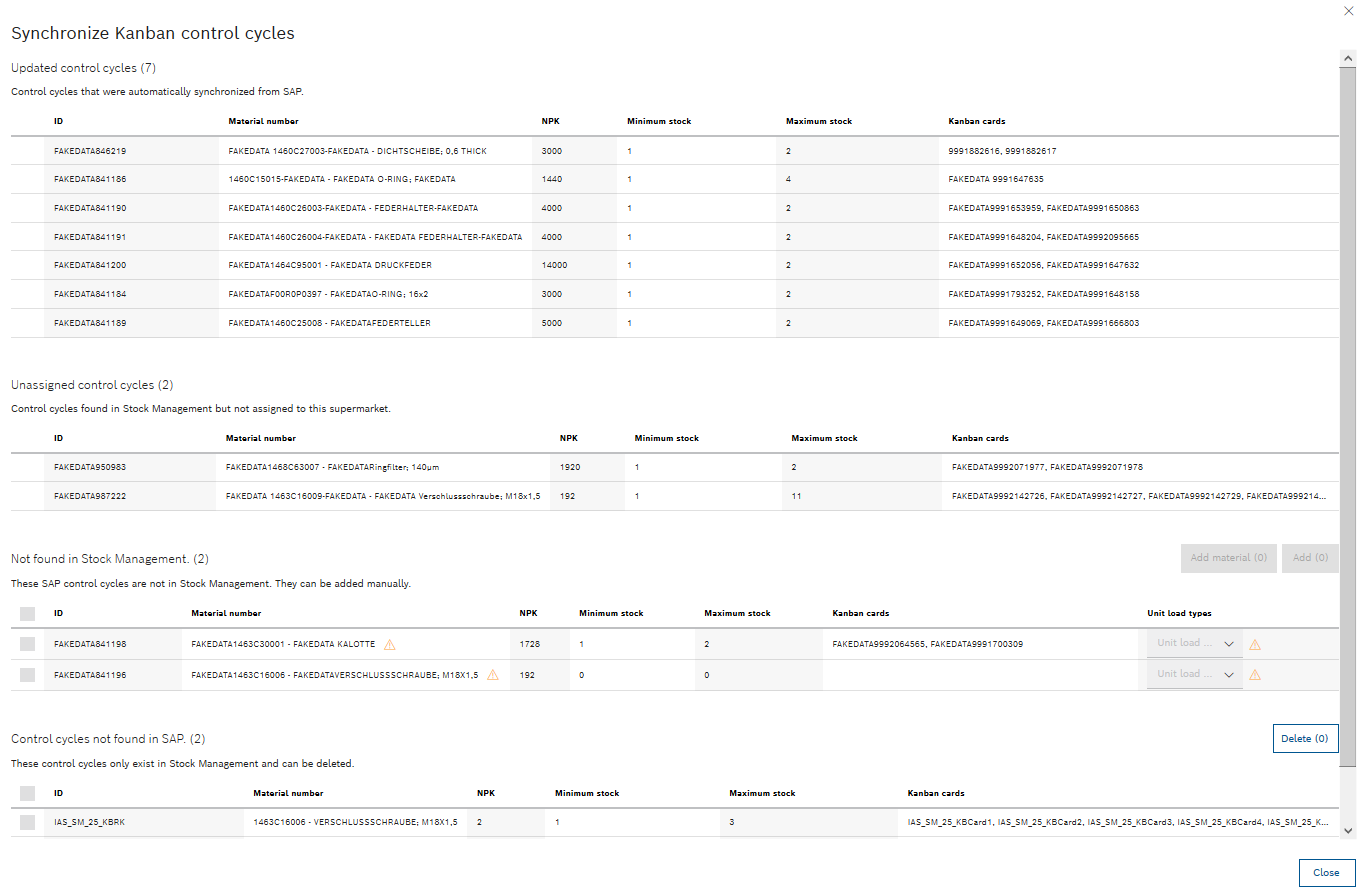
After synchronization has been completed, the Synchronize Kanban control cycles dialog window opens with the following areas: * Updated : Contains all Kanban control cycles automatically synchronized from SAP. * Unassigned control cycles : Contains Kanban control cycles that are present in the Nexeed Industrial Application System and in SAP (related to the production service area) but are not assigned to a supermarket.
+ Materials and Kanban control cycles from SAP can be assigned to the Nexeed Industrial Application System.
-
Not found in stock management : Contains Kanban control cycles and materials that are only present in SAP.
-
Not found in SAP : Contains Kanban control cycles that are only present in the Nexeed Industrial Application System.
These Kanban control cycles can be deleted manually.
Kanban control cycles can only be assigned to the Nexeed Industrial Application System if the material of the Kanban control cycle is present in the Nexeed Industrial Application System.
-
-
If necessary, assign a material from a Kanban control cycle from SAP to the Nexeed Industrial Application System:
-
Highlight the Kanban control cycle in the Unassigned control cycles.
-
Click Add material (<n>).
-
To define the load unit (optional) of the material, click the Load unit types drop-down list.
-
Click Add (<n>).
The material is added to the Nexeed Industrial Application System and listed under Material flow > Materials.
-
-
To add a Kanban control cycle from SAP to the Nexeed Industrial Application System:
-
Highlight the Kanban control cycle in the Unassigned control cycles.
-
To define the load unit (optional) of a Kanban control cycle, click the Load unit types drop-down list.
-
Click Add (<n>).
The Kanban control cycle is added and listed under Material flow > Kanban control cycles.
-
-
To remove an unassigned Kanban control cycle from the Nexeed Industrial Application System:
-
Highlight the Kanban control cycle in the Not found in SAP area.
-
Click Delete (<n>).
The deleted Kanban control cycle is marked with a check. The deleted Kanban control cycle will no longer be displayed after the next synchronization.
-
-
To close the Synchronize Kanban control cycles dialog window, click
 or Close.
Synchronization is complete when the required materials and control cycles are added or deleted.
Adding a Lane or Storage Location
|
The processes for adding a lane and a storage location are identical. The adding process is described below, using a lane as an example. |
Requirements
-
Stock management administratororStock management logistics plannerrole -
A module has been created.
Creating a Module
Procedure
-
Select the Material flow > Supermarkets menu.
-
If necessary, look for the supermarket where the required module is located.
-
In the row containing the supermarket, click
to open the supermarket for editing. -
In the graphical view, click a lane in the row of which you want to add a lane.
The lane is highlighted in light blue. The Lane configuration area appears next to the graphical display.
-
Switch to the Configuration tab.
-
In the configuration area, click Add new lane.
A lane is added to the right at the end of the selected row.
-
To configure the lane, continue with Configuring a Lane or Storage Location.
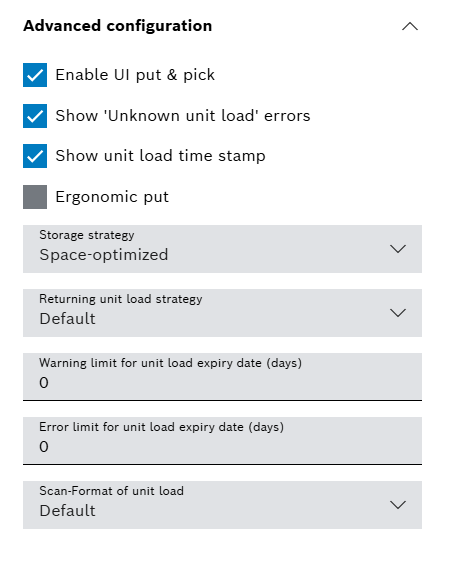
Enabling or disabling an ergonomic put
The ergonomic put selects a preferred lane based on weight calculations.
The weight of the unit load, that consists of the total material weight and the unit load type weight must be greater than the maximum weight of the lane.
This feature only works when Storage strategy is set up to Space-optimized.
Requirements
-
Stock management administratororStock management logistics plannerrole -
At least one supermarket has been created.
Procedure
-
Open the Stock Management > Supermarkets menu entry.
-
Click on
in the row of the supermarket to be edited. -
On the right-hand side, click on Advanced configuration.
The drop-down menu opens.
-
Select Space-optimized from the drop-down list Storage strategy.
-
To enable or disable the ergonomic put, activate or deactivate the checkbox Ergonomic put.
-
Confirm with Save.
A success message is shown.
-
To configure which lanes have a higher priority to place heavier items in the Lane, continue with Configuring a Lane or Storage Location.
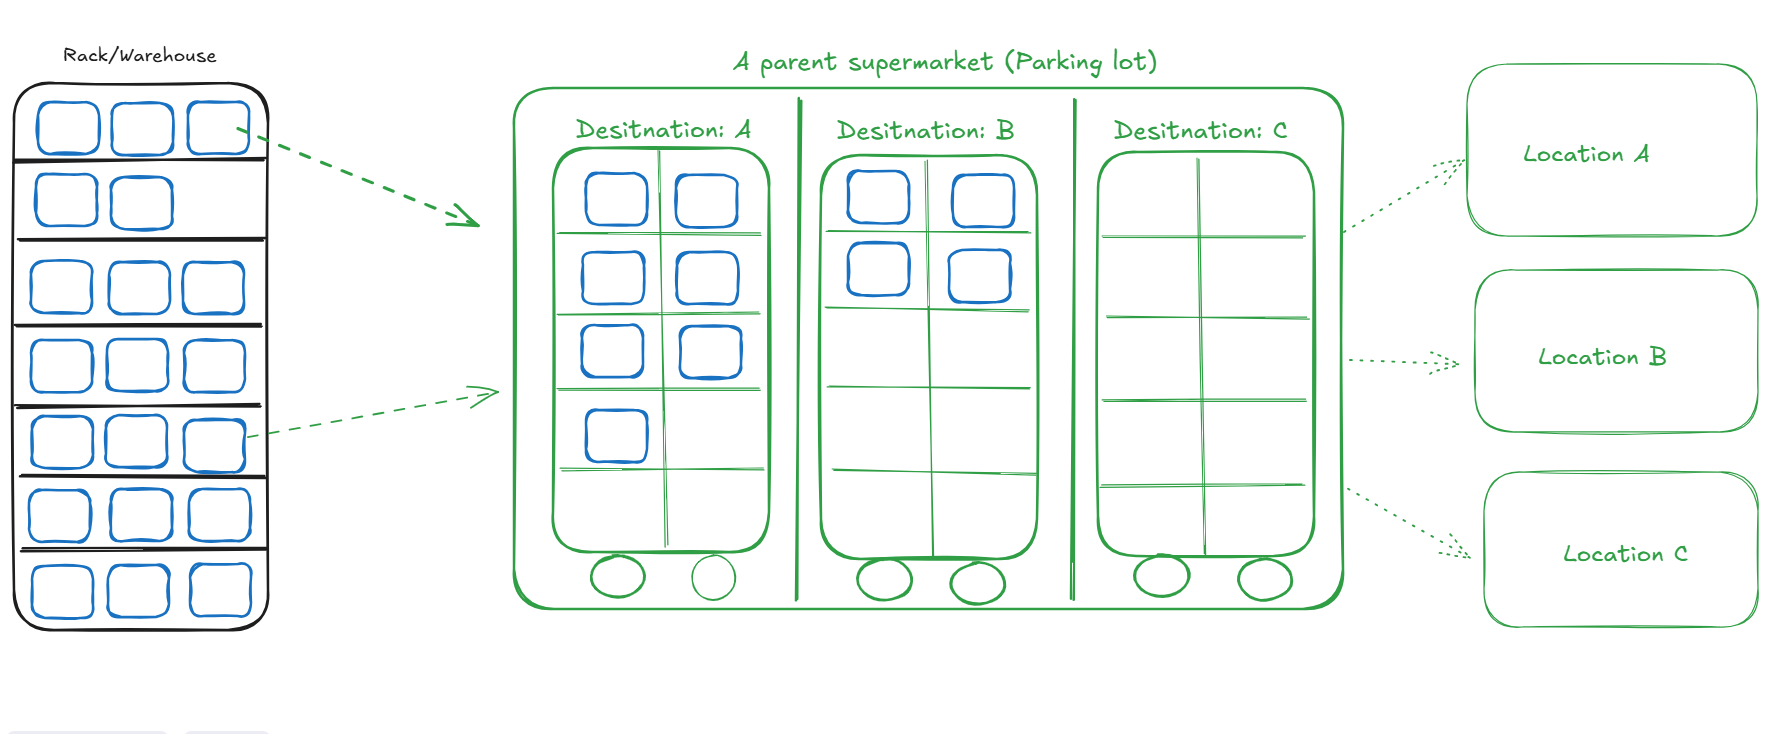
Enabling a mobile supermarket
A mobile supermarket is a movable unit placed within a static parking lot supermarket. It is used to group items for the same destination, which are then transported together to the final location.
The following image illustrates this relationship.
Prerequisites
-
Stock management administratorrole. -
At least one Stock Managed unit load type has been created.
-
At least one parent non-mobile supermarket has been created.
Procedure
-
Open the Stock Management > Supermarkets menu entry.
-
In the header, click on
 to add a new supermarket.
 -
On the right-hand side, activate the switch Mobile.
The switch button is checked.
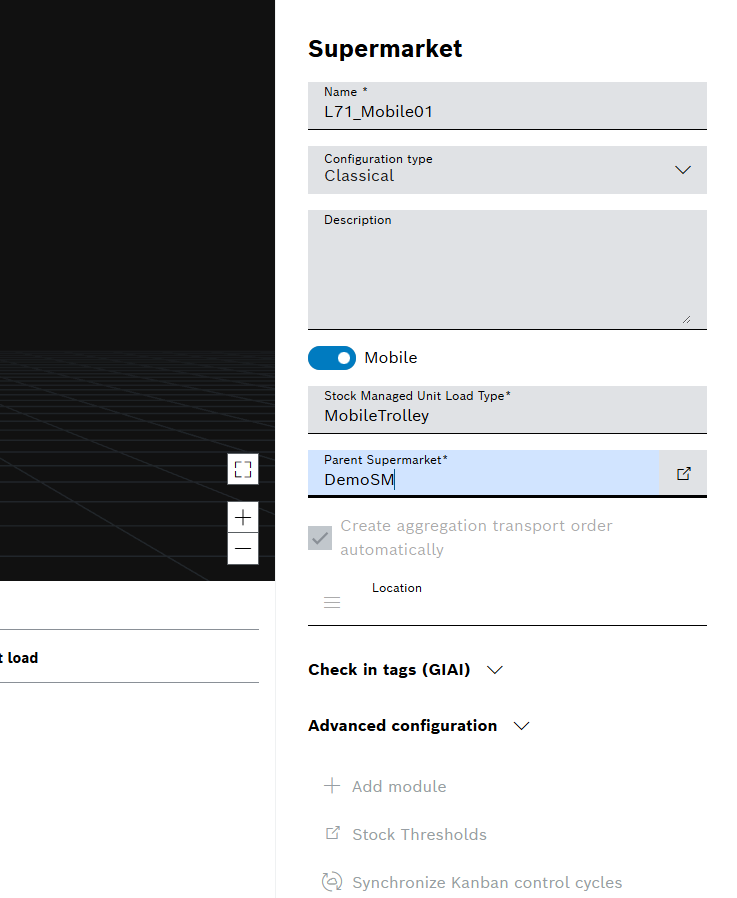
-
Select a Stock Managed unit load type from the drop-down list Stock Managed Unit Load Type.
-
Select a parent Supermarket from the drop-down list Parent Supermarket.
-
Confirm with Save.
A success message is shown.
-
To create modules in the supermarket, continue with Creating a Module.
Additional hints:
-
If a mobile supermarket has already been created, the maximum number of modules for that mobile supermarket will be limited to 1.
-
Using the Single Storage Bins module type in the parent supermarket provides the best way to display parking space information.
-
When a parent supermarket is associated with a child mobile supermarket, the Putaway mobile supermarket button in the parent supermarket will only allow selecting a mobile supermarket from the associated child supermarket to initialize the location of the mobile supermarket.
-
The location of the mobile supermarket is read-only and is updated automatically based on the actual location detected by the system.
-
The lanes of the parent supermarket need to be configured with the same unit load type as the mobile supermarket’s Stock Managed unit load type.
Deleting a Lane or Storage Location
|
The processes for deleting a lane and a storage location are identical. The deleting process is described below, using a lane as an example. |
Prerequisite
Role Stock Management Administrator or Stock Management Logistik Planer
Procedure
-
Select the Material flow > Supermarkets menu.
-
If necessary, look for the supermarket where the required module is located.
-
In the row containing the supermarket, click
to open the supermarket for editing. -
Click the lane in the graphical display.
The lane is highlighted in light blue. The Lane configuration area appears next to the graphical display.
-
Switch to the Configuration tab.
-
In the lane configuration area, click Delete lane.
-
Click Delete in the dialog window to delete the lane permanently.
The lane is deleted and removed from the graphical display.
Deleting a module
When a module is deleted, the modules vertically above it slide down one position. If there is no module vertically above it, the modules to the right of it slide one position to the left.
Preconditions
-
Role
Stock Management AdministratororStock Management Logistik Planer -
There are no booked load units in the module.
Resetting Module or Lane Stock
Procedure
-
Select the Material flow > Supermarkets menu.
-
If necessary, search for the required supermarket.
-
In the row containing the supermarket, click
to open the supermarket for editing. -
Click the module in the graphical display.
The module frame is highlighted in light blue. The module configuration area appears next to the graphical display.
-
In the configuration area, click Delete Module.
-
Click Delete in the dialog window to delete the module permanently.
The module is deleted and removed from the graphical display.
Deleting a supermarket
Prerequisite
-
Role
Stock Management Administrator
Procedure
-
Select the Supermarkets menu.
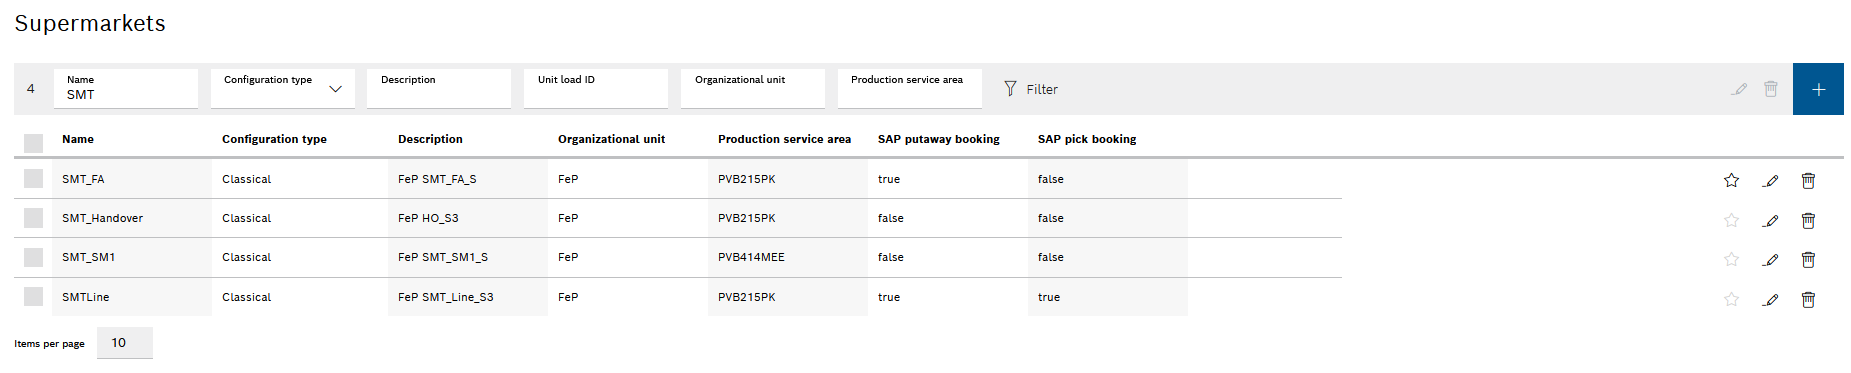
-
If necessary, filter by supermarket.
-
Delete supermarket:
-
To delete a supermarket, click
 in the row containing the supermarket.
 -
To delete multiple supermarkets, activate the checkboxes of the supermarkets and click
in the header. -
To delete all displayed supermarkets, activate the checkbox in the title bar of the list and click
in the header.
-
-
In the dialog window, delete the supermarket permanently with Delete.
The supermarket is deleted and removed from the list of supermarkets.