Scopes tab
Use the Scopes tab to manage scopes, which consists of configuring, adding, deleting and testing scopes that connect to the databases.
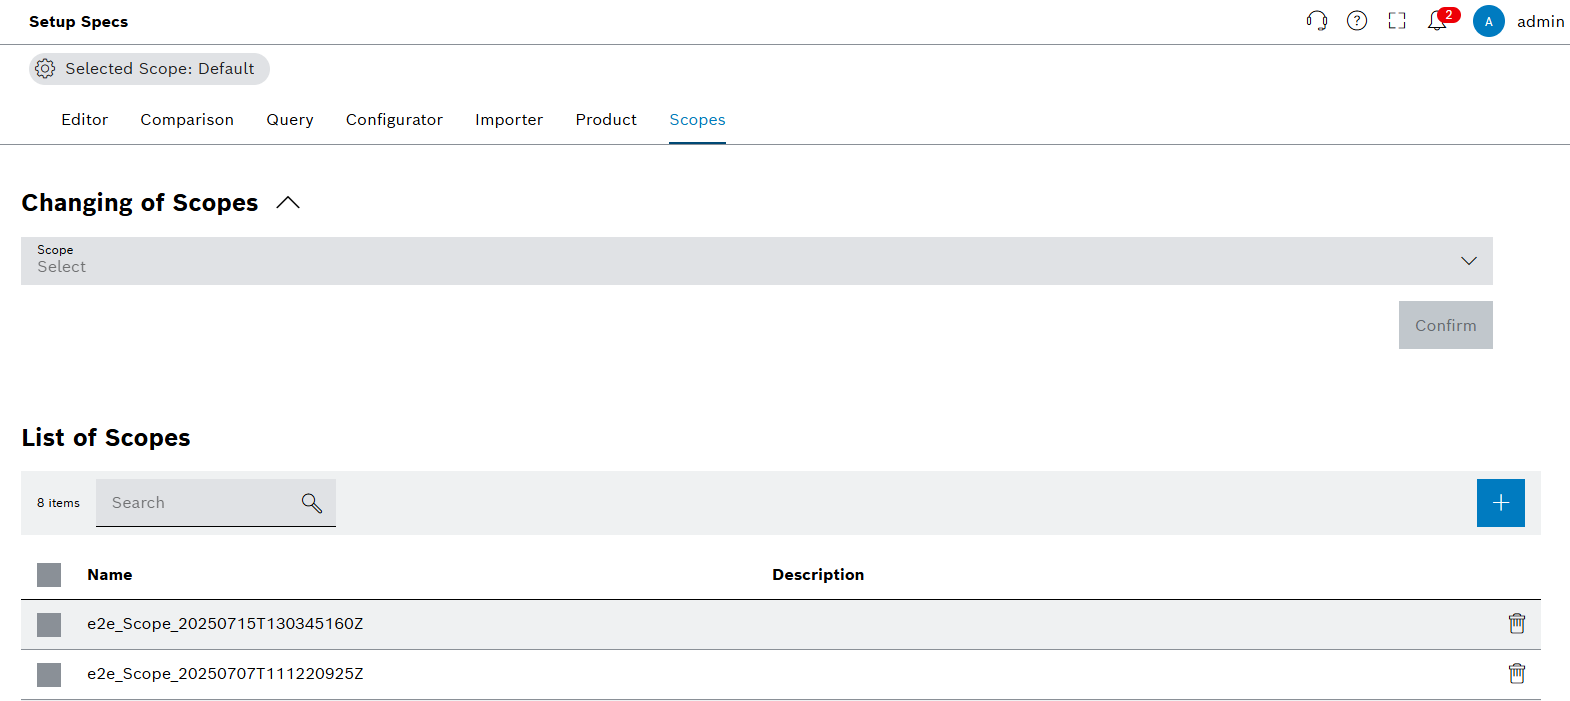
Functions in the overview of Scopes tab
| Element | Description |
|---|---|
Selected Scope: Default |
Select available scopes and see selected scope. |
|
Add new scope. |
Scope Selector |
Select new scope from the drop-down menu. |
Confirm |
Confirm the new scope selection. |
|
Delete scope. |


Chose a Scope to Setup Specs to have connection to the database.
|
If no specific Scope exists, Setup Specs selects Default Scope automatically. If multiple Scopes are available, select the preferred scope at the start. Refer to page Initial Scope Selection. |
|
Click on |

Add scope
Procedure
-
Open the Product & Quality > Setup Specs menu entry.
-
Click on the Scopes tab.
-
Click on
 next to List of Scopes.
The dialog window opens.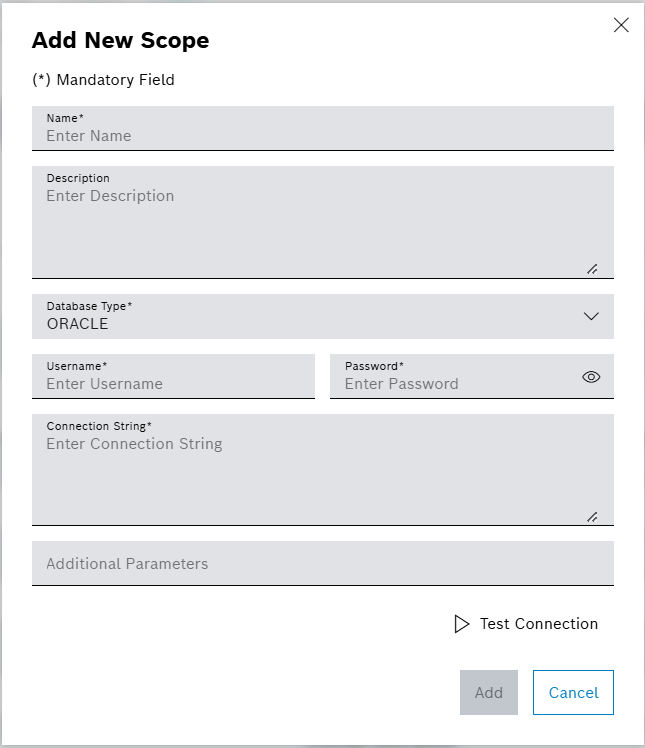
-
Enter data in the Add New Scope window.
For more information on Test Connection: Test Scope -
Click on Add.
The scope was added and a success message is shown.
Select scope
Prerequisites
Procedure
-
Open the Product & Quality > Setup Specs menu entry.
-
Click on the Scopes tab.
-
Click on
 in the row of Scope dropdown menu to see the list of available scopes.
The dialog window opens. -
Click on an available scope.
-
Click on Confirm.
The scope was selected and a success message is shown.
|
The following error message appears if the selected scope cannot connect to the database: Connection failed. Please use another scope. In this case, the created scope is not selectable. See test scope for testing the database connection. |
Test scope
Procedure
-
Open the Product & Quality > Setup Specs menu entry.
-
Click on the Scopes tab.
-
Click on
 on the Add New Scope dialog window.
|
The test is successful when the database connectivity is successful. The test fails when the database connectivity is not successful. Update the username, password, and connection string and try again. |
The scope was tested and a success message is shown.