Product tab
Use the Product tab to manage production areas and the product hierarchy, which consist of product families, products and variants.
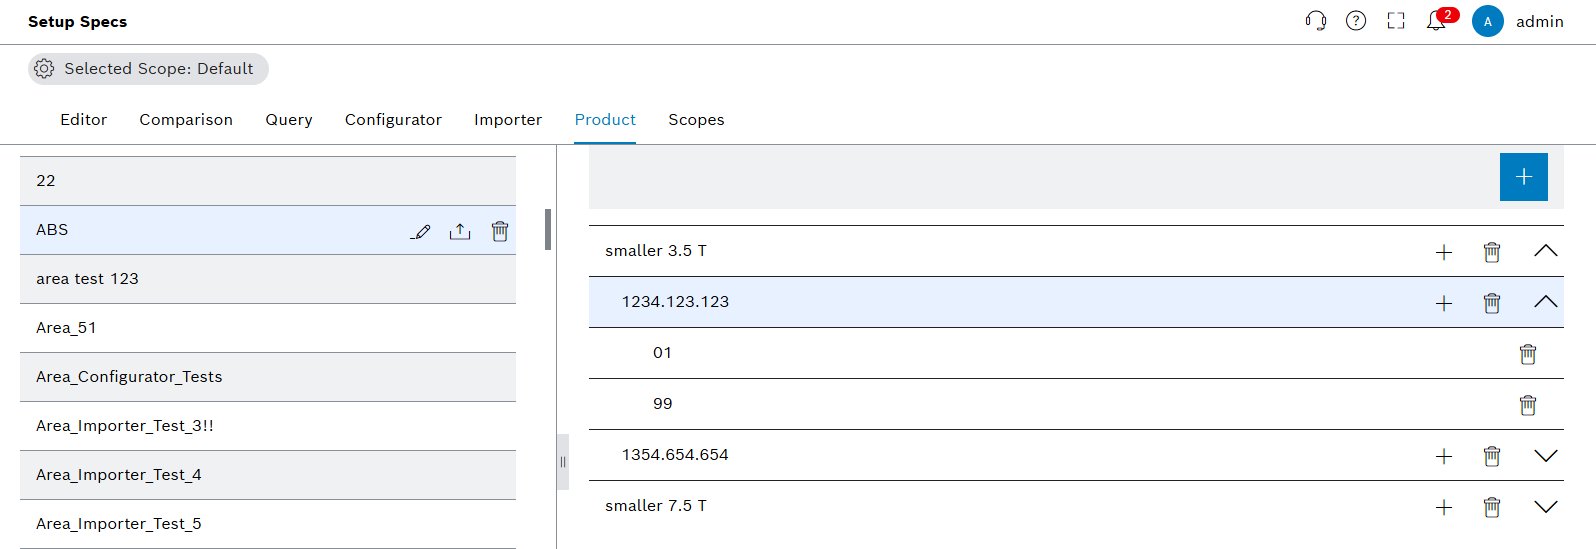
Functions in the overview of Product tab
| Element | Description |
|---|---|
Selected Scope: Default |
Select available scopes and see selected scope. |
|
Edit production area. |
|
|
|
Automatic export options for selected production area. |
|
Add product family under selected production area. |
|
Add products and variants under selected product family. |
|
Expand product family and product. |


Create production area
Procedure
-
Open the Product & Quality > Setup Specs menu entry.
-
Click on the Product tab.
-
In the detail view on the right, click on
 .
.
The dialog window opens.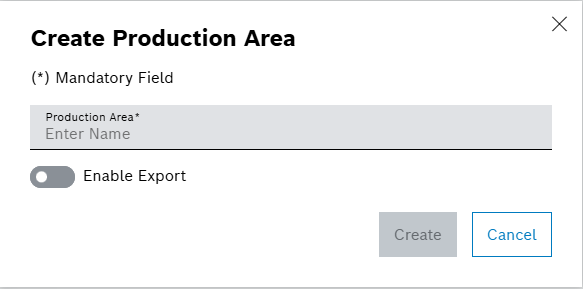
-
Enter data in the Create Production Area window.
-
Click on Create.
The production area is created and a success message is shown.
Add product family
Prerequisite
Procedure
-
Open the Product & Quality > Setup Specs menu entry.
-
Click on the Product tab.
-
Click on a production area.
-
In the detail view on the right, click on
.
The dialog window opens.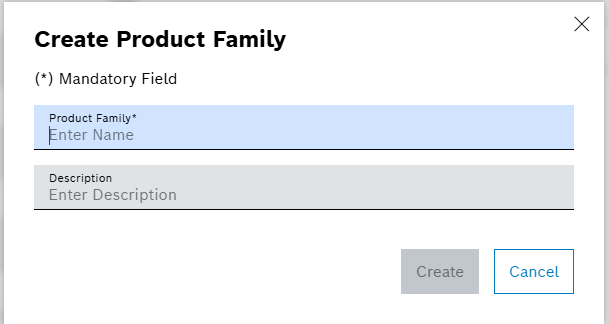
-
Enter data in the Create Product Family window.
The name of the product family must be unique within the production area.
-
Click on Create.
The product family is created and a success message is shown.
Add product
Prerequisites
Procedure
-
Open the Product & Quality > Setup Specs menu entry.
-
Click on the Product tab.
-
Click on a production area.
-
In the detail view on the right, click on a product family.
-
Click on
 in the row of the product family.
The dialog window opens.
-
Enter data in the Create Product window.
The name of the product must be unique within the process.
-
Click on Create.
The product is created and a success message is shown.
Add variant
Prerequisites
Procedure
-
Open the Product & Quality > Setup Specs menu entry.
-
Click on the Product tab.
-
Click on a production area.
-
In the detail view on the right, click on
 in the row of a product family.
 -
Click on
in the row of a product.
The dialog window opens.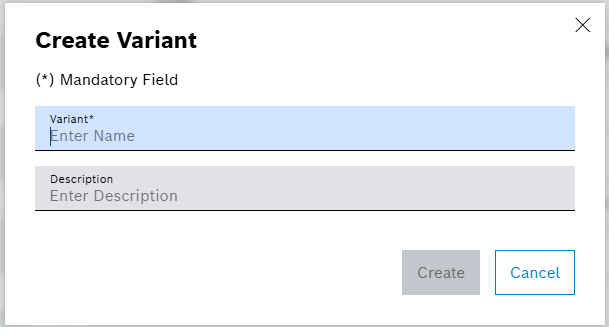
-
Enter data in the Create Variant window.
The name of the variant must be unique within a product.
-
Click on Create.
The variant is created and a success message is shown.
Export production area
Prerequisites
-
Dataset, structure element and parameters exist: Configurator tab
Procedure
-
Open the Product & Quality > Setup Specs menu entry.
-
Click on the Product tab.
-
Click on a production area.
-
Click on
 in the row of the production area.
The dialog window opens. -
Open or save the file in the operating system.
The production area is exported and a success message is shown. The export includes the current product hierarchy.
Enable automatic export for production area
Prerequisites
-
Dataset, structure element and parameters exists: Configurator tab
Procedure
-
Open the Product & Quality > Setup Specs menu entry.
-
Click on the Product tab.
-
Click on a production area.
-
Click on
 in the row of the production area.
The dialog window opens.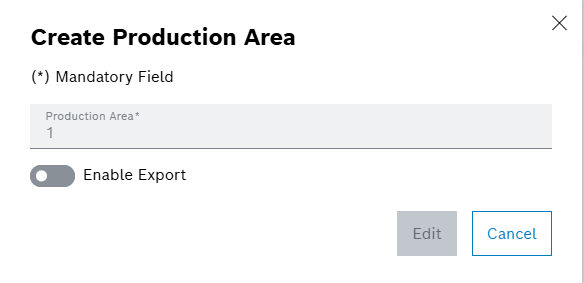
-
Activate the switch Enable Export.

-
Select an Export Format from the dropdown list.
-
Click on Edit.
-
Deactivate the toggle to deactivate the automatic export in given format.
The automatic export is enabled and a success message is shown. The export will take place after releasing a variant in the Editor tab.
|
To enable automatic export, switch on the Enable Export when adding the production area: Create Production Area |