Importer tab
Use the Importer tab to import production areas, product families, products and variants.
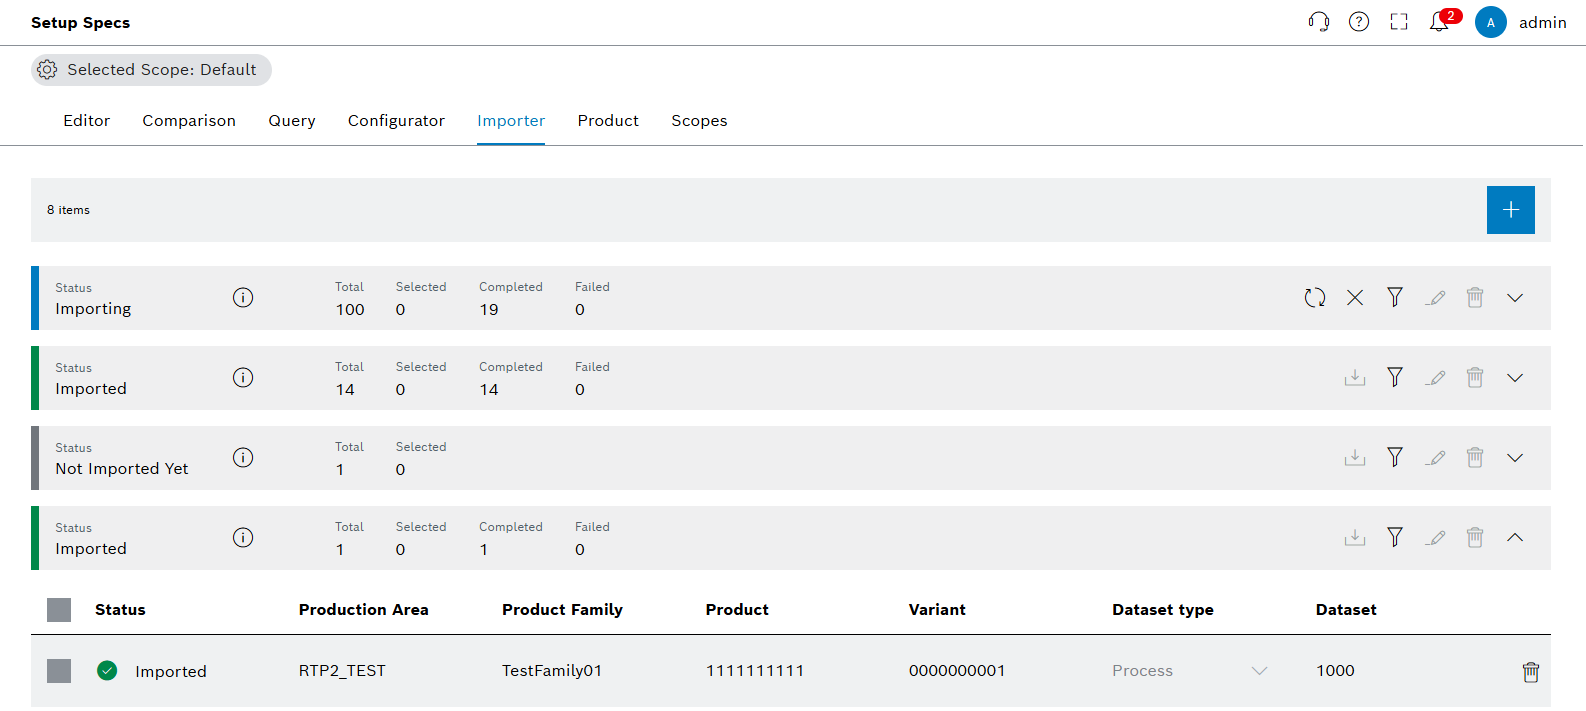
Functions in the overview of Importer tab
| Element | Description |
|---|---|
Selected Scope: Default |
Select available scopes and see selected scope. |
|
Import the files from the explorer. |
|
Represents active importing processes. |
|
Cancel active importing processes. |
|
Filtering import processes according to missing data and import statuses. |
|
Edit selected import processes. |
|
Delete import processes or select import items. |
|
Export datasets. |
|
Expand import processes. |


Importing elements
Prerequisite
A file to import exists.
Procedure
-
Open the Product & Quality > Setup Specs menu entry.
-
Click on the Importer tab.
-
In the header, click on
 .
. -
In the file system, select the ZIP file to confirm the import.
-
Click on Open.
-
Click on
 in the line of the new import group.
 -
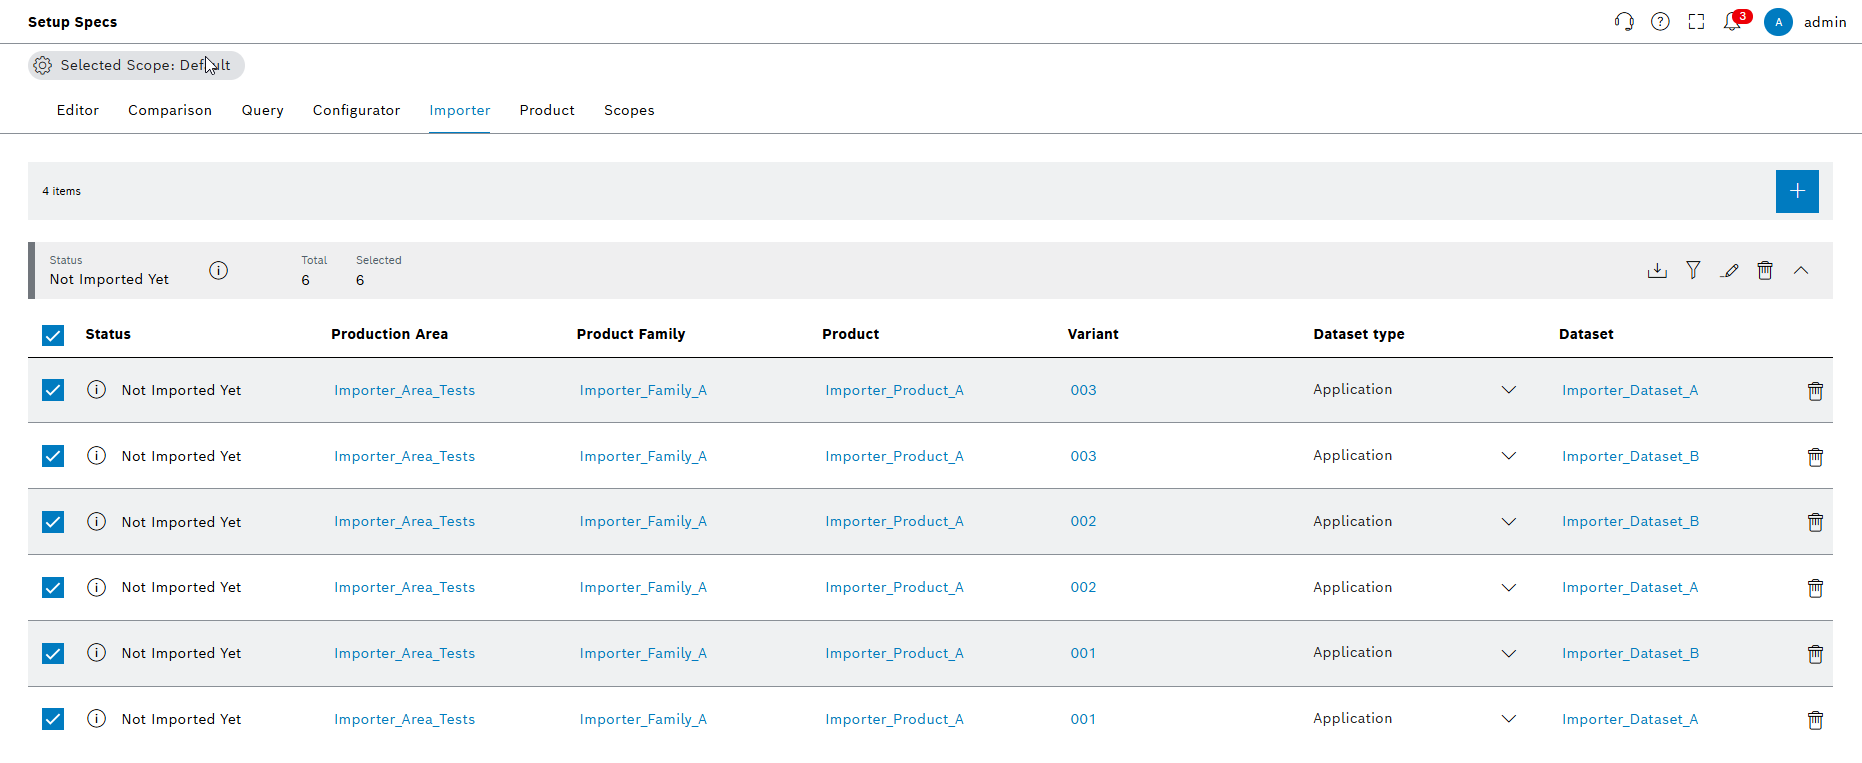
Select all elements by activating the Multiple Selection checkbox.
-
Click on
 .
.
The dialog window opens.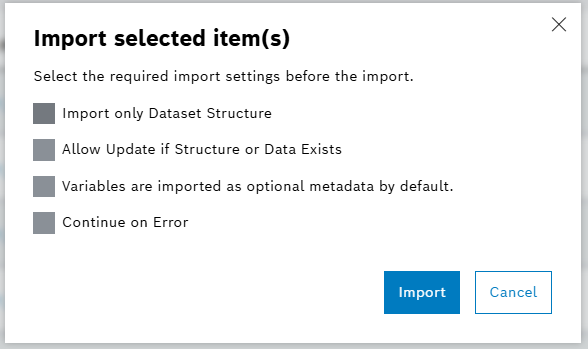
-
Enter data in the Import Selected Items window:
-
Import only dataset structure: Select this option to only import dataset structure.
-
Allow update if structure or data exists: Select this option to allow overwriting for given structure.
-
Variables are imported as optional metadata by default: Select this option to import variables as optional metadata.
-
Continue on error: Select this option to continue import operation regardless of any errors.
-
-
Click on Import.
Imported items have the status imported, and a success message is shown.
|
Setup Specs shows the total number of import items and the number of selected items next to the import status. |
Edit selected import elements
-
Open the Product & Quality > Setup Specs menu entry.
-
Click on the Importer tab.
-
In the header, click on
. -
In the file system, select the ZIP file to confirm the import.
-
Click on Open.
-
Click on
in the line of the new import group. -
Select all elements by activating the Multiple Selection checkbox.
-
Click on
 next to the import bar.
The editing options window opens.
next to the import bar.
The editing options window opens.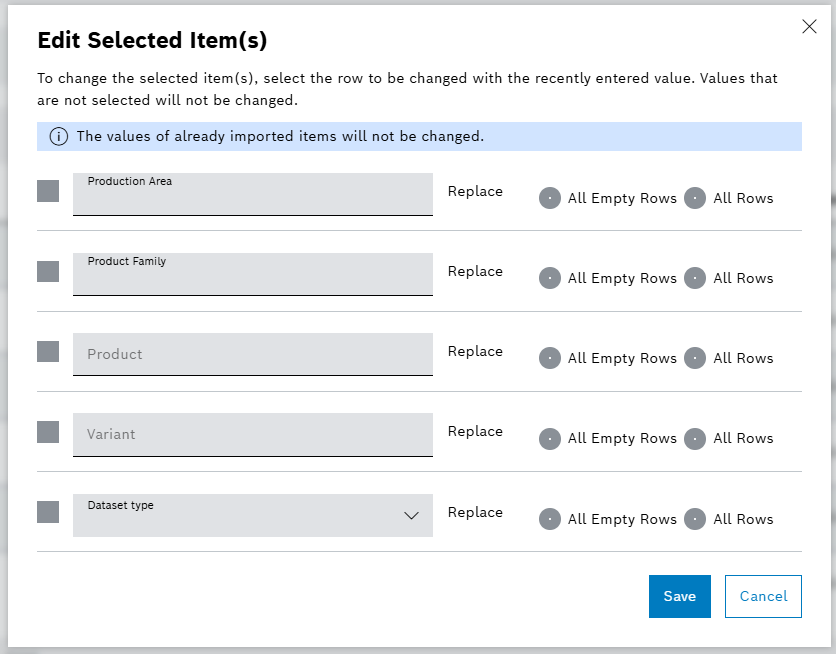
-
To change the production area, product family, product or variant, select the row.
-
Enter the new attributes next to the selected fields.
-
Select the editing criteria for each selected row:
-
Select All empty rows to edit all empty rows of the import items on the import list.
-
Select All rows to edit all the rows of the import items on the import list.
-
-
Click on Save.
-
-
Click on
.
The dialog window opens. -
Enter data in the Import Selected Items window:
-
Import only dataset structure: Select this option to only import dataset structure.
-
Allow update if structure or data exists: Select this option to allow overwriting for given structure.
-
Variables are imported as optional metadata by default: Select this option to import variables as optional metadata.
-
Continue on error: Select this option to continue import operation regardless of any errors.
-
-
Click on Import.
Imported items are changed and a success message is shown.
|
Setup Specs does not allow the change of the values of already imported items. |
Filter element
Prerequisite
Procedure
-
Open the Product & Quality > Setup Specs menu entry.
-
Click on the Importer tab.
-
Click on
in the row of an import group. -
Click on
 in the row of the import group and select filter criteria.
Setup Specs only displays elements with the selected filter criteria in the list.