Try out the APIs
This page provides tutorials on how to use API request tools like Bruno or Postman to interact with the NEXEED APIs.
Bruno
You can download our Bruno collection which includes predefined API requests to explore our module APIs.
Environment
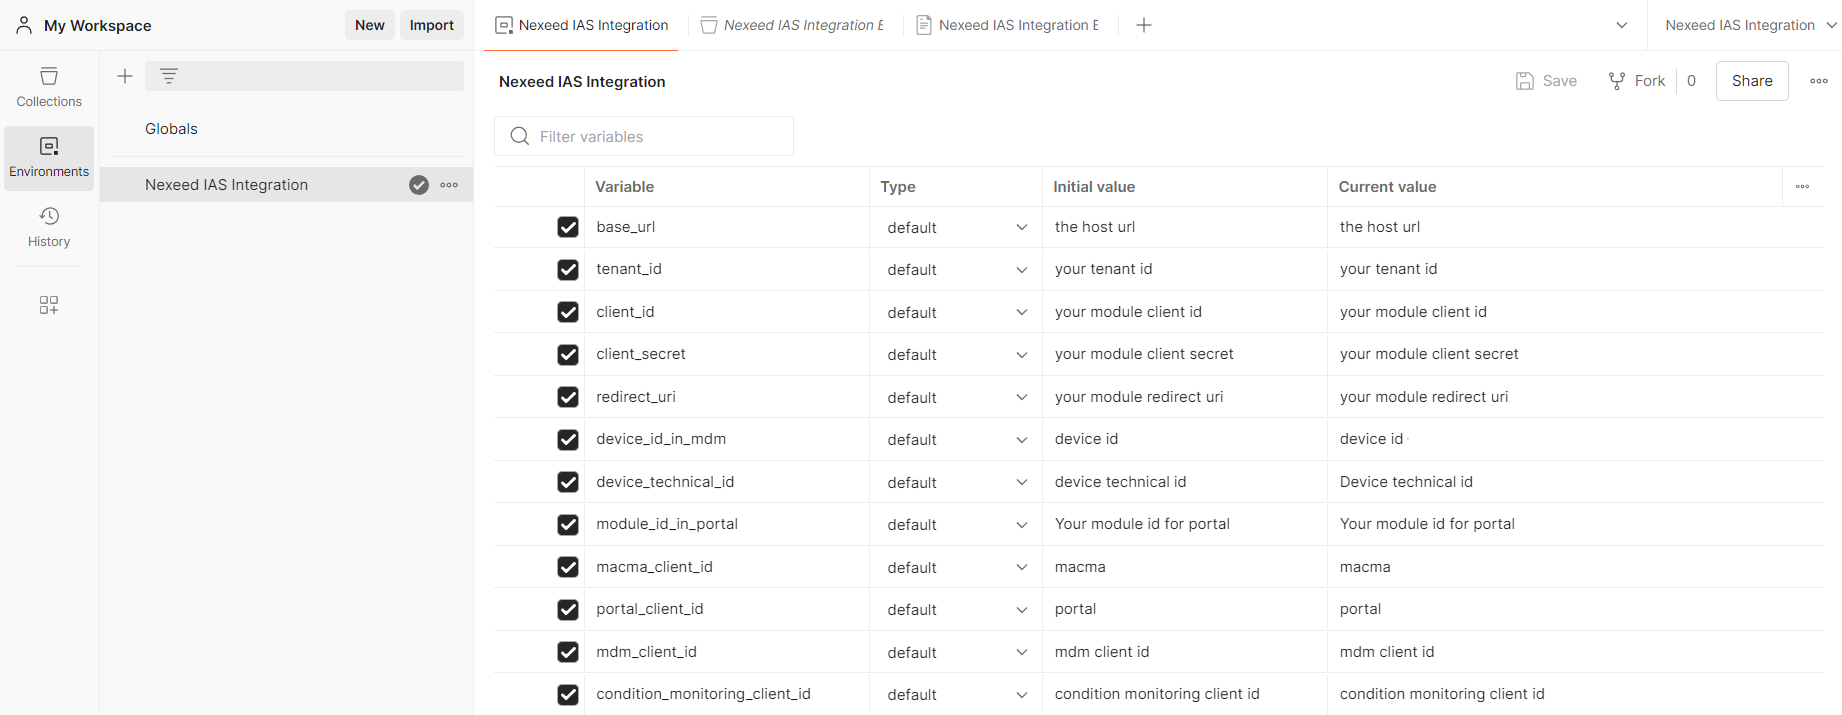
Bruno uses a folder-based project structure. When importing the collection, any associated environments will be imported automatically.
After importing, open the environment named Nexeed IAS Integration in Bruno and update the variable values to match your setup.
To obtain your client_id and client_secret, refer to the
"https://learn.bosch-nexeed.com/en/multitenant_access_control/getting_started/10_appregistration" section of the Multitenant Access Control documentation.
Collection
Import the prepared Bruno collection to Bruno. Each module API is organized in a dedicated folder inside the Bruno project.
| Make sure you’re using the appropriate environment for the module you’re testing. |
Request access token
Most API calls use the "Client Credentials Flow" for authentication.
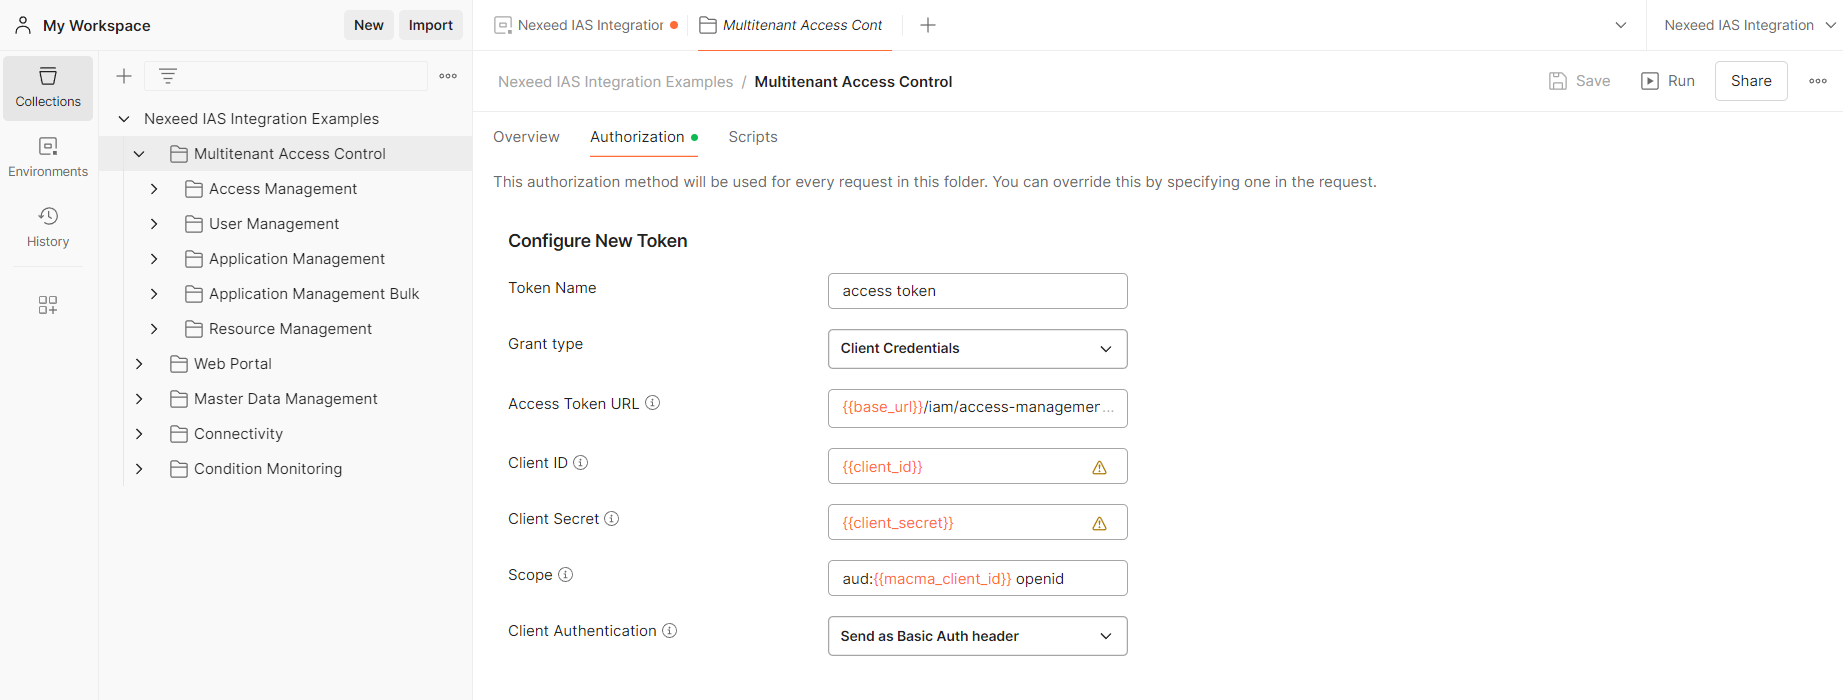
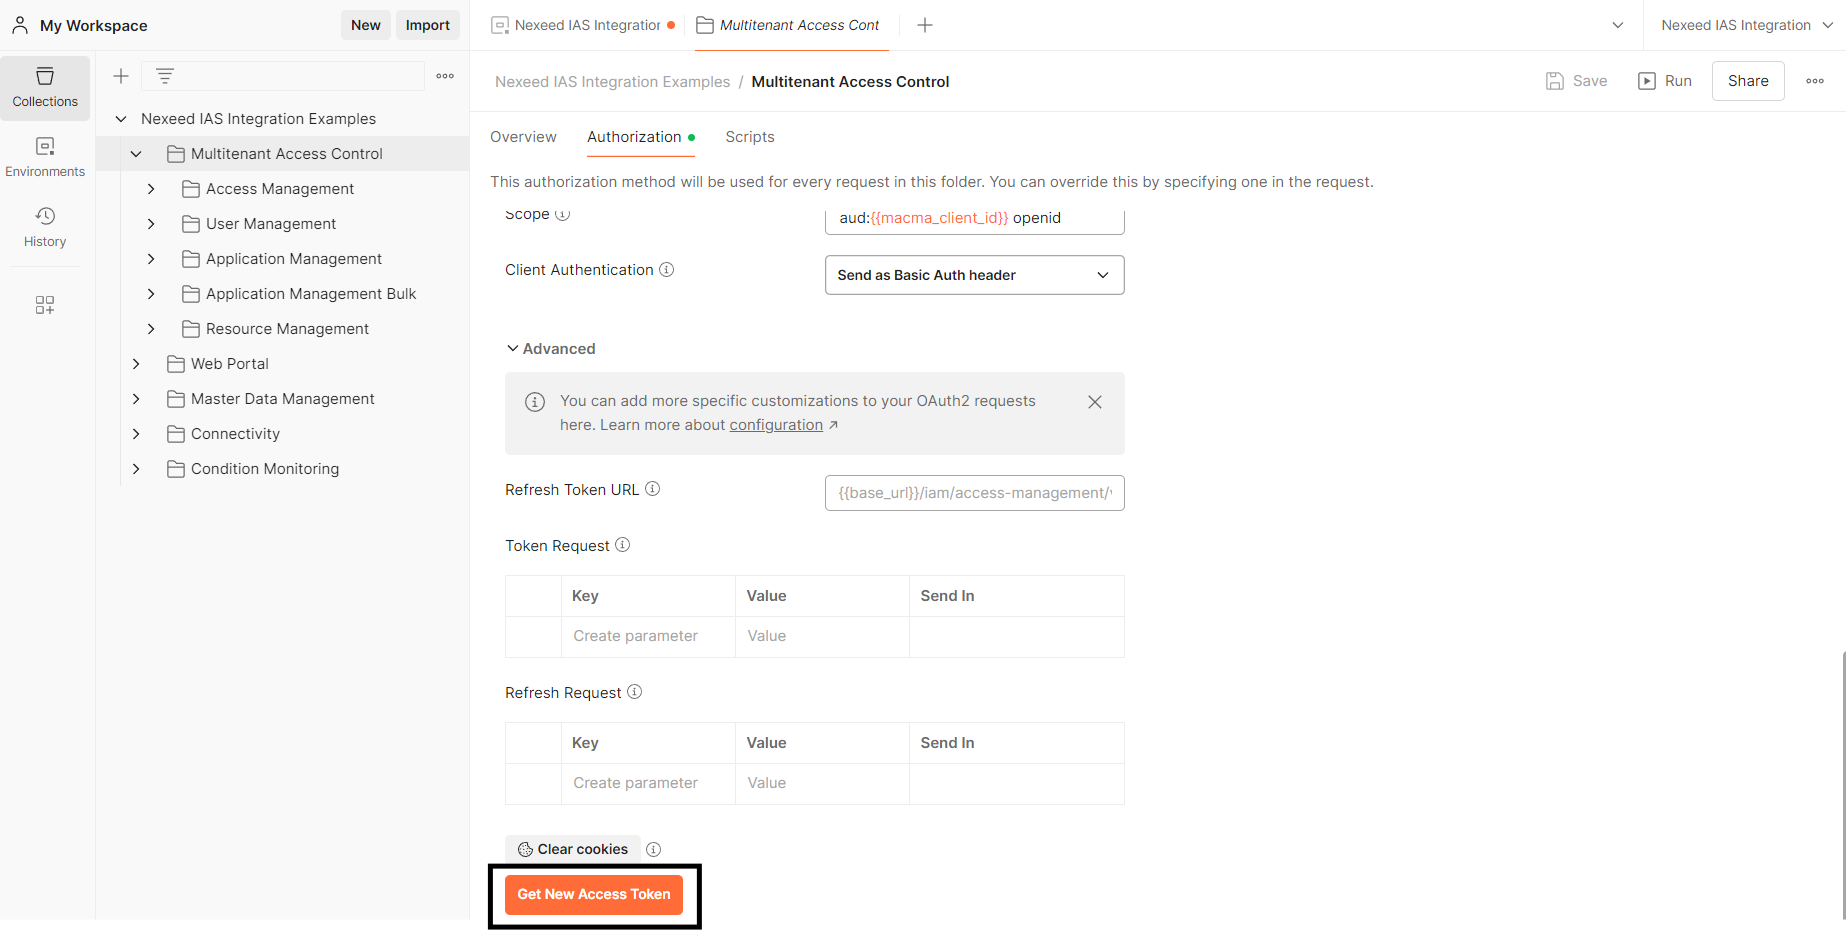
| To request an access token from Multitenant Access Control, visit the authorization tab on the parent folder of a request you want to try. |
In Bruno 2.x, you can configure authorization settings at both the collection and folder levels. For example, if you want to test any request under Multitenant Access Control, the access token can be set at either the collection or the relevant folder level, depending on your project structure. All requests will inherit the token and settings defined at their nearest parent level—either from the folder or, if not set there, from the collection.
Also, make sure the following environment variables are configured:
-
Access Token URL
-
Client ID
-
Client Secret
-
Scope
These variables will be used in the OAuth2 flow to obtain and manage the token.
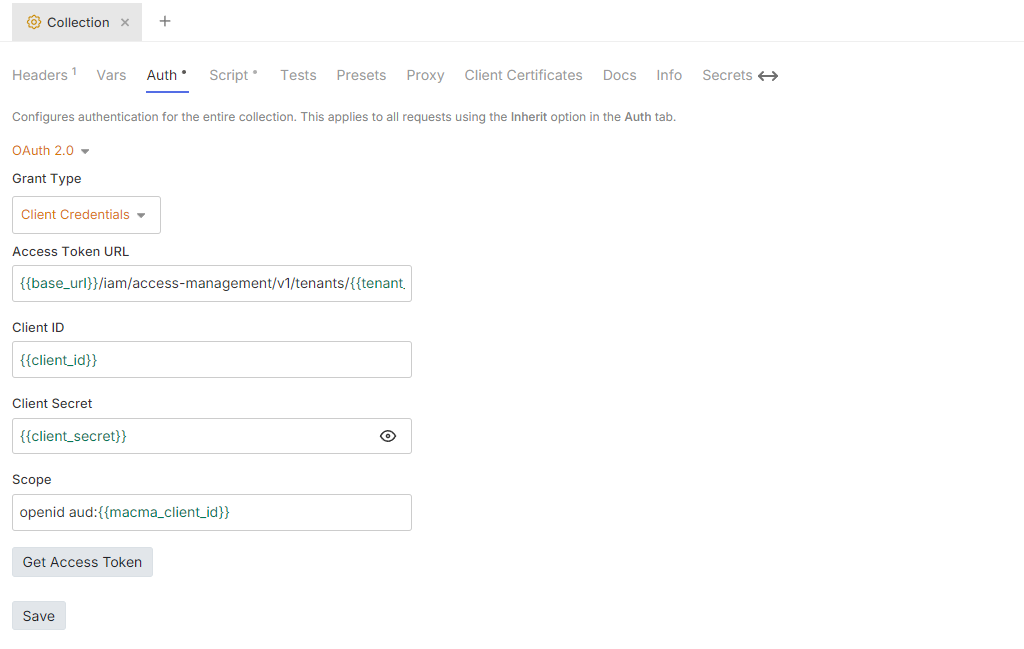
Click Get Access Token, this will let the auth server check the validity of your credentials and will create a bearer token, which will be added as an authorization header for all subsequent requests. Keep in mind that the token has a 5 minutes expiry time and therefore needs a refresh every couple minutes.
Postman
You can download our Postman collection with the API calls to try out how the various module APIs work.
Environment
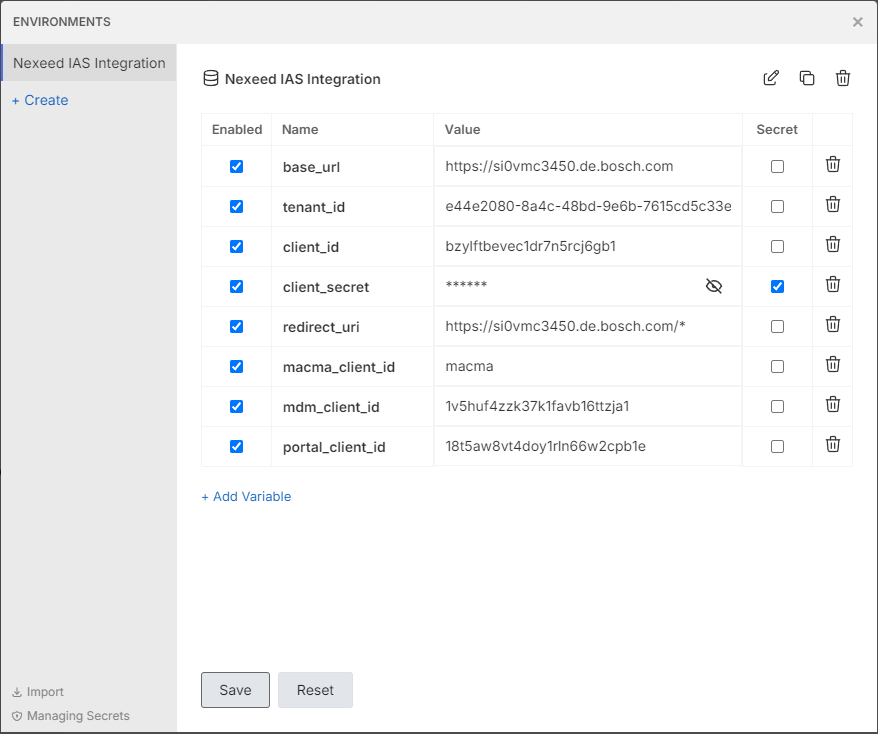
Import the prepared environment file Postman Environment into Postman to create the default environment for the upcoming requests. Add your specific values for the environment variables. To get client ID and client secret, check out the https://learn.bosch-nexeed.com/en/multitenant_access_control/getting_started/10_appregistration section of the Multitenant Access Control documentation.
Collection
Import the prepared Postman collection to Postman.
| Make sure your collection uses the environment "Nexeed IAS Integration" and that it is configured. |
Request access token
Most of the requests will use the "Client Credential Grant Type Flow".
| To request an access token from Multitenant Access Control, visit the authorization tab on the parent folder of a request you want to try. |
For example, if you want to try any request from Multitenant Access Control, the token can be obtained from the authorization tab on the parent folder named Multitenant Access Control. All the requests in this folder will inherit the access token.
Verify that the variables for Access Token URL, Client ID, Client Secret and Scope are configured in the environment variables.
Click on Get New Access Token and then on use token.
This will let the auth server check the validity of your credentials and will create a bearer token, which will be added as an authorization header for all following requests. Keep in mind that the token has a 5-minute expiry time and therefore needs a refresh every couple minutes.