Workflows Tab
User-specific workflows can be created with the Workflow Editor ( Workflow Editor Overview ).
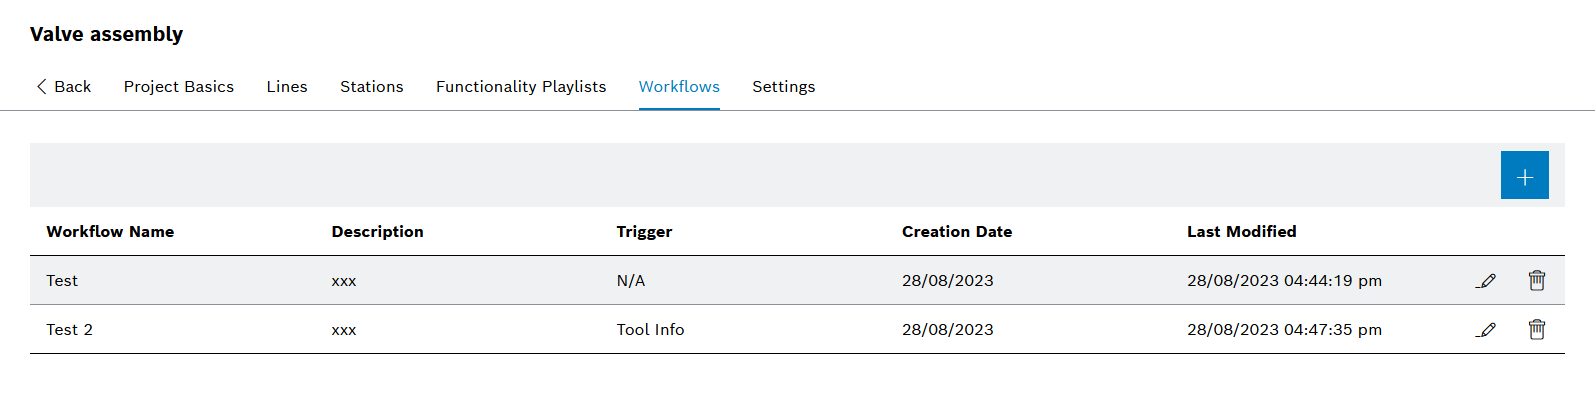
When clicking on a project, the project details are displayed under Engineering > Project Overview. An overview of the existing workflows is displayed in the Workflows tab. Workflows can be created, opened for editing and deleted in the overview.
Header
| Element | Description |
|---|---|
|
Entries Table
| Element | Description | ||
|---|---|---|---|
|
Edit Basic Data of a User-Specific Workflow
|
||
|
Add User-Specific Workflow to the Project
Prerequisite
Administrator role
Procedure
-
Open Engineering > Project Overview ( Project Overview ).
-
Click on a project in the table and open the Workflows tab in the project details.
The overview of the existing workflows is displayed ( Workflows Tab ).
-
Use to
 add a workflow.
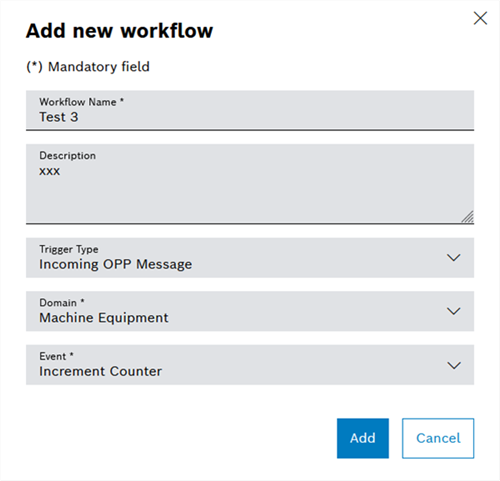
The Add New Workflow dialog window is displayed.
-
Enter Name and Description of the workflow.
-
In the Trigger Type drop-down list, specify which message type is to be sent.
-
Select Domain in the drop-down list.
-
Select Event in the drop-down list.
-
Click Add.
The workflow is displayed in the table ( Workflows Tab ).
|
To continue editing a user-specific workflow with the workflow editor, follow Edit Workflows with the Workflow Editor. |
Workflow Editor Overview
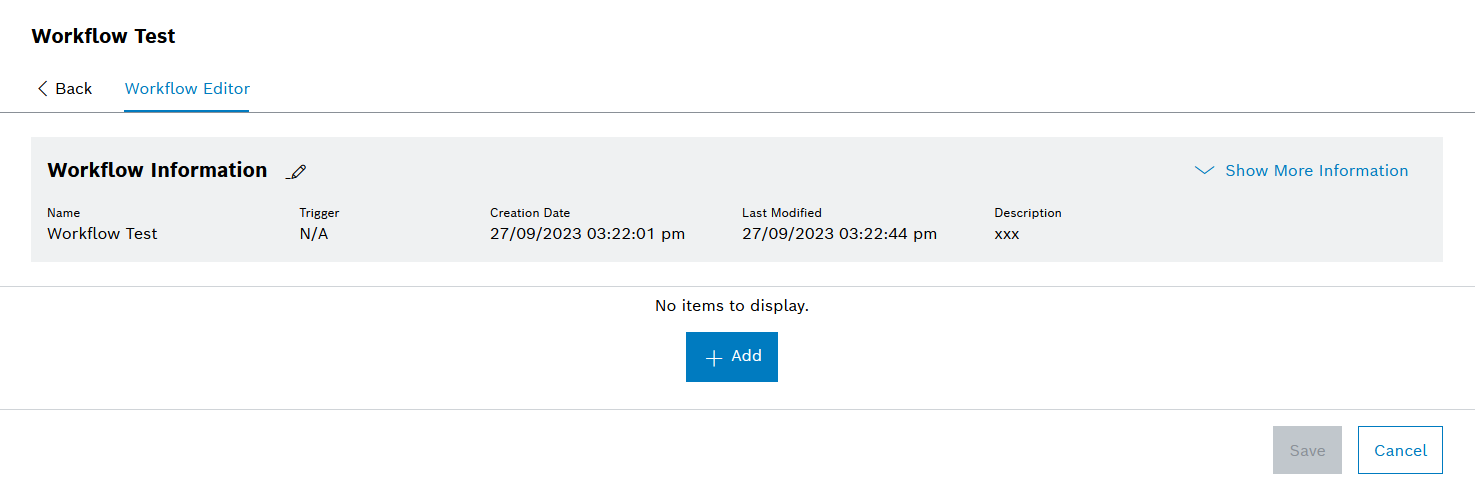
The Workflow Editor can be used to create user-specific workflows. An overview of the existing workflows is displayed under the Workflows tab ( Workflows Tab ). Clicking on a workflow opens it in the Workflow Editor.
Header
| Element | Description |
|---|---|
|
Displays the basic data of the workflow |
|
Opens the detailed area of the workflow with information on inputs, outputs and variables. |
Entries Table
| Element | Description |
|---|---|
|
Add Graphical Function Blocks ( Workflow Editor: Edit User-Specific Workflows ) |
Workflow Editor: Add Inputs/Outputs and Variables
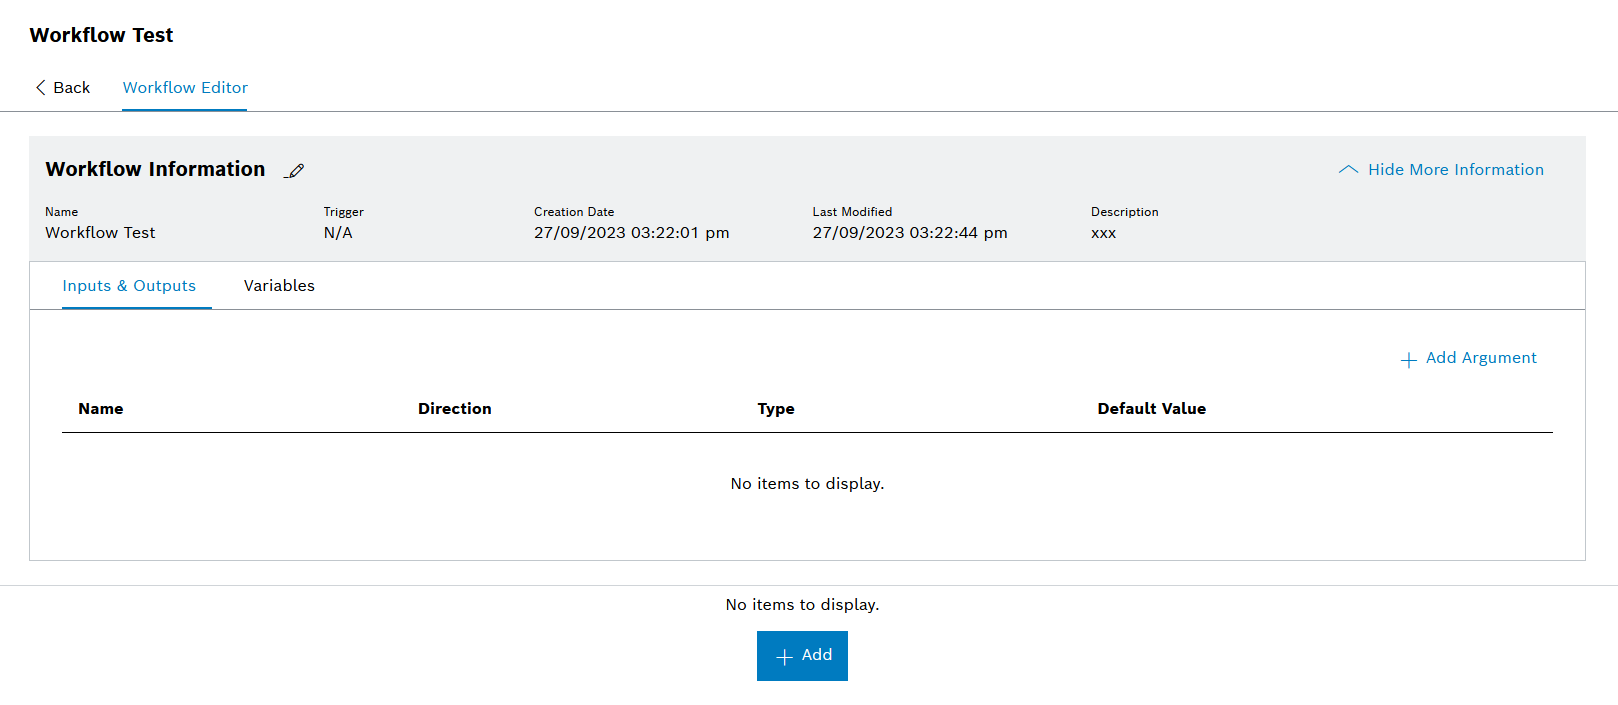
When a workflow is created with the Workflow Editor , the graphical function blocks require information about inputs/outputs (arguments) and variables. The Workflow Editor offers the option of creating, editing and deleting Arguments ( Inputs , Outputs and Variables ) in the drop-down detail area.
Prerequisites
-
Administratorrole -
A user-specific workflow has been created ( Add User-Specific Workflow to the Project ).
Procedure
-
Open Engineering > Project Overview ( Project Overview ).
-
Click on a project in the table and open the Workflows tab in the project details.
The overview of the existing workflows is displayed ( Workflows Tab ).
-
Click the workflow that you want to edit with the Workflow Editor.
The workflow is opened in the Workflow Editor ( Workflow Editor Overview )
The Workflow Editor consists of a header, an expandable detailed area and a work area.
-
Click
 Display More information to expand the detailed area of the workflow.
The detailed area is displayed.
-
To create a variable, open the Variables tab.
Or:
To create an input or output function, open the Inputs and Outputs tab.
-
Click
 Add Argument.
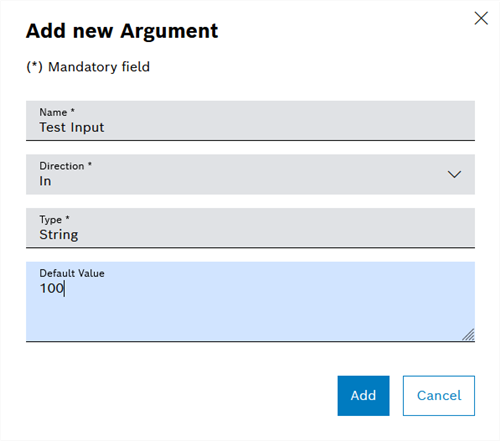
The Add New Argument dialog window is displayed.
In the example, an input or output function is created.
-
Enter the Name for the argument.
-
Select the Direction that the request is to take.
If the request from a station goes in the direction of a module, select In. If information from a module goes in the direction of a station, select Out.
-
Use Type to select the data type of the request.
Selecting the Type determines which data type the argument is to use.
String: Any character string (letters, numbers and special characters)
Integer: Integer values without decimal points/places
Boolean: Truth value that can be either TRUE or FALSE.In addition to the three specified data types, you can also enter your own data types in the Type field.
-
Enter the Default Value of the argument according to the previously selected data type.
-
Click Add.
The new argument is displayed in the detailed area of the workflows under the Inputs and Outputs tab.
Any number of arguments can be created.
-
In the Variables tab, click
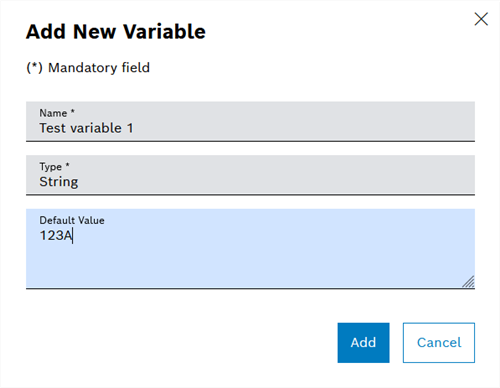
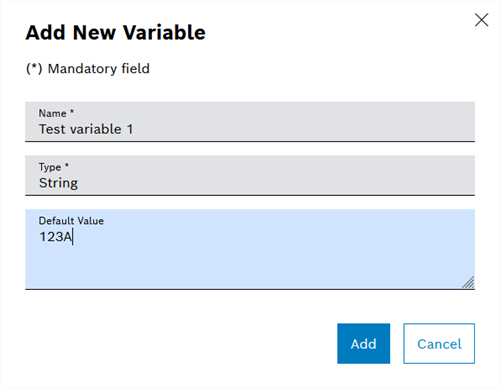
Add Variable.The Add Variable dialog window is displayed.
-
Enter Name for the variable.
-
Select Type for the variable (string, integer or Boolean).
In addition to the three specified data types, you can also enter your own data types in the Type field.
-
Enter the Default Value of the variable according to the selected type.
-
Click Add.
The new variable is displayed in the header of the workflows under the Variables tab.
Any number of variables can be created.
-
If no other variables or arguments are to be created, close the detailed area with
 Hide Additional Information.
Workflow Editor: Edit Inputs/Outputs and Variables
Prerequisite
Administrator role
Procedure
-
Show Detailed area of the Workflow to be Changed ( Workflow Editor: Add Inputs/Outputs and Variables ).
-
Open the tab in which the content is to be edited: Inputs and Outputs or Variables.
-
Click
 in the row of the object to be edited
 -
Implement changes as per Workflow Editor: Enter Inputs/Outputs and Add Variables.
-
Click Save.
The changes are displayed in the table in the detailed area of the workflow.
Workflow Editor: Delete Inputs/Outputs and Variables
Prerequisite
Administrator role
Procedure
-
Open the detailed area of the workflow to be changed ( Workflow Editor: Add Inputs/Outputs and Variables ).
-
Open the tab in which the content is to be edited: Inputs and Outputs or Variables.
-
In the row of the object to be deleted, click
 .
. -
In the dialog window, click Delete.
The deleted object is removed from the table.
Workflow Editor: Edit User-Specific Workflows
The workflow editor allows complex, user-specific workflows to be created using predefined graphical function blocks. The individual function blocks can be arranged or nested one after the other.
|
Before editing the actual workflow, Inputs and Outputs (arguments) and Variables must be created that are required for the user-specific workflow ( Workflow Editor: Add Inputs/Outputs and Variables ). |
Prerequisites
-
Administratorrole -
A user-specific workflow has been created ( Add User-Specific Workflow to the Project ).
Procedure
-
Open Engineering > Project Overview ( Project Overview ).
-
Click on a project in the table and open the Workflows tab in the project details.
The overview of the existing workflows is displayed ( Project Details: Workflows Tab ).
-
Click the workflow that you want to edit with the workflow editor.
The workflow is opened in the workflow editor ( Workflow Editor Overview )
-
Click
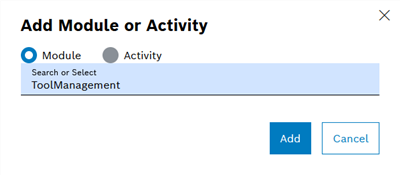
Add.The Add Module or Activity dialog window is displayed. The Module area is preselected.
In the Nexeed Engineering module, a distinction is made between two different activity types:
Module activities refer to functionalities provided by modules (e.g. the "Get Tool Info" or "Increment Counter" module activities of the Tool Management module).
Structural activities refer to simple activities that are used to establish the structure of a workflow when the workflow editor is used (for example, the Set function to assign a specific value to a variable, or the If function to insert conditional branches).The Module selection determines which module the new function block is to be addressed to.
-
In the Search or Select field, enter the desired search term in full or in part.
The selectio list shows all entries that contain the search term.
-
Select the desired entry and click on Add.
The selected module is inserted as a graphical function block in the work area. The Details of the function block are displayed in the right-hand area.
The example uses the Tool Management module.
Selected function blocks are highlighted in blue. The Details section is displayed when a function block is selected.
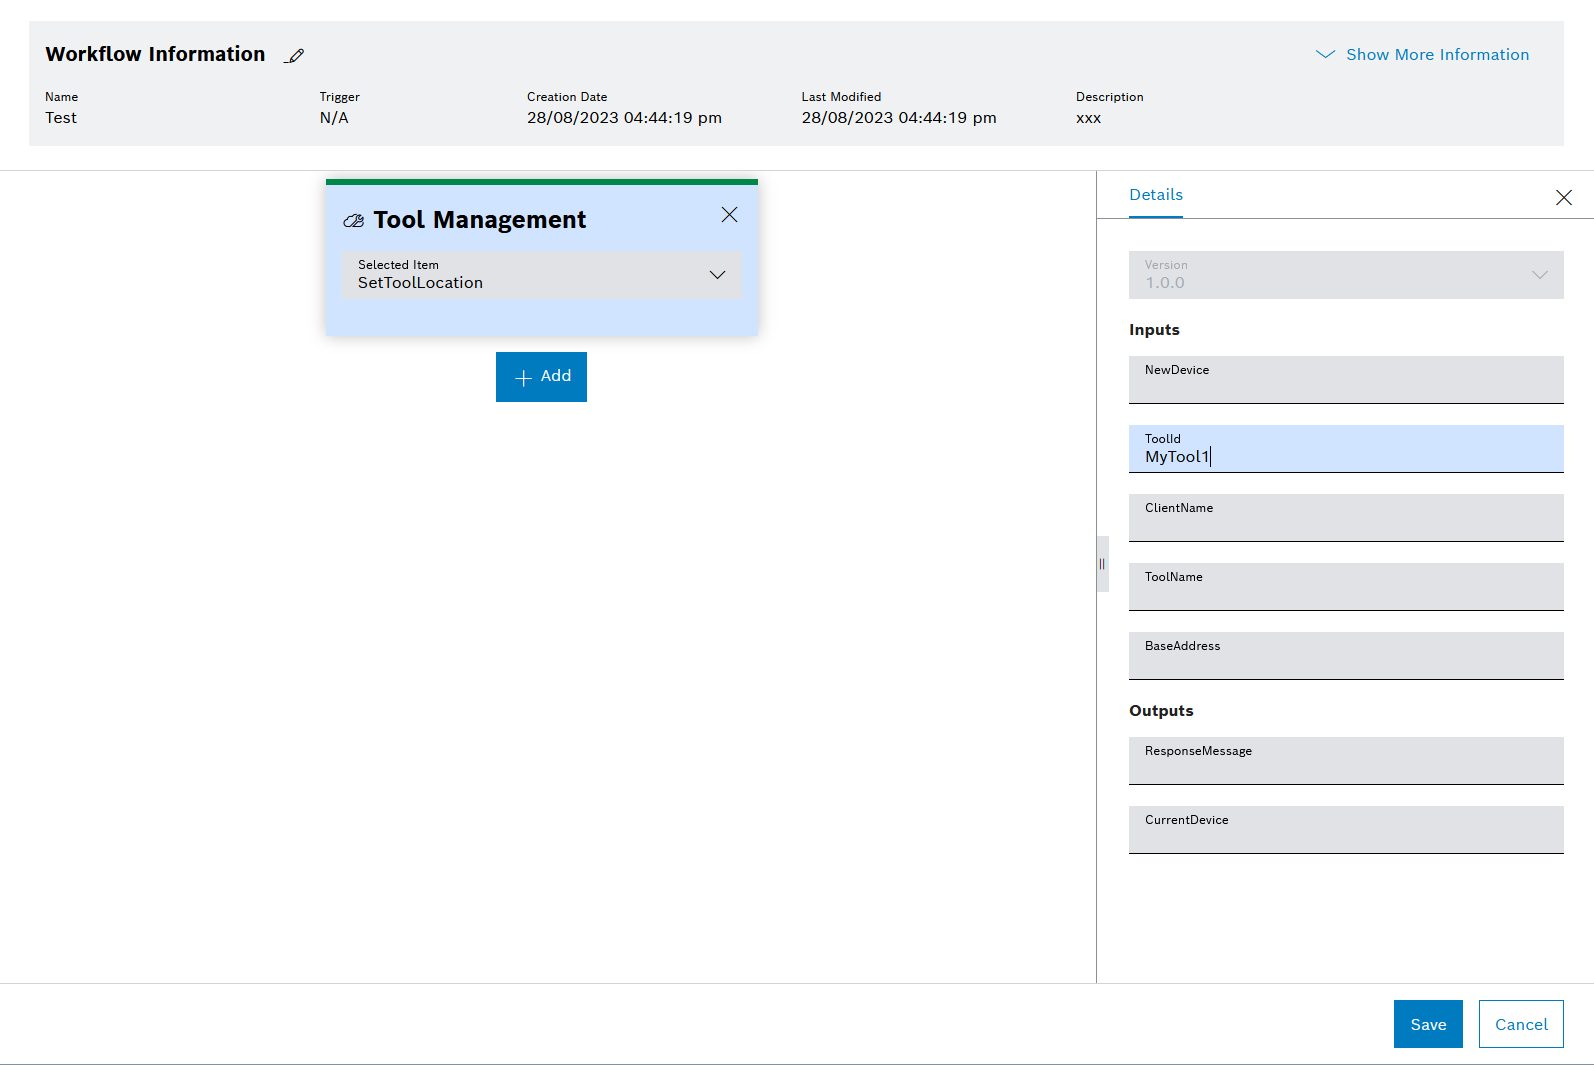
-
In the Selected Article drop-down list, select which activity of the selected module is to be used in this function block.
In the example, tool information is retrieved from the Tool Management module using the Get Tool Info module activity.
-
In the Details area, enter the required parameters for the activity of the function block.
-
To insert additional function blocks, click
Add.Any number of function blocks can be inserted. When the workflow is executed, all function blocks are executed one after the other. The order of the function blocks can no longer be changed for an existing workflow.
-
To insert a structural activity (example: Set ), click
Add.The Add Module or Activity dialog window is displayed.
Using the structural activity Set , previously created variables ( Workflow Editor: Add Inputs/Outputs and Variables ) can have values assigned to them.

-
Select the Activity radio button.
-
Select the Set structural activity from the drop-down list and click Add.
The selected structural activity is inserted as a graphical function block in the work area. The details of the function block are displayed in the right-hand area.
Selected function blocks are highlighted in blue. The Details section is displayed when a function block is selected.
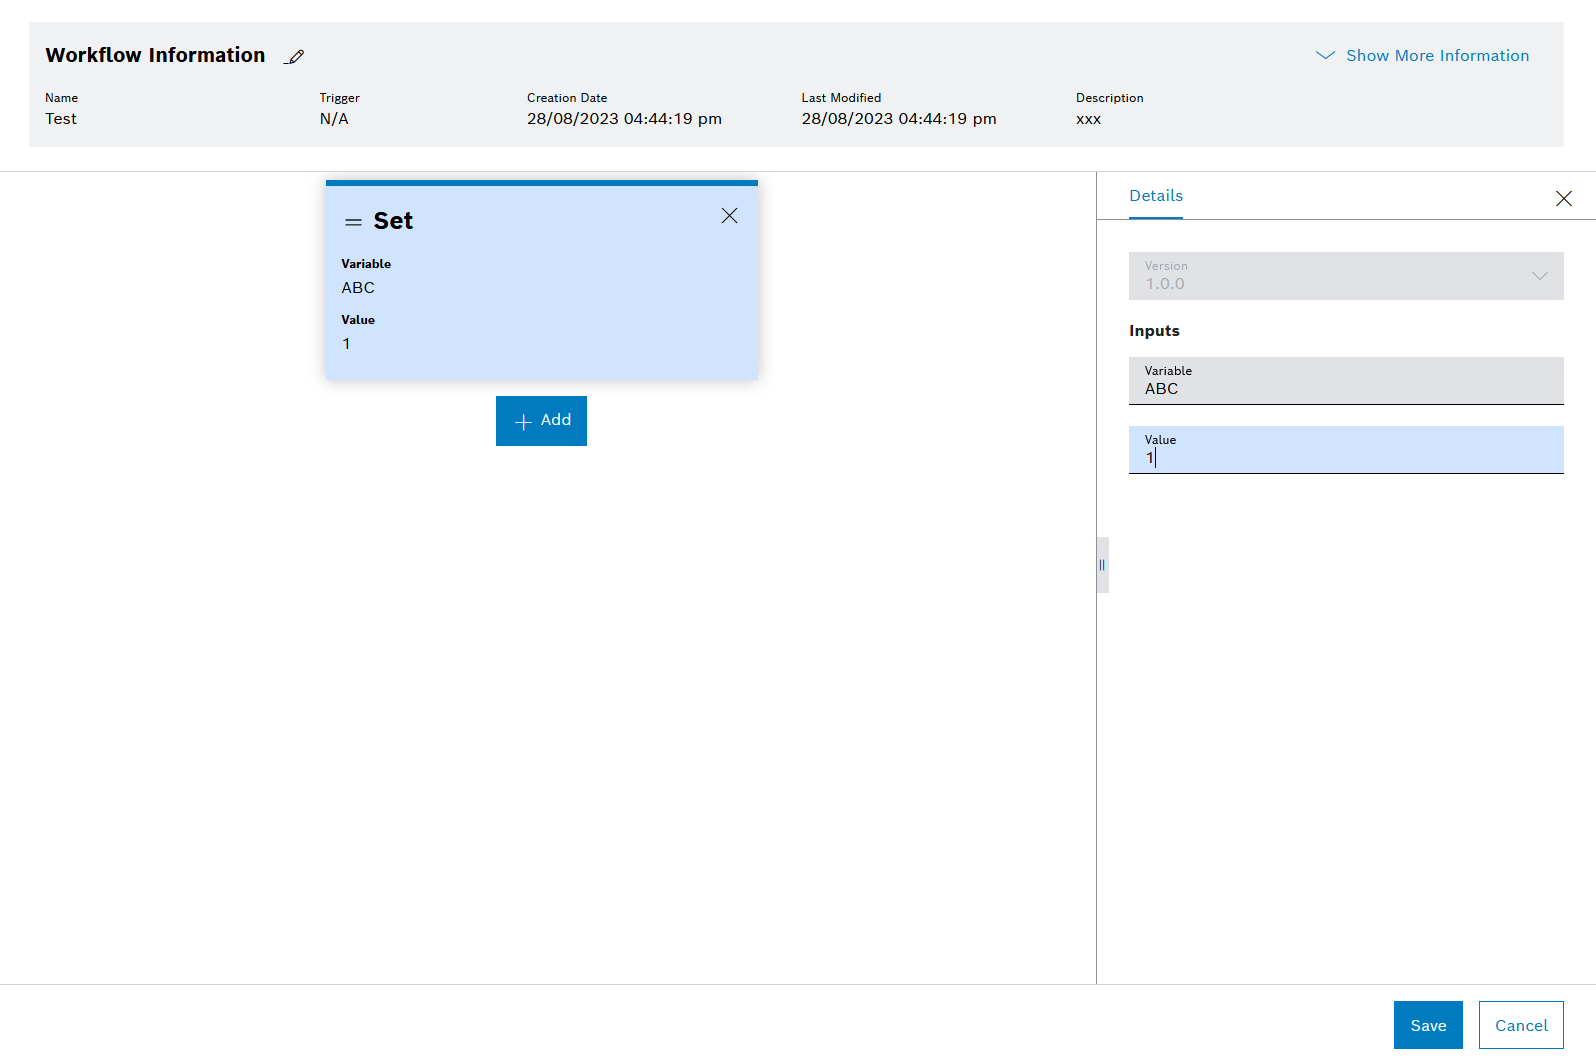
-
Enter the required parameters for the Set function block in the Details section.
-
To insert an If structural activity, click
Add.The Add Module or Activity dialog window is displayed.
The If function can be used to insert conditional branches whose branches are only executed under certain conditions.

-
Select the Activity radio button.
-
In the drop-down list, select the If structural activity and click Add.
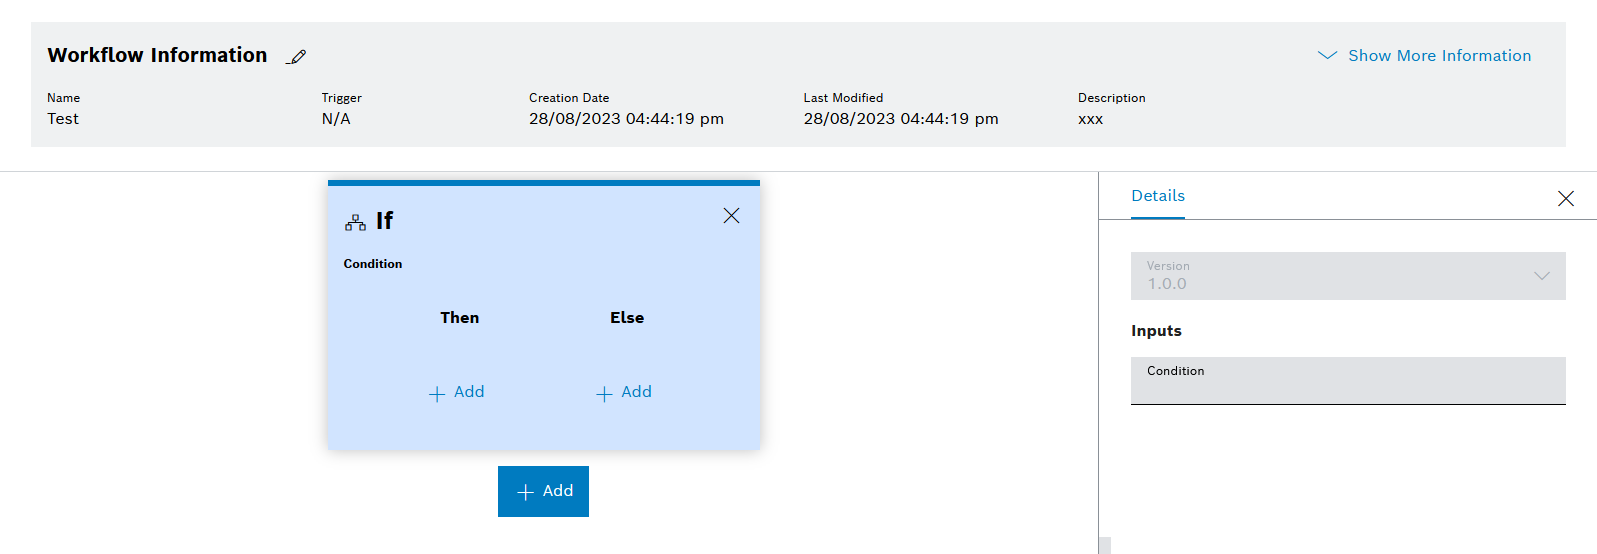
-
Enter the required Condition in the if/then branch.
-
Use
Add to insert the desired branches.Any number of nesting levels can be inserted.
-
Once the user-specific workflow has been created in full, click Save.
The user-specific workflow is displayed in the overview ( Workflows Tab ).
Edit Basic Data of a User-Specific Workflow
Prerequisite
Administrator role
Procedure
-
Open Engineering > Project Overview ( Project Overview ).
-
Click on a project in the table and open the Workflows tab in the project details.
The overview of the existing workflows is displayed ( Workflows Tab ).
-
Click
in the row of the workflow to be modified.The Edit Workflow dialog window is displayed.
-
Make changes as per Add User-Specific Workflow to the Project.
-
Click Save.
The changes to the user-specific workflow are saved.
Delete Workflow
Prerequisite
Administrator role
Procedure
-
Open Engineering > Project Overview ( Project Overview ).
-
Click on a project in the table and open the Workflows tab in the project details.
The overview of the existing workflows is displayed ( Workflows Tab ).
-
Click
in the row of the workflow to be deleted. -
In the dialog window, click Delete.
The workflow is deleted and is no longer displayed in the table ( Workflows Tab ).