Project overview
All existing projects are displayed in a table under Engineering > Project Overview. Projects can be created, imported, exported, edited and deleted.
To display a detailed view with the project areas Project Basics , Lines , Stations , Functionalities Playlist , Workflows and Settings , click on a project.
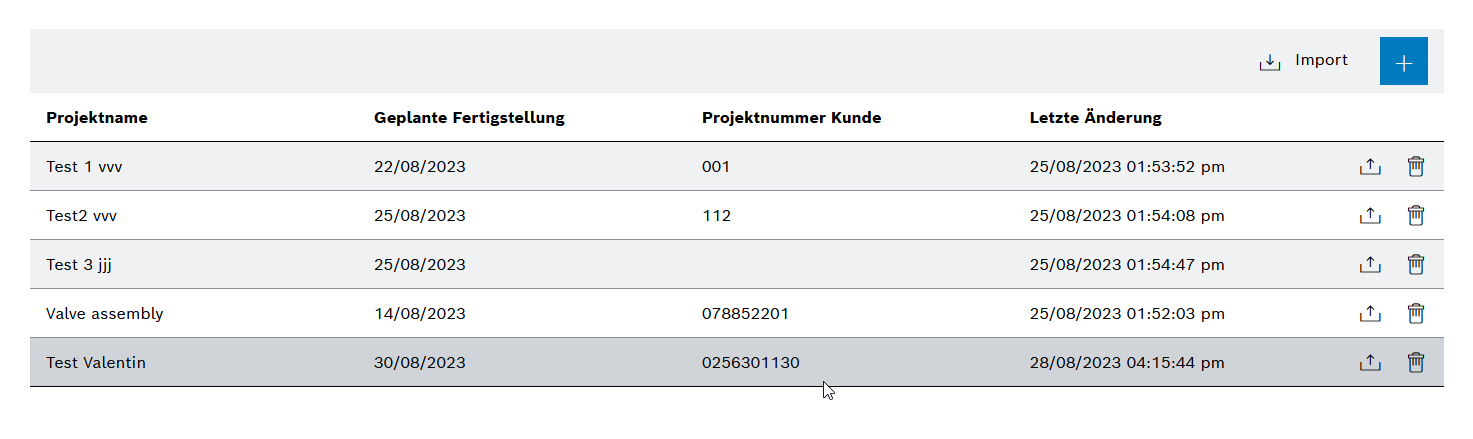
The table contains the existing projects.
Header
| Element | Description |
|---|---|
|
|
|
Entries Table
| Element | Description |
|---|---|
|
|
|
Add Project
Prerequisite
Administrator role
Procedure
-
Open Engineering > Project Overview.
-
Click
 .
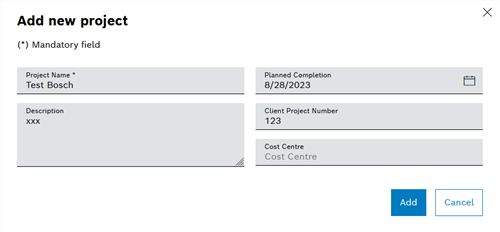
.The Add New Project dialog window is displayed.
-
In the Project Name text field, enter the project name under which the project is listed in the project table.
Fields marked with an asterisk (*) are mandatory and must be completed.
-
Add a Description of the project.
-
Select Scheduled Completion.
-
Enter the Customer Project Number.
-
Enter Cost Center.
-
Click Add.
The new project is displayed in the Project Overview view ( Project Overview ).
-
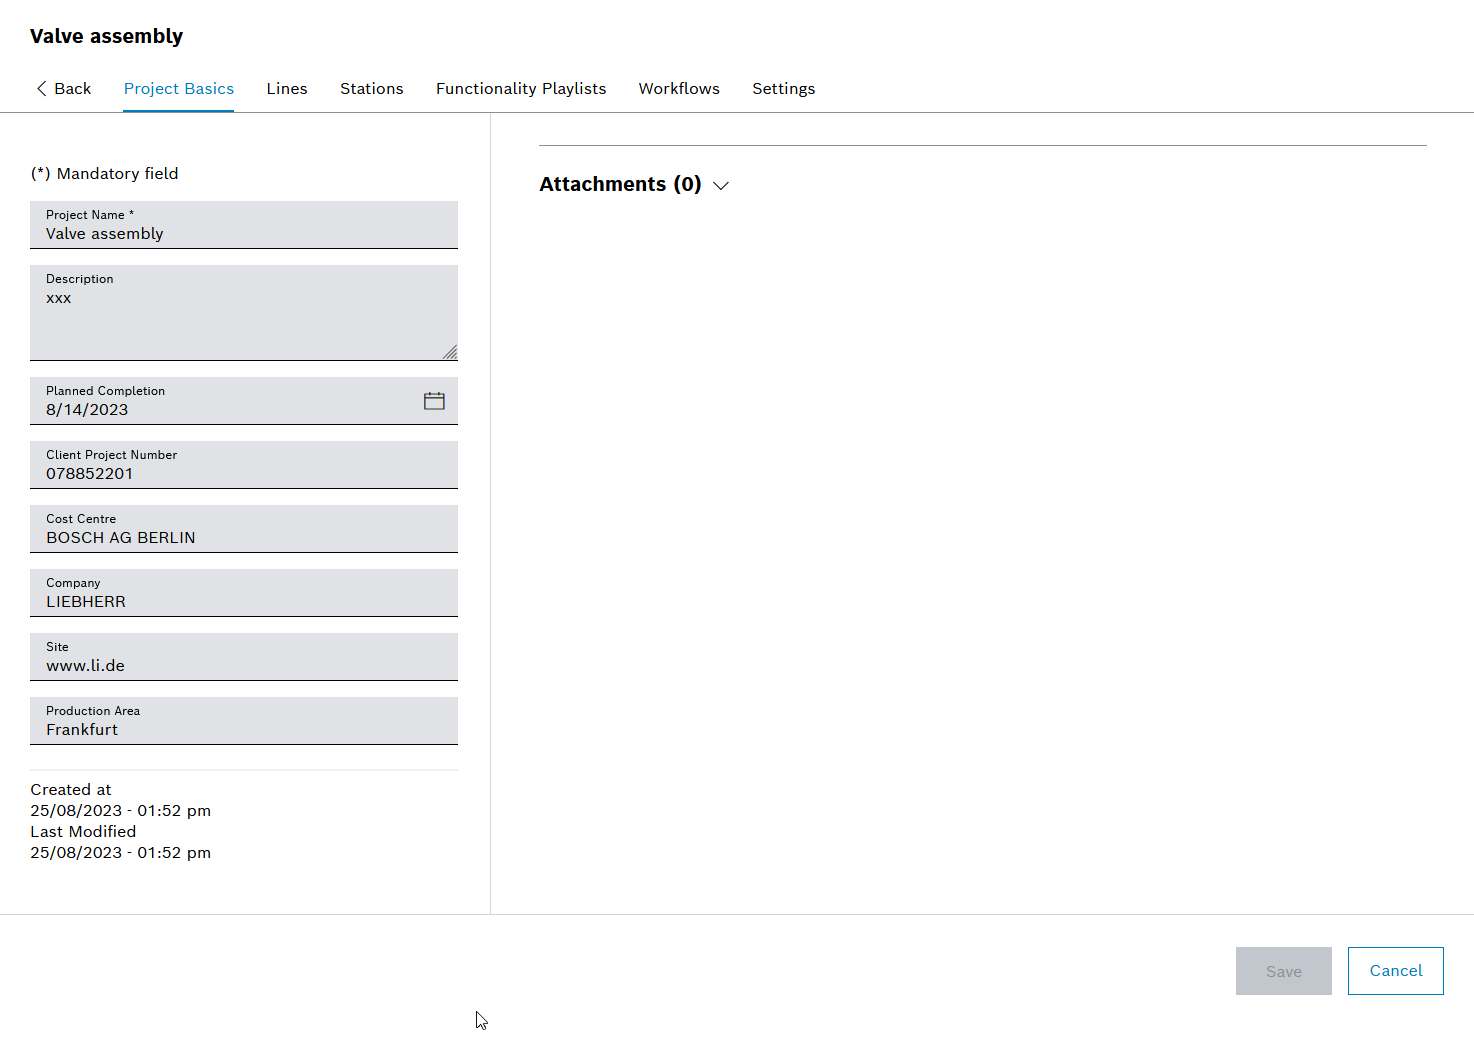
Click on the newly created project.
-
In the Project Basics tab, complete the other input fields Company , Site and Production Area.
-
Click Save.
The project is created and displayed in the table ( Project Overview ).
Edit Project
Prerequisite
Administrator role
Procedure
-
Open Engineering > Project Overview ( Project Overview ).
-
Click on a project in the table.
The project details are displayed with the following tabs: * Project Basics ( Project Basics Tab ) * Lines ( Lines Tab ) * Stations ( Stations Tab ) * Functionalities Playlist ( Functionalities Playlist Tab ) * Workflows ( Workflows Tab ) * Settings ( Settings Tab )
-
Make the desired changes in the individual tabs according to the following chapters.
-
Click Save.
The changes to the project are saved.
Import Project
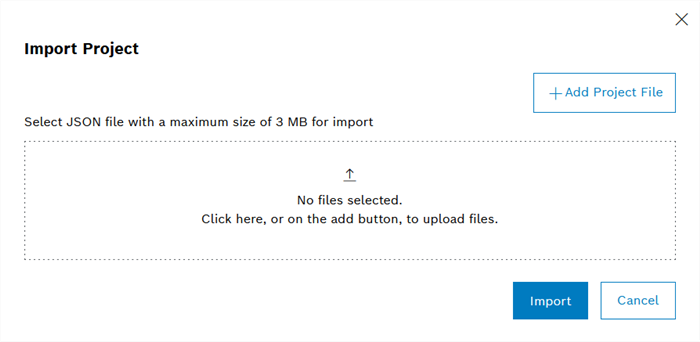
Project data can be imported in JSON format.
Prerequisites
-
Administratorrole -
Project data is available in JSON format.
-
The JSON file is < 3 MB.
Procedure
-
Open Engineering > Project Overview ( Project Overview ).
-
Click
 in the header.
The Import Project dialog window is displayed.
-
Click
 or
or  Add Project Data.
The Upload File dialog window of the operating system is displayed.
-
In the file system, select the file to be imported.
Only one file may be selected.
-
Click Import to start the import process.
If the imported project file does not meet the specifications, the import is aborted with an error message.
If the import was successful, the imported file is displayed as a new project in the project overview ( Project Overview ).
Export project
Project data with all project details can be exported in JSON format.
Prerequisite
Administrator role
Procedure
-
Open Engineering > Project Overview ( Project Overview ).
-
Click
 in the row of the project to be exported.
The project export is prepared. Once the preparations are complete and the project file is ready for download, the
icon changes to  .
. -
To download the project file, click
.
The project is saved in the download folder of the Internet browser.
Deleting Projects
Prerequisite
Administrator role
Procedure
-
Open Engineering > Project Overview ( Project Overview ).
-
Click
 in the row of the project to be deleted.
 -
In the dialog window, click Delete.
The project is deleted and is no longer displayed in the table Project Overview.