Diese Seite ist nur auf Englisch verfügbar.
User
A user has the following properties:
-
Is assigned to an organization.
-
Can belong to several groups.
-
Roles can be assigned to the user.
User Overview
The user overview displays all users registered in the system with their first name, last name and user name.
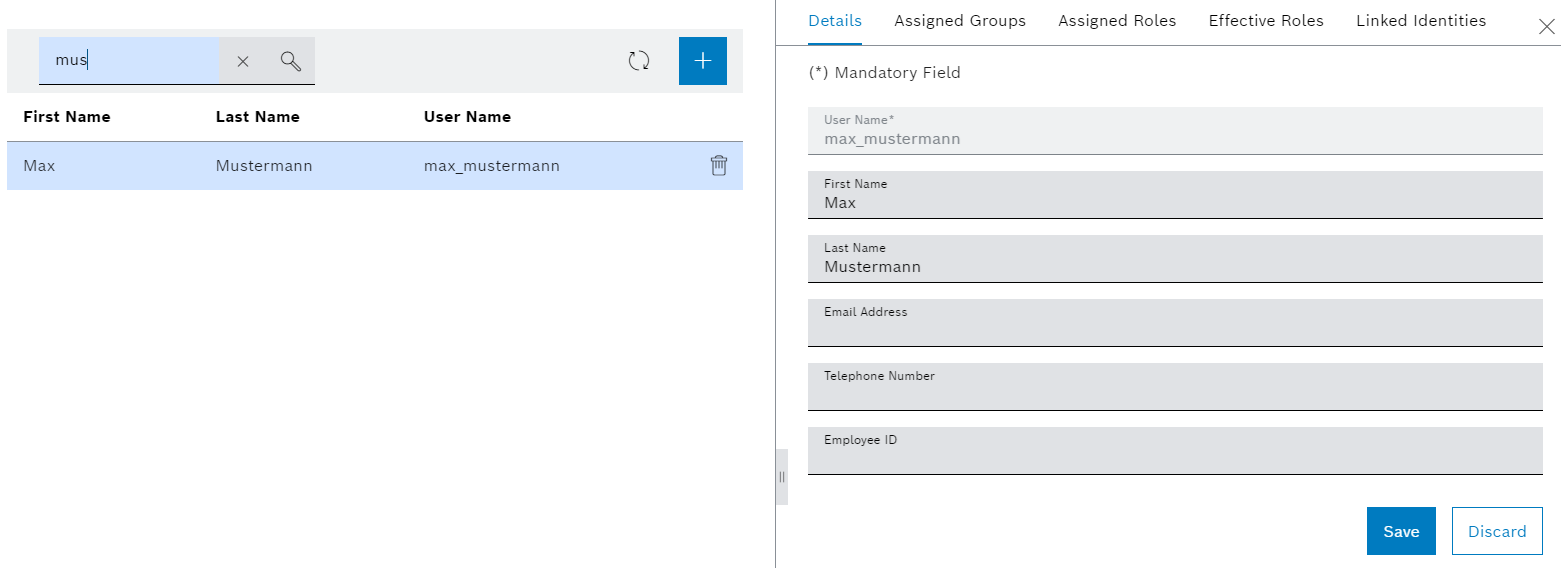
After selecting a user, the user details are displayed in the detailed view on the right. In this view, you can update the user details, assigned groups and assigned roles, and create a password.
Detailed view
| Icon/element | Description | ||
|---|---|---|---|
Effective roles |
Displays the effective roles that the user has |
||
Linked identities |
If a user has logged on to the system through an Identity providers , that identity provider appears here.
You can also delete a linked identity (for example, if an error occurs when logging in through the identity provider) using |

Add user
Prerequisite
Access Manager role
Procedure
-
Call up the Multitenant Access Control > Users menu.
-
Click
 .
-
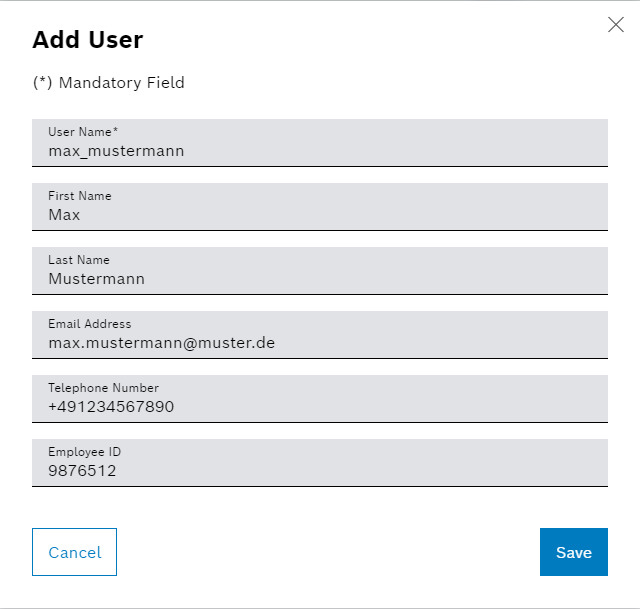
In the Add user dialog window, enter the data of the new user:
-
User name
-
|
The user name cannot be changed retrospectively. |
-
First name, last name, email address, phone number and personnel number
This data can also be entered later.
The password can be created after the user has been added.
-
Click Save.
-
The user is added and displayed in the overview.
-
To create a password for the new user or to change the specified data, continue with Updating User Data.
Updating User Data
|
An administrator will provide a temporary password, which must be changed after the first login. |
Prerequisites
-
Access Managerrole
Procedure
-
Call up the Multitenant Access Control > Users menu.
-
Select the required user from the overview.
In the detailed view, the user data is displayed in the Details tab.
-
Update the required user data and enter a new password if necessary.
The data can only be saved if valid data has been entered.
-
Apply changes with Save.
The user data is updated and will be displayed in the overview. If the password is changed, a confirmation message will appear at the bottom of the screen.