Subscription
|
Deprecated as of IAS version 2025.02.00: Event Types and Subscriptions are deprecated and will be removed in September 2026. Please migrate your Quick Reactions in Deviation Processor to use Direct Messages. Other modules, such as Ticket Management, have already been updated to use this new method. |
Subscriptions are based onEvent Type. To this end, event messages are created based on the information contained in an event type; these messages are sent to one or more users in the form of subscriptions.
Under Notification Service > Subscription , the existing subscriptions are displayed in a table.
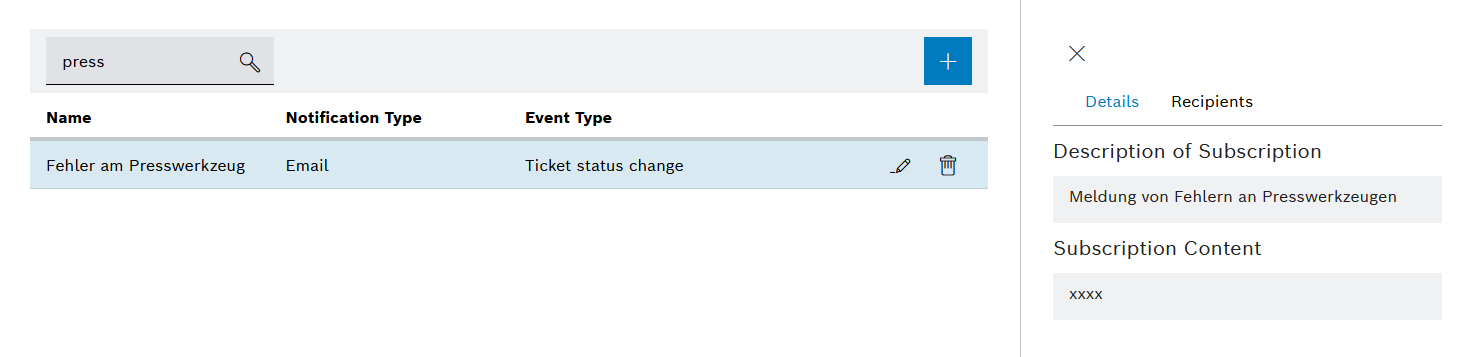
Subscription overview
Subscriptions created by Module or Operator are displayed under Notification Service > Subscription. Details and recipients of the subscriptions can be viewed on click of each subscription. In the Subscription overview, you can create new subscriptions and edit or delete existing subscriptions.
Header
| Element | Description | ||
|---|---|---|---|
|
Search by subscription name, notification type or event type. Enter the search term in full or in part.
|
||
|
Create a new subscription. |

Subscription list entry
| Element | Description |
|---|---|
|
|
|
Creating a subscription
Prerequisite
Operator role
Procedure
-
Call up Notification Service > Subscriptions.
-
Click
 .
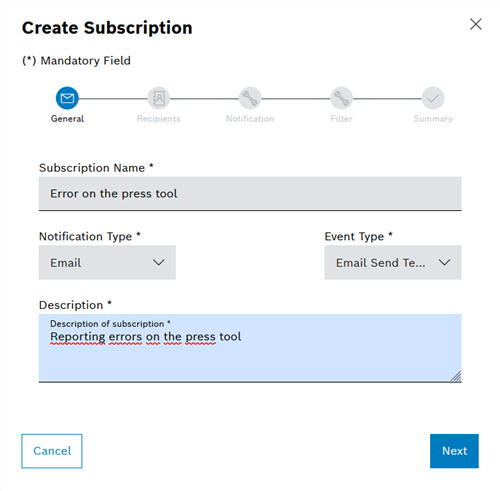
.The Create Subscription dialog window is displayed with the General step.
-
In the Subscription Name text field, enter the name of the subscription to be created.
Entering a subscription name that is as unique and specific as possible enables faster identification and reduces the risk of duplicates (different subscription names with the same content).
-
Select the notification type from the Notification Type drop-down list: Email , Printer or Push message.
-
In the Event Type drop-down list, select the Event Type to which the subscription is to be linked.
-
In the Description text field, enter a brief description to be included with the subscription.
-
Click Next.
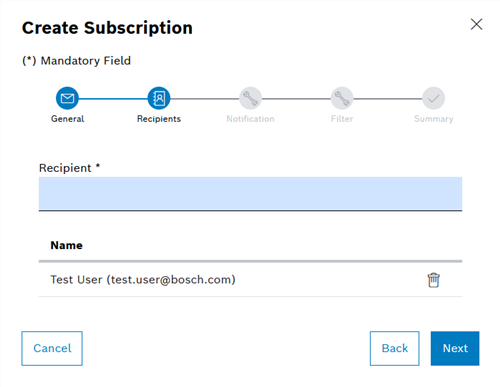
The Create Subscription dialog window is displayed with the Recipients step.
-
In the Recipients text field, select the email address(es) of the recipient(s) for whom the subscription is being created.
After you have entered one or more characters of a recipient name, a list of all recipients will be displayed which contain the relevant characters or the relevant character sequence.
-
Email notification type: Enter one or more email addresses as the recipient. Use a semicolon as a separator between the email addresses.
-
Printer notification type: Enter the e-mail address of a printer.
For printer output, the event to be printed must contain a PDF file as an attachment. Only the PDF file is printed.
-
Push notification type: If the sending of push messages was approved during the initial login to the IAS system, push messages are sent to the device stored in the system.
Push messages can only be set up retrospectively by an administrator.
-
-
Click Next.
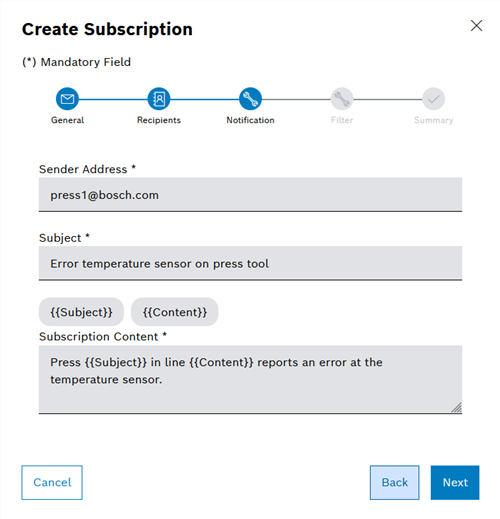
The Create Subscription dialog window is displayed with the Notification step.
-
In the Sender Address text field, enter the email address of the sender of the notification.
In the system configuration, you can specify whether the Sender Address text field is pre-populated with an editable or non-editable default address.
If Push is selected as the notification type, this text field is omitted.
-
In the Subject field, enter a clear and brief summary of the subject.
The information entered here is sent as the header of a notification. In the case of the notification type Email, this content appears as the email subject.
-
In the Subscription Content field, enter a description of the notification text.
The dynamic content within brackets is provided by the respective module and can be used to specify event messages.
-
Click Next.
The Create Subscription dialog window is displayed with the Filter step.
The filter function allows you to create filter rules based on AND and OR links. Filter rules can be used to precisely specify and limit events that a subscription should contain.
-
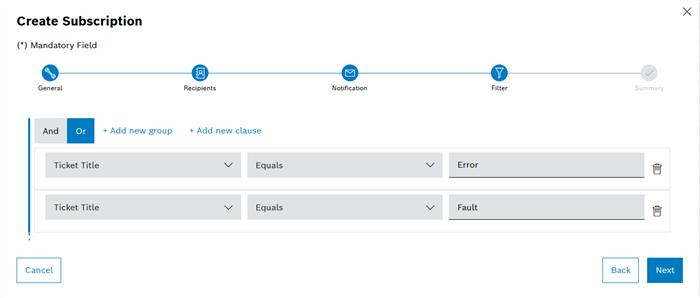
Example 1: Create simple OR xref: To select an OR link, click on the Or field.
The selected link type is highlighted in blue.
-
To insert additional rule templates, click on + Add New Clause.
Any number of clauses can be created. A clause includes one rule in each case. Each rule consists of a variable (left), an operator (center) and a value (right).
-
Create rule contents in the inserted rule templates.
In example 1, the subscription includes all events whose Ticket Title is either Error OR Malfunction.
-
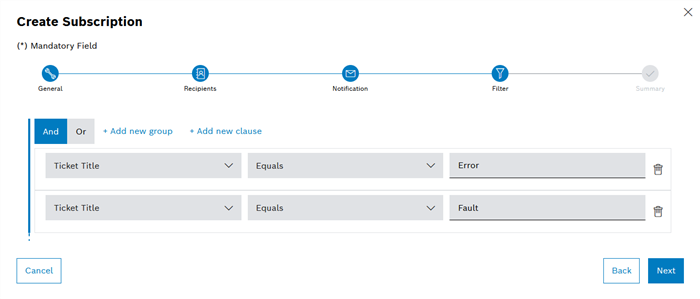
Example 2: Create a simple AND xref: To select an AND link, click on the And field.
The selected link type is highlighted in blue.
-
To create one or more rule templates, click on + Add New Clause.
-
Create rule contents in the inserted rule templates with object, link type and value.
In example 2, the subscription includes all events whose Ticket Title is Error AND Malfunction.
-
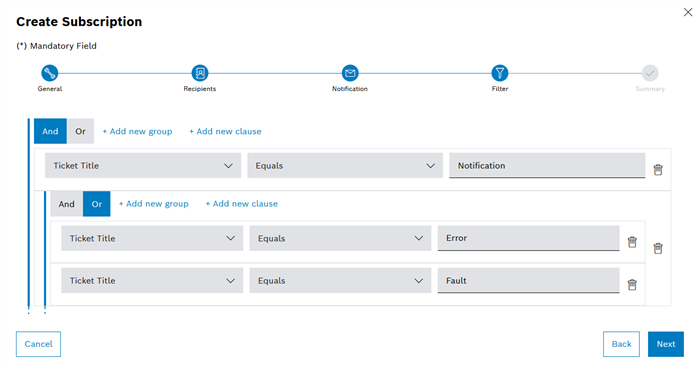
Example 3: Create a more complex AND/OR link with groups: Create a simple AND link according to example 1.
Groups can be used to combine AND links and OR links. Groups can be used to establish nesting on multiple levels.
Any number of nesting levels can be created in the form of groups and subgroups.
-
Insert group template with + Add New Group into the AND link.
-
To assign an OR link to this group, click Or in the added group.
-
Create additional rule templates within the group with + Add New Clause.
-
Create rule contents in the inserted rule templates with object, link type and value.
In example 3, the subscription includes all events whose Ticket Title is Message AND all events whose Title is either Error OR Malfunction.
-
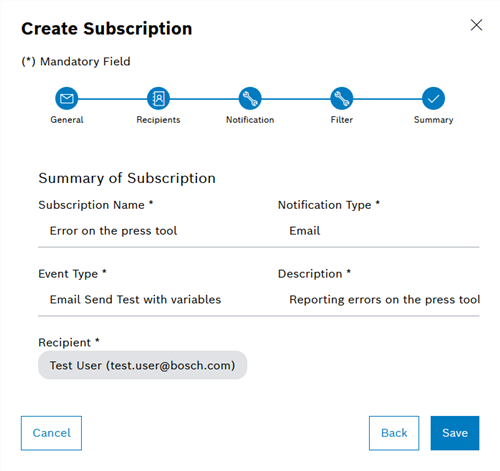
Once all filters have been set, click Next.
The Create Subscription dialog window is displayed with the Summary step.
-
Check all entries. To make changes, press Back to go back and make changes.
-
Click Save.
The subscription is created and displayed in the table ( Overview of Subscriptions ) with ownership as Operator.
Editing a subscription
Prerequisite
Operator role
Procedure
-
Call up Notification Service > Subscriptions.
-
In the subscription table, click a subscription.
-
Click
 .
.The Update Subscription dialog window is displayed.
-
Make the desired changes in the dialog window.
-
Click Save.
The changes to the subscription are saved.
Deleting a subscription
Prerequisite
Operator role
Procedure
-
Call up Notification Service > Subscriptions.
-
In the subscription table, click a subscription.
-
Click
 .
. -
Click Yes.
The subscription is deleted and no longer appears in the table of subscriptions Overview of Subscriptions.
Settings for push notifications
To send subscriptions as push notifications, you may need to make the following adjustments when using Mozilla Firefox:
Prerequisites
Mozilla Firefox(preferable), Safari, Edge
Procedure
-
Enable service workers for the browser that you are testing. For firefox, navigate to about:serviceworkers in the url and enable the service worker
-
Check and Enable Service Workers (if not enabled in firefox)
-
Launch your Firefox browser.
-
Open Firefox Configuration Settings:
-
Type about:config in the address bar and press Enter.
-
Click "Accept the Risk and Continue" if prompted.
-
-
Search for Service Worker Preferences:
-
In the search bar on the about:config page, search for dom.serviceWorkers.enabled and set to true.
-
-
Enable Service Workers:
-
If the dom.serviceWorkers.enabled preference is set to false, double-click on it or click the toggle button to change it to true.
-
-
Restart Firefox:
-
Close and reopen the browser to ensure the changes take effect.
-
Restart the system
-
-
-
Allow push notification in the application with below steps:
-
Open Nexeed application.
-
Enter credentials and accept all cookies.
-
Allow push notifications in the popup.
-
Check if permissions to the logged space has send notifications allowed (refer screenshot below)
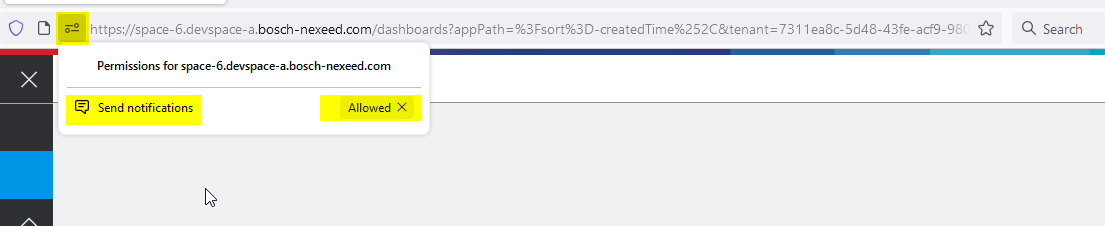
-