Modules
External modules can be added to the Nexeed Industrial Application System. The modules can be edited and linked to roles. A module that has been created can communicate with other modules and, if applicable, also to their data, using the assigned roles.
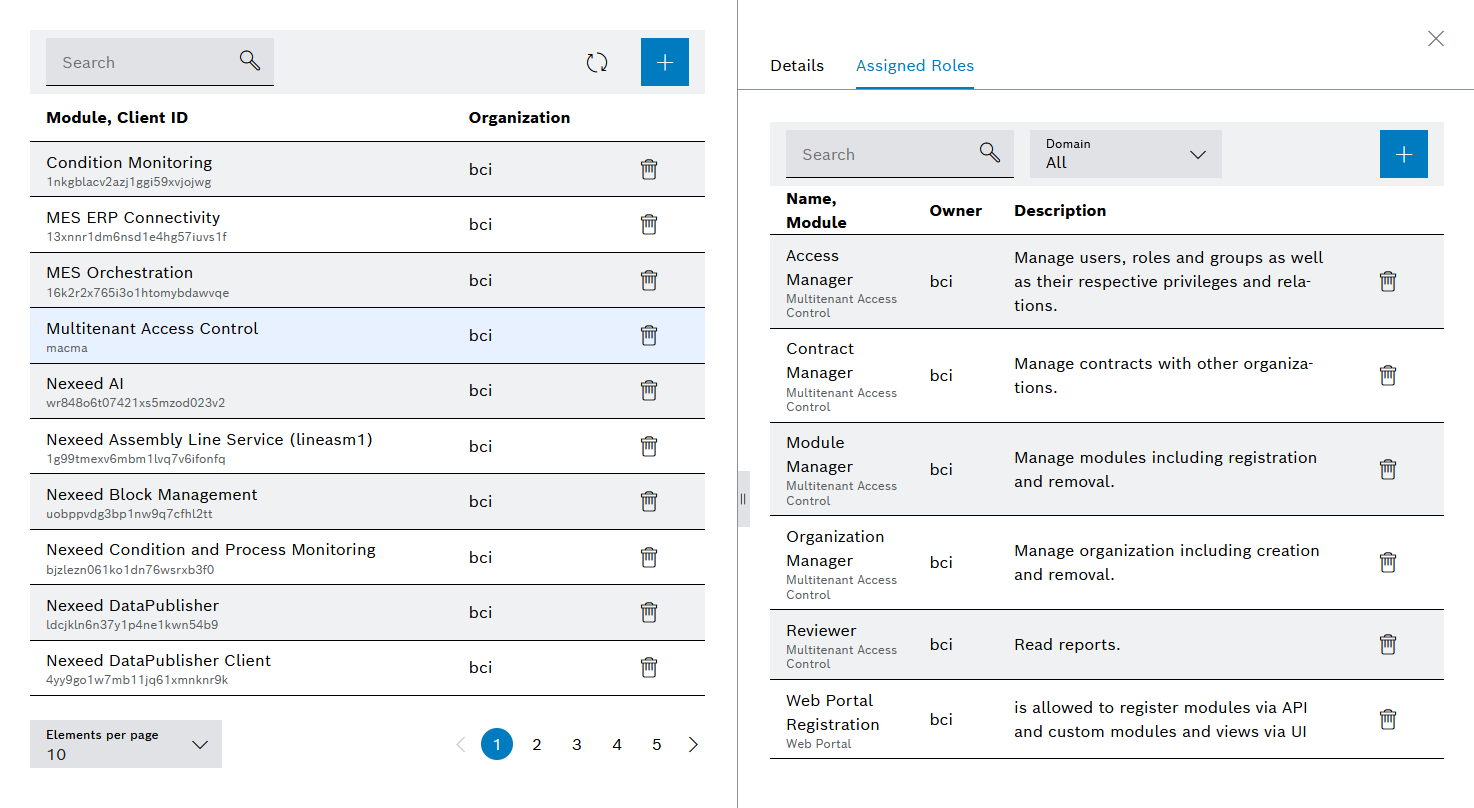
By default, the installed IAS modules are listed in the Multitenant Access Control > Modules menu.
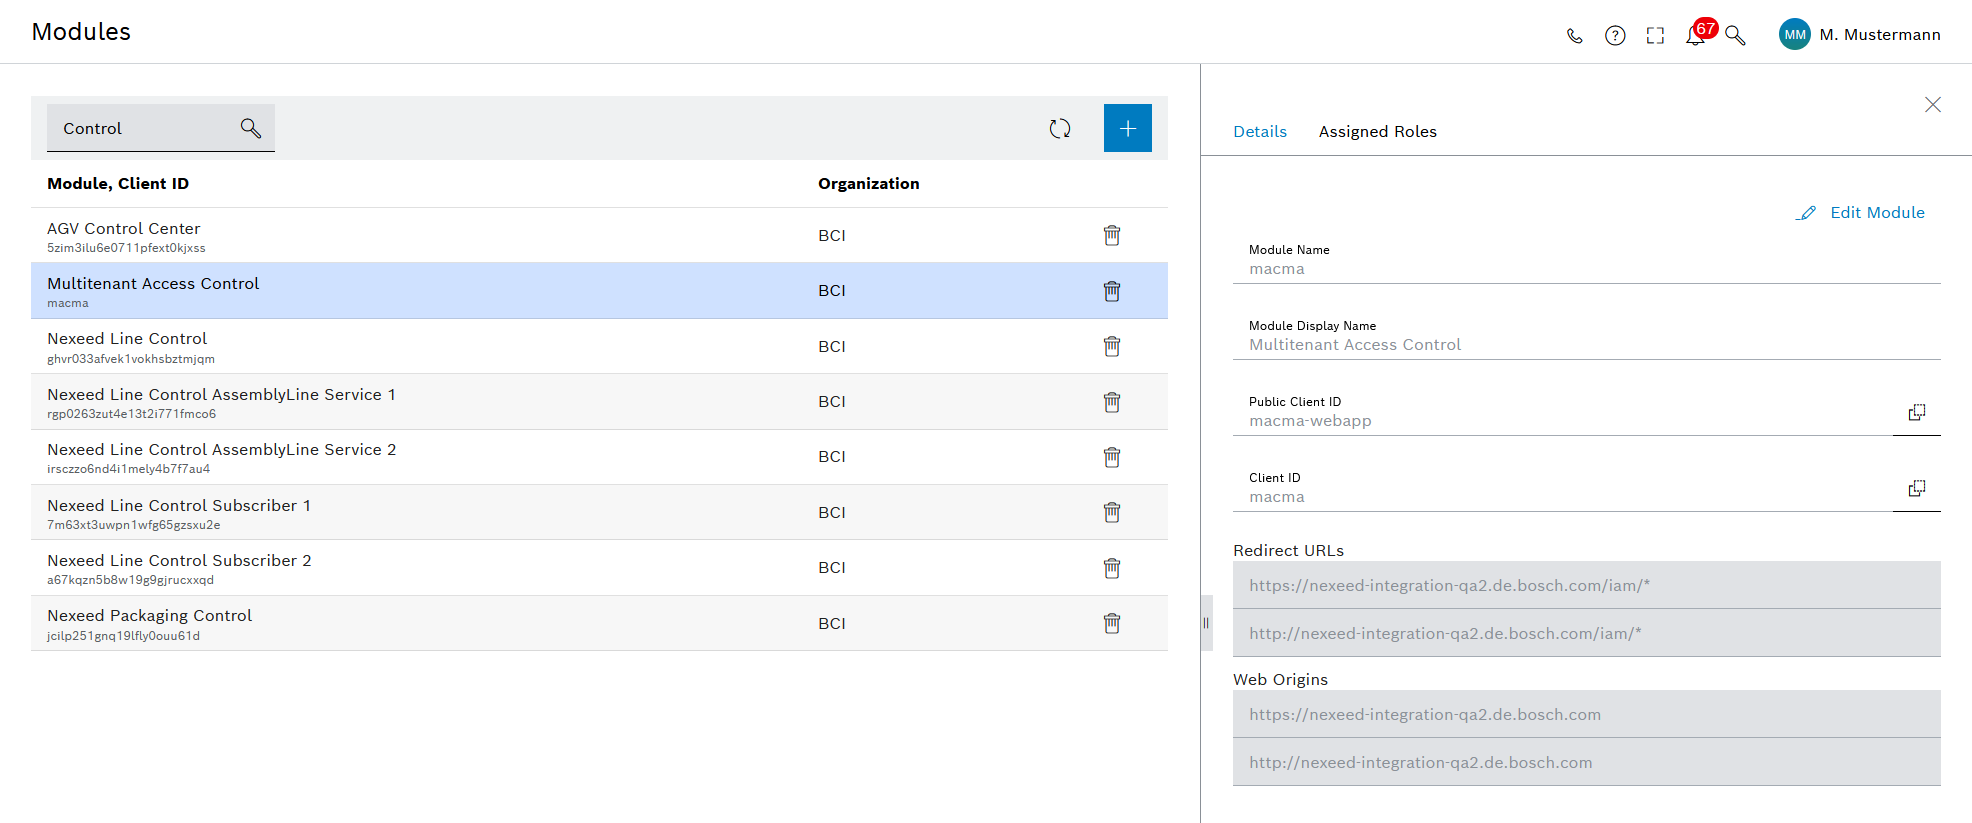
After selecting a module in the overview, the module data is displayed in the detailed view on the right. In this view, you can edit the module data and manage assigned roles.
Detailed view
| Icon/element | Description |
|---|---|
Details |
Displays the module details |
Assigned roles |
Displays the roles that are assigned to the module |
Adding a Module
External modules can be added to the Nexeed Industrial Application System. After a module has been integrated, it is displayed in the overview.
Prerequisite
Module Manager role
Procedure
-
Call up the Multitenant Access Control > Modules menu.
-
Click
 .
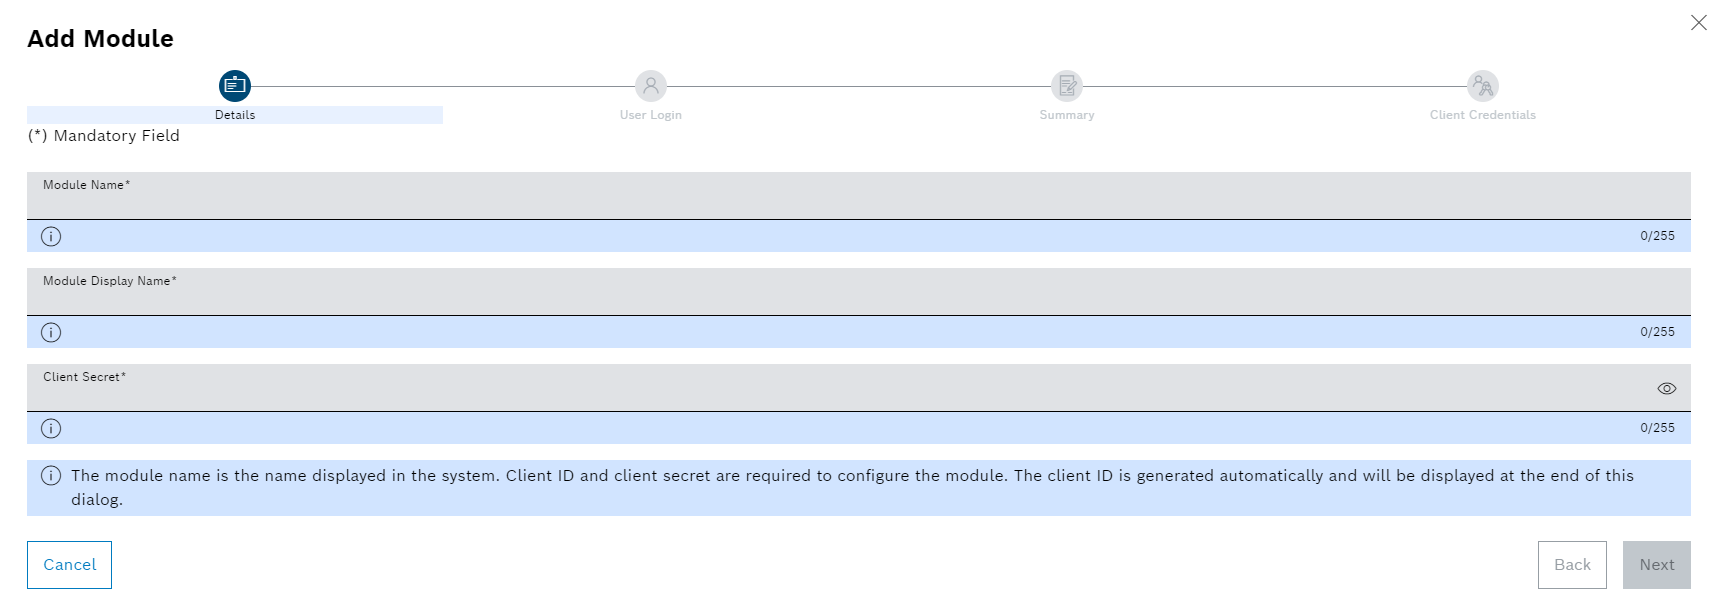
.The Add module dialog window appears with the Details step.
-
In the Details step, enter the following information:
-
Module name
Name of the module
Display name of the module
Name to be displayed in the overview and in the Nexeed Industrial Application System
-
Client secret
Used to configure the module.
The client ID is automatically generated and will appear at the end of the Access data step. The client ID is additionally used for configuring the module.
Make sure that the client ID is safely retained for reference.
-
-
Click Next.
The User login step will appear.
-
To configure the module login, enter the following information:
-
If you do not want additional logins to take place for the module, deactivate the User login switch.
No further information is required in the User login step.
-
If a login needs to take place for the module on a user device, activate the User login switch.
-
If a login needs to take place for the module via the server using a confidential client, activate the Create public client switch.
-
-
To configure the connection to the module, enter the following information:
-
Redirect-URLs
URL to which the user should be redirected after successfully logging into the module.
Placeholders (e.g.
https://bosch.com/Apps/SimpleApp/*) and relative paths are possible. -
Web origins
URL from which the user may log in to the module (e.g.
https://bosch.com).Requests from other URLs are rejected.
-
-
Click Next.
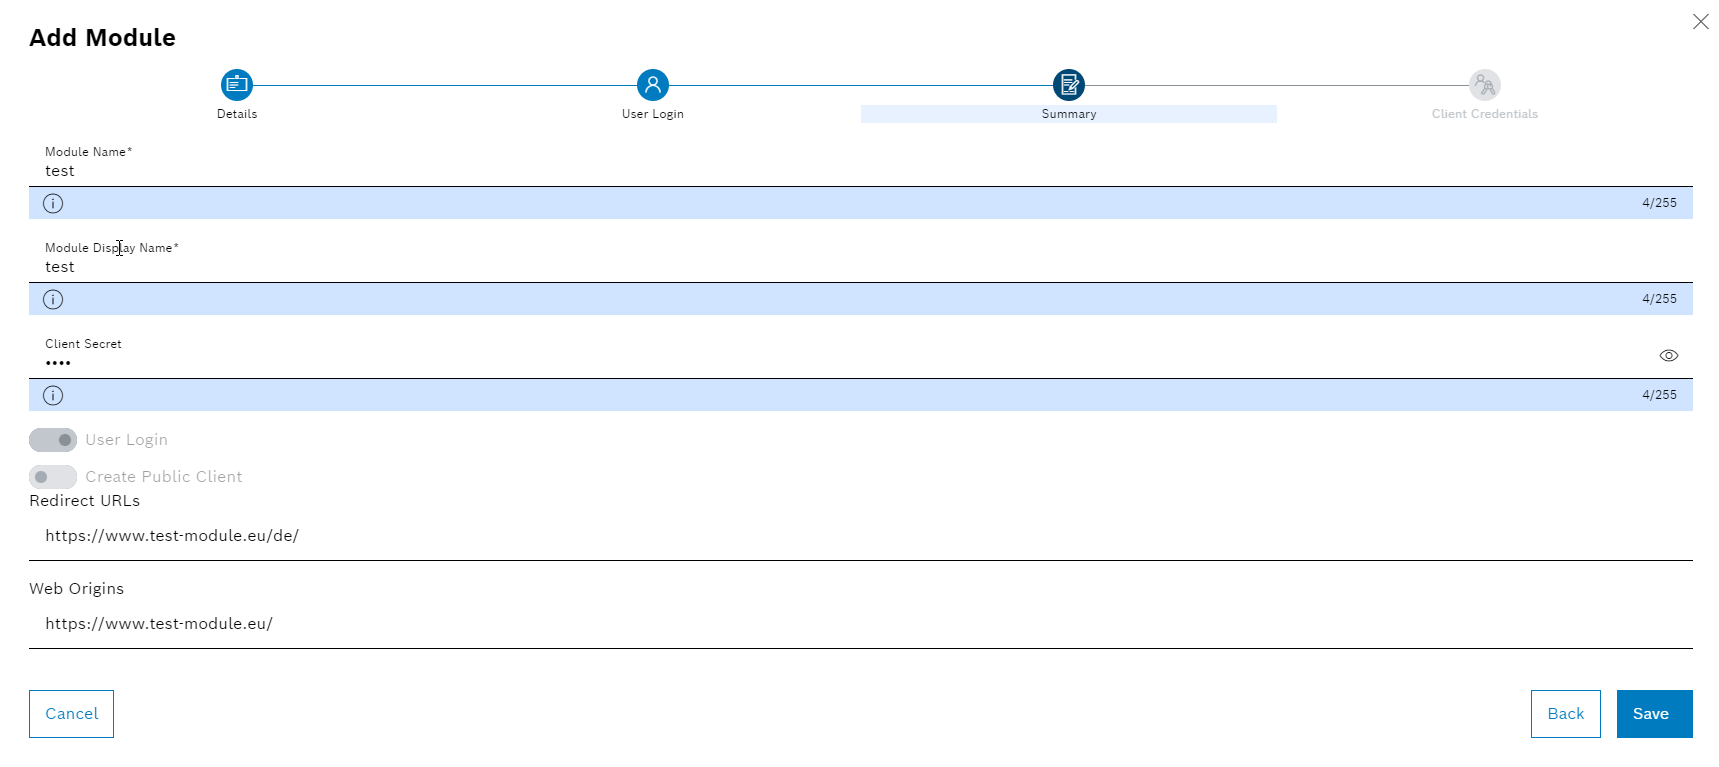
The Summary step will open.
-
To edit details, click on Back or on the required step.
-
To save the details, click Save in the Summary step.
The module is added to the Nexeed Industrial Application System.
In the Access data step, the access data for registering the module in the Nexeed Industrial Application System is displayed.
If the Create public client switch has not been activated in the User login step, the Public client ID field remains blank.
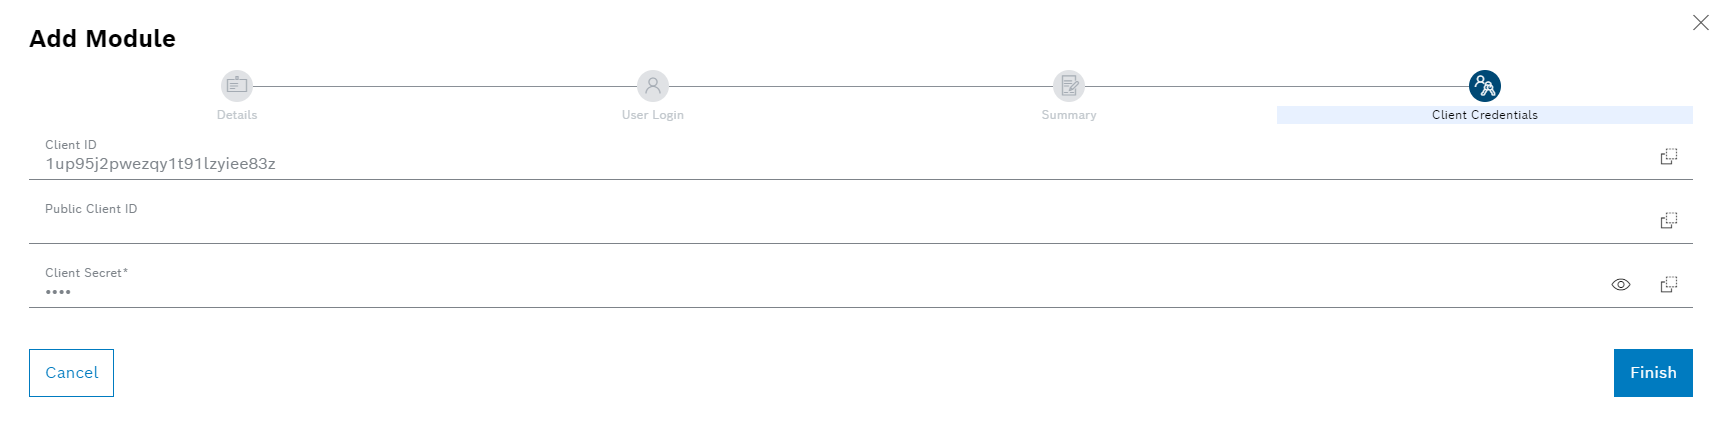
To copy data to the clipboard, click
 at the end of the respective row.
 -
Exit the operation using Close.
The module is added and displayed in the overview.
-
To edit the added module, continue with Editing a Module.
-
To assign a role to the module, continue with Assigning a Role to a Module.
Editing a Module
Prerequisite
Module Manager role
Procedure
-
Call up the Multitenant Access Control > Modules menu.
-
Select the required module from the overview.
The module data is displayed in the Details tab in the detailed view on the right.
-
Click
 in the detailed view.
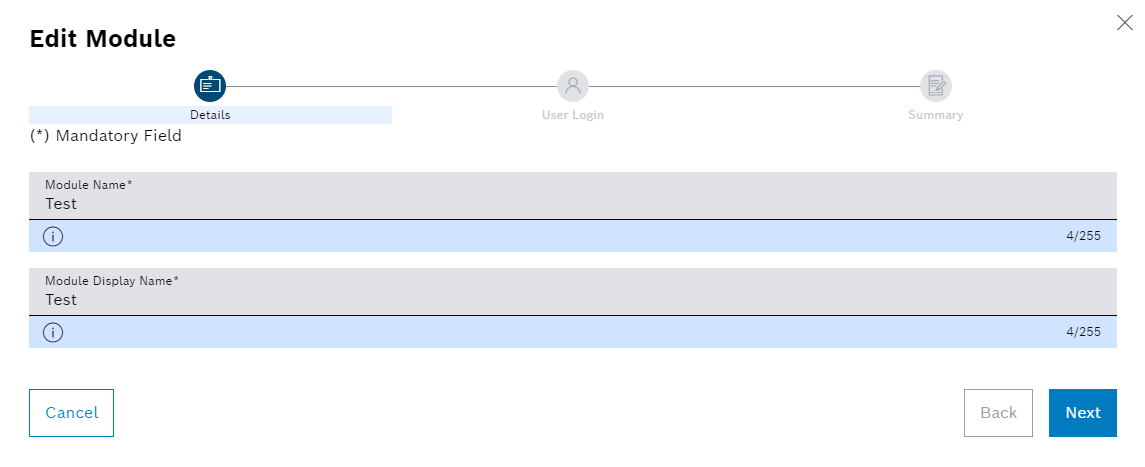
The Edit module dialog window appears with the Details step.
-
Adjust the required information in the Details step:
-
Module name
Name of the module
-
Display name of the module
Name to be displayed in the overview and in the Nexeed Industrial Application System.
-
-
Click Next.
The User login step appears.
-
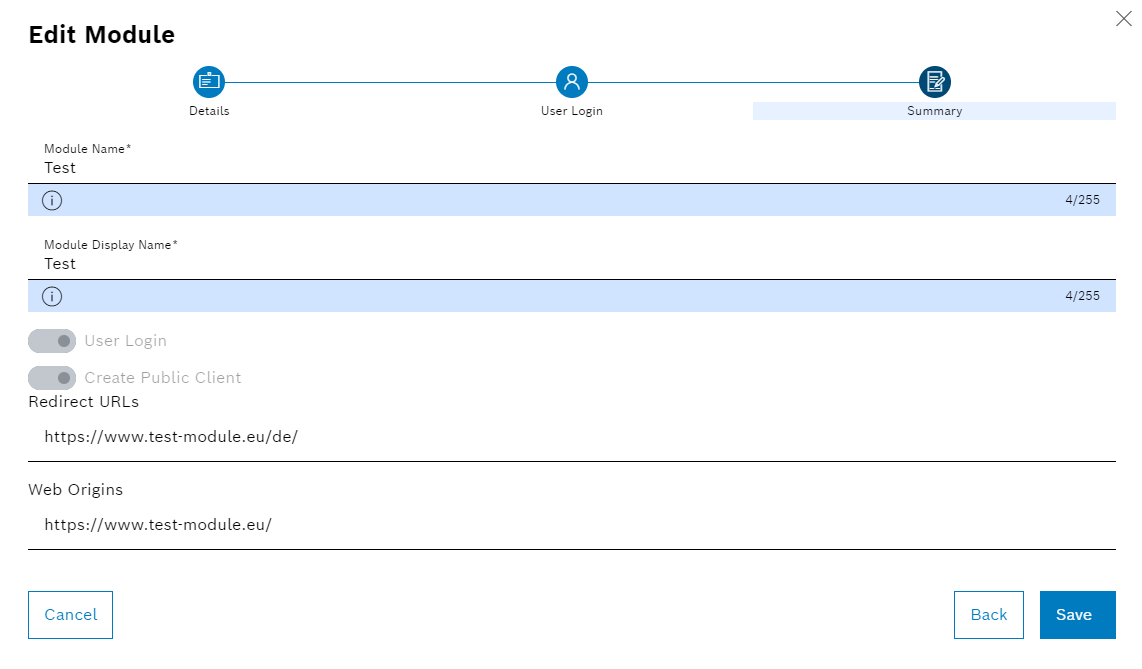
Adjust the required information in the User login step:
-
User login switch
If you do not want additional logins to take place for the module, deactivate the User login switch. No further information is required in the User login step.
If a login needs to take place for the module on a user device, activate the User login switch.
-
Create public client switch
If a login needs to take place for the module via the server using a confidential client, activate the Create public client switch.
-
Redirect URLs
URL to which the user should be redirected after successfully logging into the module.
Placeholders (e.g.
https://bosch.com/Apps/SimpleApp/*)and relative paths are possible. -
Web origins
URL from which the user may log in to the module (e.g.
https://bosch.com).Requests from other URLs are rejected.
-
-
Click Next.
The Summary step will open.
-
To edit details, click Back or the required step.
-
To save the details, click Save in the Summary step.
The module is displayed in the overview with the changed details.
-
To assign a role to the module, continue with Assigning a Role to a Module.
Assigning a Role to a Module
Prerequisite
Module Manager role
Procedure
-
Call up the Multitenant Access Control > Modules menu.
-
Select the required module from the overview.
The module data is displayed in the Details tab in the detailed view on the right.
-
In the detailed view, go to the Assigned roles tab.
-
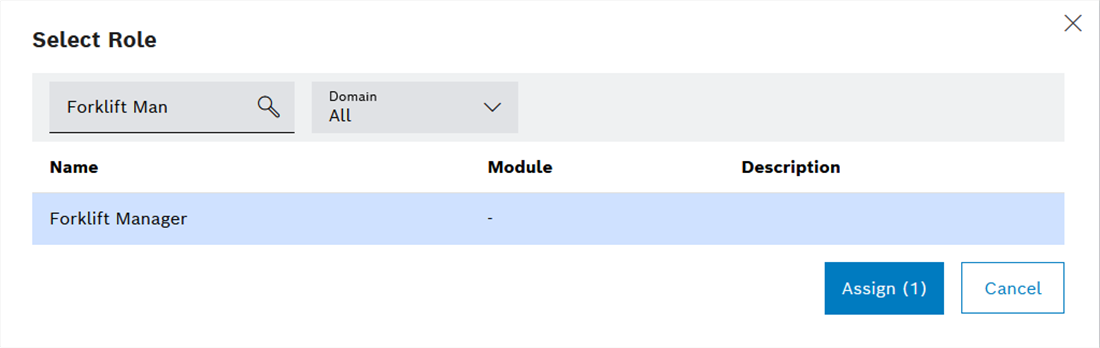
Click
.The Select role dialog window appears.
-
To limit the number of roles, implement the following settings:
-
In the Domain drop-down list, select the module or organization in which the corresponding application role or organization role is located.
Or:
Enter the required role designation in the Search text field.
Organizational roles are marked with a - in the Module column.
-
Select the required roles.
-
Click Assign.
The selected roles will be assigned to the module and displayed in the detailed view in the Assigned roles tab.
-
To cancel an assignment of a role to a module, continue with Canceling the Assignment of a Role to a Module.
Canceling the Assignment of a Role to a Module
The assignment of roles to a module can be changed.
Prerequisites
-
Module Managerrole -
At least one module has been created: Add module.
-
At least one role has been created ( Adding a Role ) and has been assigned to the module Assign Role to a Module.
Procedure
-
Call up the Multitenant Access Control > Modules menu.
-
Select the required module from the overview.
The module data is displayed in the Details tab in the detailed view on the right.
-
In the detailed view, go to the Assigned roles tab.
-
To limit the number of roles, implement the following settings:
In the Domain drop-down list, select the module or organization in which the corresponding application role or organization role is located.
Or:
Enter the required role designation in the Search text field.
Organizational roles are marked with a - in the Module column.
-
Click
 next to the role you want to delete.
The assignment of the role to the module is canceled and the role is no longer displayed in the Assigned roles tab.