Connector Packages Tab
The Connector Packages tab is used to add, display, activate, deactivate and edit connector packages. Connector packages provide specific functionalities for integrating the Nexeed Industrial Application System with one or more defined ERP systems.
The following functions are available in the widgets:
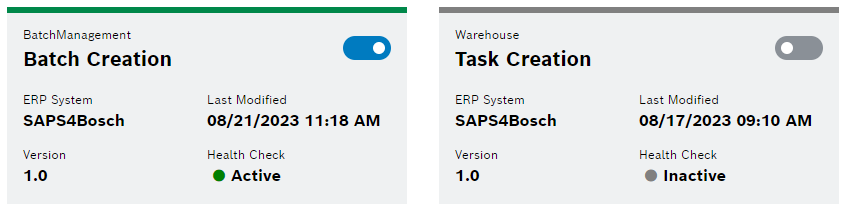
| Color indicator | Status of the connector package |
|---|---|
Green |
Enabled |
Gray |
Disabled |
Yellow |
Warning |
Red |
Error |
Add Connector Package
Prerequisites
Power User role
Procedure
-
Go to the ERP Connectivity > Configuration menu.
-
Open Connector Packages tab.
-
Click
 in the header.
The content and scope of the configuration wizard depends on the respective connector package. The steps described below are examples, and so these can differ.
-
In the Add Connector Package dialog window, click
 in the Upload step.
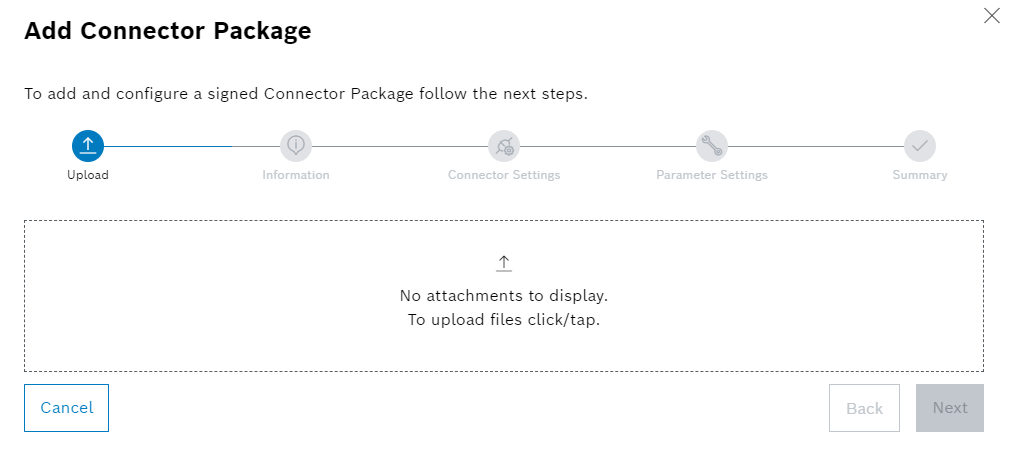
-
Open the corresponding file in the operating system dialog window.
The file is uploaded and checked.
The connector packages can only be provided manually via file exchange for the time being, as there is no general online storage location in the current version as of yet.
The standard connector packages (signed.zip archives) are provided by BCI. Only connector packages signed by BCI can be uploaded in this way.
-
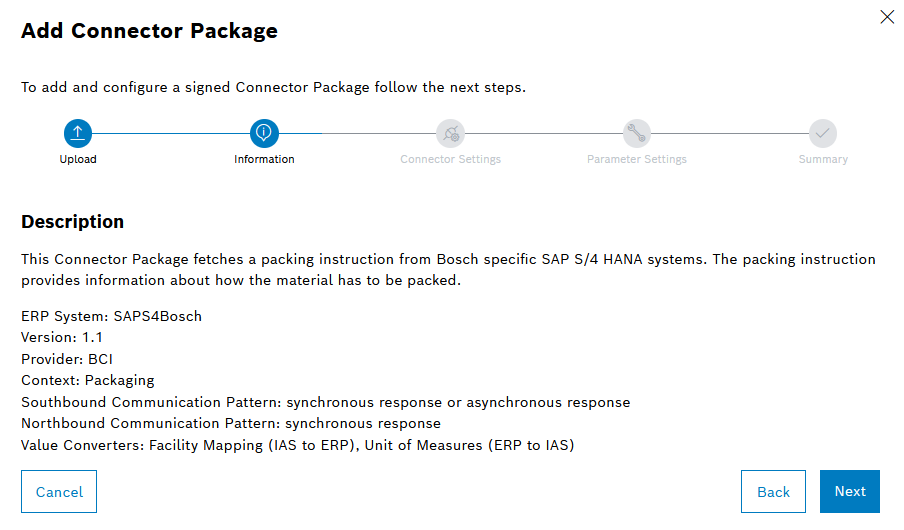
Click Next.
The Information step provides a description of the functionality of the uploaded connector package and technical information. This can include, for example, the value conversions used or connection details to the external ERP system.
-
Click Next.
-
In the Connector settings step, enter information about the endpoints of the external ERP system.
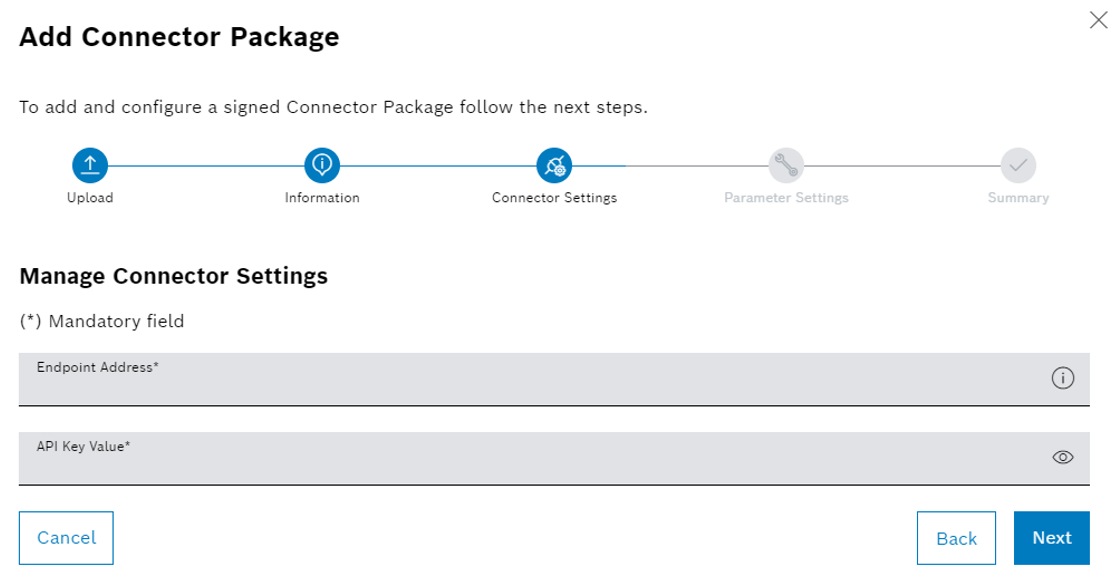
Depending on the respective connector package, the input fields can be automatically validated. Information about erroneous entries is displayed below the input fields.
-
Click Next.
-
Enter information about the parameters in the Parameter Settings step.
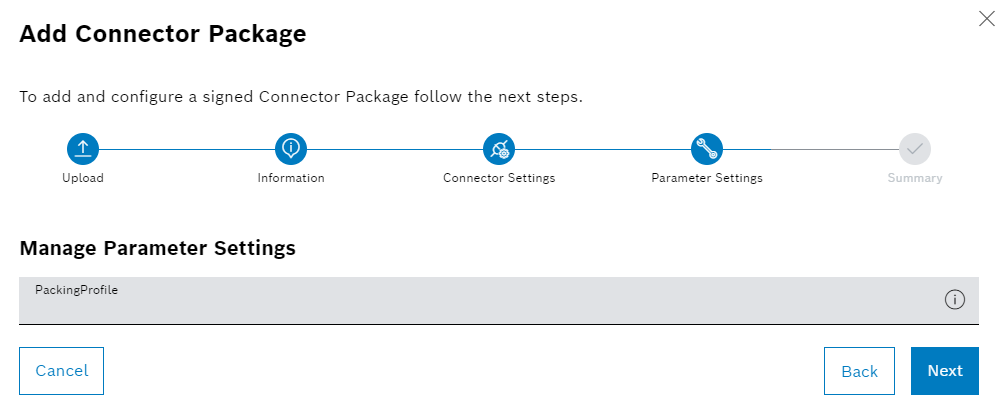
Depending on the respective connector package, the input fields can be automatically validated. Information about erroneous entries is displayed below the input fields.
The Summary step displays the created API endpoint. This endpoint can be used by client applications to call the connector package.
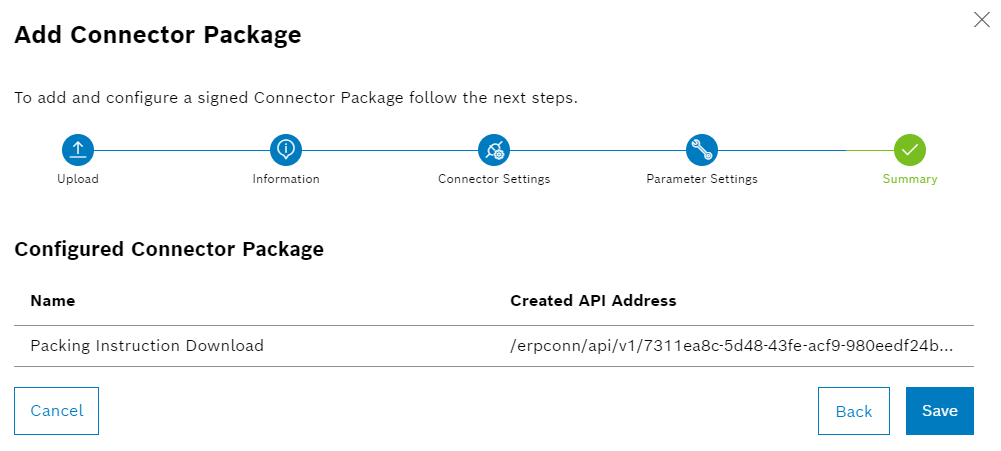
-
Click Save.
-
In the Activate Connector Package dialog window, select the status of the connector package:
-
To activate the connector package directly, click Activate.
-
To leave the connector package deactivated for the time being, click Cancel.
-
The connector package is added and displayed in the overview.
Activate Connector Package
Prerequisites
Editor or Power User role
Procedure
-
Go to the ERP Connectivity > Configuration menu.
-
Open Connector Packages tab.
-
In a connector package, click on
 .
.Alternatively, a connector package can be activated by clicking on the connector package in the detailed view in the Connector Settings tab.
The connector package is activated. The color indicator at the top of the connector package is green.
Deactivate Connector Package
Prerequisites
Editor or Power User role
Procedure
-
Go to the ERP Connectivity > Configuration menu.
-
Open Connector Packages tab.
-
In a connector package, click on
 .
.Alternatively, a connector package can be deactivated by clicking on the connector package in the detailed view in the Connector Settings tab.
The connector package is deactivated. The color indicator at the top of the connector package is gray.
Display Connector Package Details
Prerequisites
User , Editor or Power User role
Procedure
-
Go to the ERP Connectivity > Configuration menu.
-
Open Connector Packages tab.
-
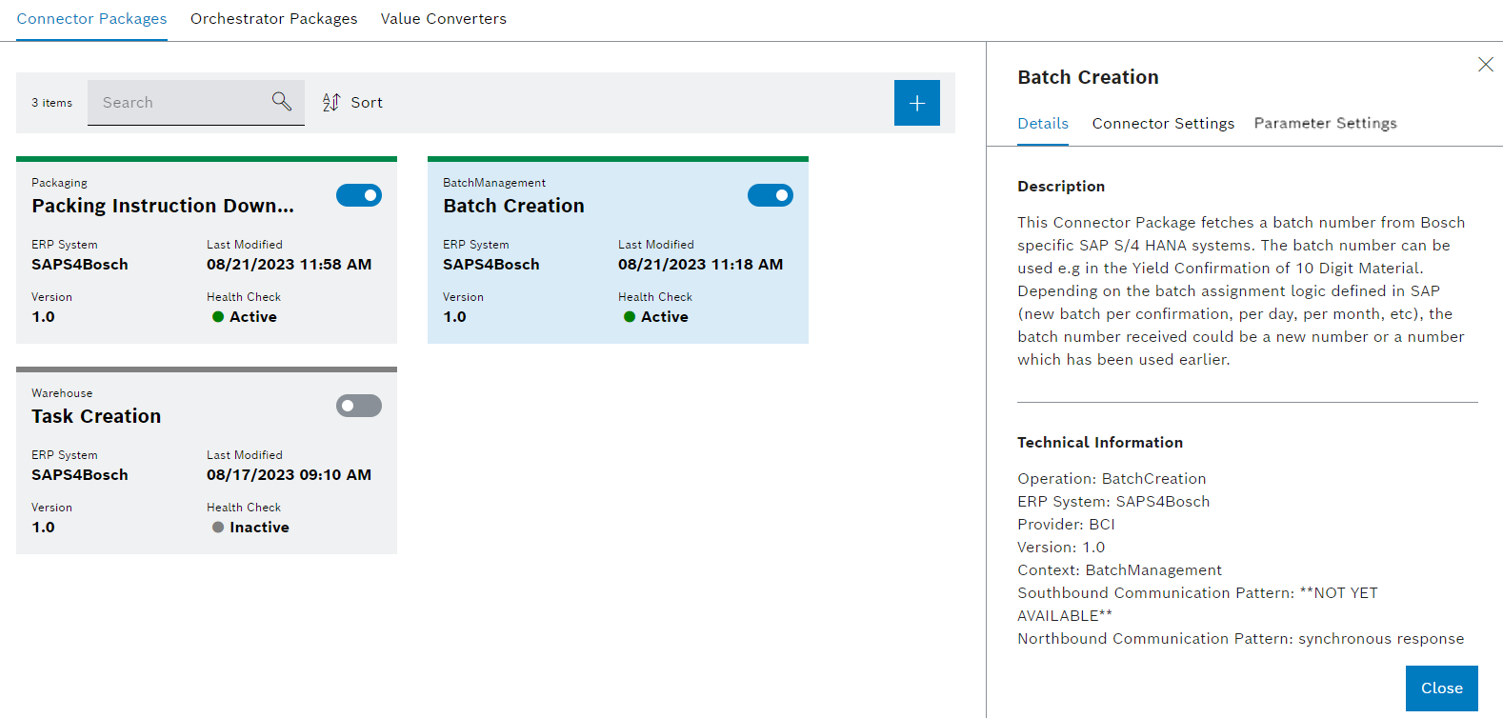
Click on a connector package.
A description of the functionality of the connector package and technical information are displayed in the detailed view in the Details tab.
Edit Connector Package
Prerequisites
Editor or Power User role
Procedure
-
Go to the ERP Connectivity > Configuration menu.
-
Open Connector Packages tab.
-
Click on a connector package.
-
Optional: Deactivate the connector package.
If the connector package is activated, the changes are applied directly. If there is a possibility that this could cause impairments, deactivate the connector package.
-
Open the Connector Settings tab in the detailed view.
-
Edit information.
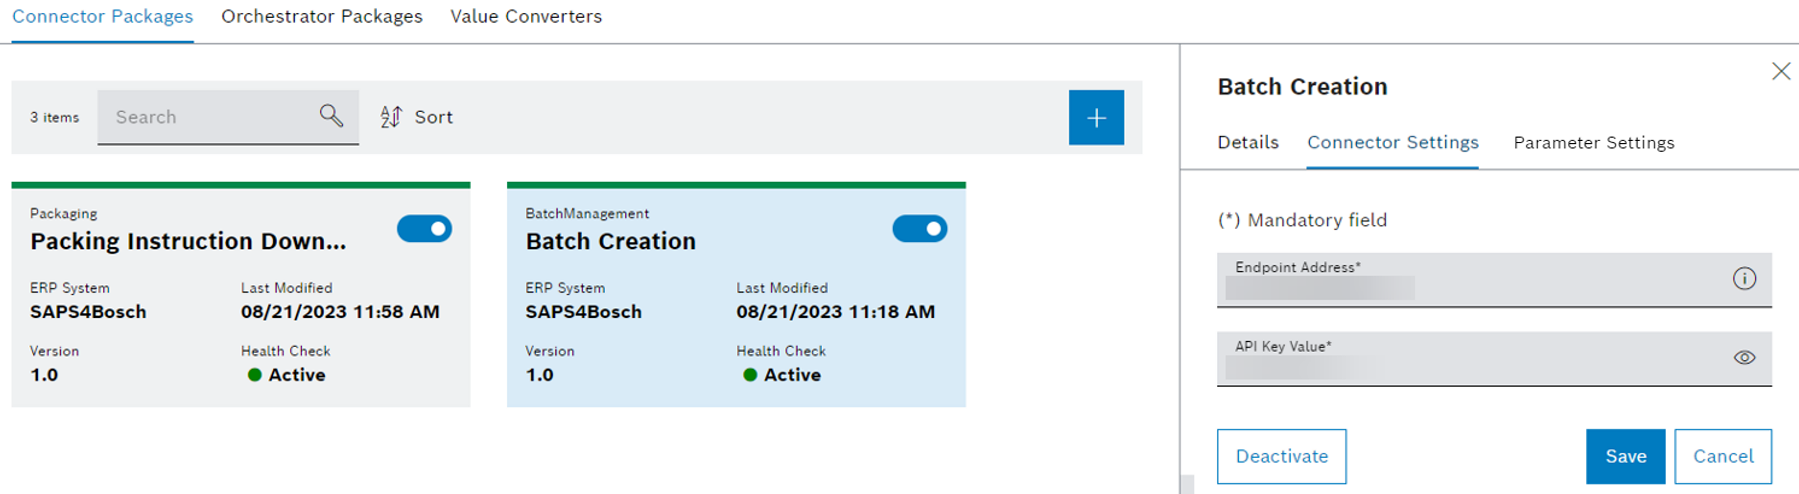
Depending on the respective connector package, the input fields can be automatically validated. Information about erroneous entries is displayed below the input fields.
-
Click Save.
The connector package is edited and becomes active with the changes.
Execute Connector Package Automatically and Repeatedly
Prerequisites
Editor or Power User role
Procedure
-
Go to the ERP Connectivity > Configuration menu.
-
Open Connector Packages tab.
-
Click on a connector package.
-
Open the Connector Settings tab in the detailed view.
-
Edit default values for automatic message retries:
-
Number of automatic message retries
-
Length of the timeout
-
Retry wait time
-
-
Click Save.
The connector package is automatically executed repeatedly.
Delete Connector Package
Prerequisites
Power User role
Procedure
-
Go to the ERP Connectivity > Configuration menu.
-
Open Connector Packages tab.
-
Click on a connector package.
-
Click Delete in the detailed view in the Details tab.
-
In the Delete Connector Package dialog window, click Delete.
The Connector Package is deleted and is no longer displayed in the overview. The functionality is no longer available, not even for other modules that use it. All messages related to the functionality are also deleted.