Blocking area
The blocking area can be accessed from the following tabs:
-
Blocking management > Blocking > Overview
-
Blocking management > Blocking > History
If the search results have been filtered by block, the search results can be processed further in the following ways:
-
Sort blocks according to different criteria.
-
View blocks in different views:
-
Sorted by block
-
Sorted by identifier
-
Header
The header controls the sorting or viewing mode of the results table.

| Element/icon | Function | |||
|---|---|---|---|---|
<nn> |
Total number of blocks found
|
|||
|
Filter the results table by identifier or block ID. Enter the block ID or identifier in full or in part in the text box. |
|||
|
Filter by block status ( Blocked / Released ).
|
|||
|
Sort blocks by Severity or Date/time of creation in ascending or descending order. |
|||
|
Display the results table according to specific filter criteria ( Sorted by block , Sorted by identifier , Unsorted ). |
|||
|
||||
|
|


To view the different views of the results table, go to:
Results table sorted by blocks

| Element/icon | Function | ||
|---|---|---|---|
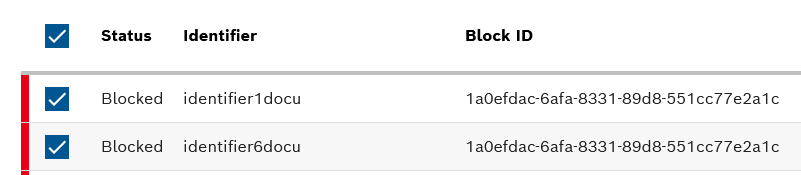
Status |
Block status ( Blocked / Released )
|
||
Block ID |
Character string uniquely assigned to the block by the Nexeed Industrial Application System |
||
|
Further information on status, block and release that is not noted in the result line itself |
||
Number of parts |
Number of block types linked to the block |
||
Severity type |
Severity of the reason for the block assumed by the Nexeed Industrial Application System (the higher the number between 0 and 100, the higher the severity) |
||
Reason for the block. |
The reason for the block is entered by the block creator. |
||
Block info |
Further information on the block is entered by the block creator. |
||
Date and time of the |
Date/time when the block was created |
||
|
Release block (only under Blocking management > Blocking > Blocks > Overview ). |
||
|
Display further options ( Copy block , Export block ). |
||
|
Display Identifiers linked to the block. |
||
|
Copy block ( Create block from an existing block). |
||
|


Results table sorted by identifier

| Element/icon | Function | ||
|---|---|---|---|
Identifier |
Identifier of the blocked element |
||
bloq. |
Number of blocks linked to the identifier |
||
Approved |
Number of released blocks linked to the identifier |
||
|
|||
|
|||
|
Display Identifiers linked to the block. |
||
Status |
Block status (Blocked / Released )
|
||
Block ID |
Character string uniquely assigned to the block by the Information Application System |
||
|
Call up further information on status, block and release. |
||
Number of parts |
Number of block types linked to the block |
||
Severity type |
Severity of the reason for the block assumed by the Nexeed Industrial Application System (the higher the number between 0 and 100, the higher the severity) |
||
Reason for the block. |
The reason for the block is entered by the block creator. |
||
Block info |
Further information on the block is entered by the block creator. |
||
Date and time of the block creation |
Date/time when the block was created |
||
|
Release blocks (only possible under Blocking management > Blocking > Blocks > Overview ). |

Filter by block
|
To filter by block, at least one of the two text boxes Minimum severity and Maximum severity must be filled in. |
-
To filter by block with the Blocked or Released status, call up Blocking management > Blocking > Overview.
Or :
To filter by block with the Released status, call up Blocking management > Blocking > History.
-
Open the filter options with Filter
 .
. -
Select a Block type from the "Block type" selection list.
-
Filter by identifier of block types:
-
To filter for an individual identifier, enter the identifier in full or in part in the Identifier text box.
Or :
-
To filter by multiple identifiers at the same time, click
 in the Identifier text box.
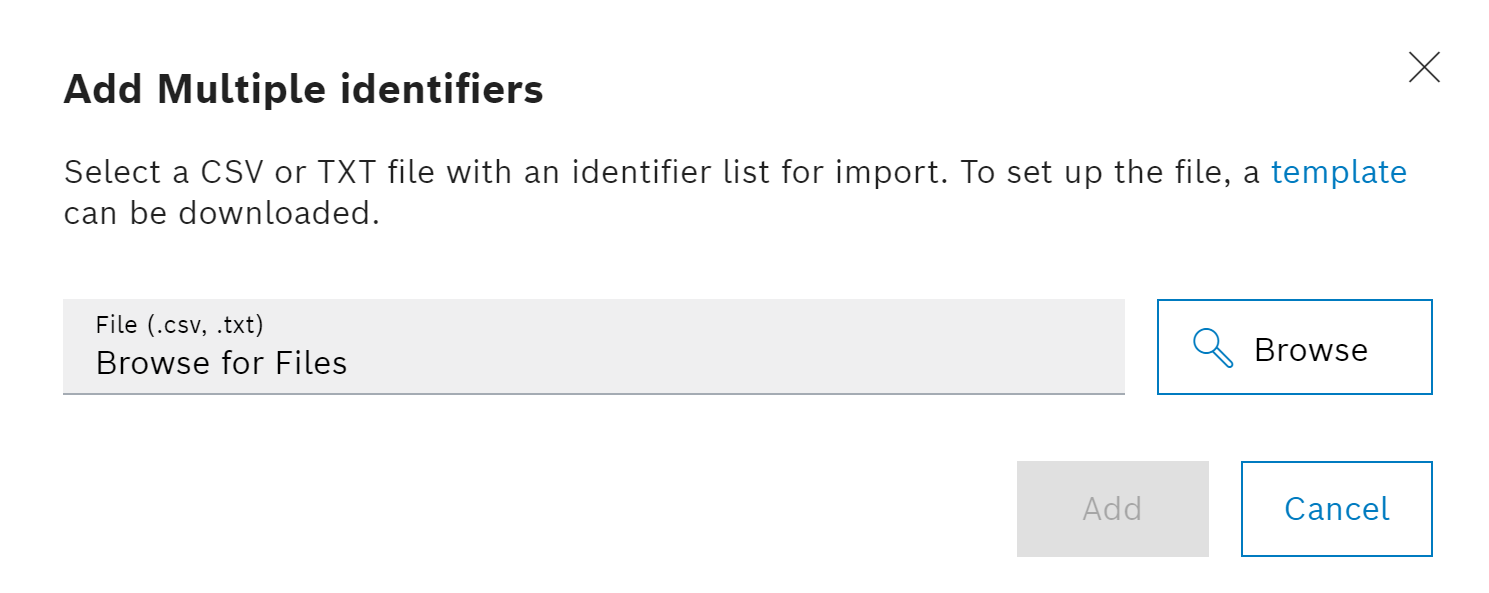
-
To import an identifier list, click on
 Browse and select the desired file in the file system.
Identifier lists must be in .csv or *.txt format. To download a template, click *Template in the dialog window.
-
Confirm the import with Add.
-
-
Select the Date and Period of the block creation.
By default, 00:00:00 is set for the End point. To filter the end day, enter the desired time under End point. To use the search option Today , enter a time under End point.
-
Enter information in the Block created by , Block ID and Reason for block text boxes.
-
In the Minimum severity and Maximum severity text boxes, enter positive integer values between 0 and 100.
To filter by block, at least one of the two text boxes Minimum severity and Maximum severity must be filled in.
To search for blocks with a specific severity (e.g. 31), enter the same value in the Minimum severity and Maximum severity text boxes. -
Click Search.
The results table shows all blocks that match the selected filter criteria.
Click
 to remove the filter criteria under the Filter area one by one.
Click Remove all to remove all filter criteria.
 -
To refine the filter results, filter the results table further:
-
To filter the results table by identifiers, click
 View
View  and select Sorted by identifier.
Or :
-
To filter the results table by block IDs, click
View and select Sorted by block. -
To filter the results table by both identifiers and block IDs, click
View and select Unsorted.
-
-
Enter the filter criterion in full or in part in the
 Search text box.
-
Click
 .
.
The results table shows all blocks that match the filter criterion being searched for.
Create block
Blocks can be created in three ways:
-
Create a new block for an element
-
Add an element to an existing identifier of a block type
-
Create new elements with the Blocking reason and Severity properties of existing or released blocks
Procedure
-
Call up Blocking management > Blocking > Overview.
-
To create a new block for an element, proceed as follows:
-
Click
 in the header.
The Create block dialog window opens.
Or :
To add an element to an already existing identifier of a block type, proceed as follows:
-
In the header, under
 View , select > Sorted by identifier.
 -
Click
 in the result line.
The Create block dialog window opens.
Or:
To block an element based on the properties of existing or released blocks, proceed as follows:
-
Under Blocking management > Blocking > Overview or Blocking management > Blocking > History , Filter by block.
-
In the header under
View Select > Sorted by block. -
In the result line, click
 Copy.
Copy.The Create new block from copy dialog window opens.
If the block was created based on released or existing blocks, the newly blocked element inherits the Block type , Reason for block , Severity and, if applicable, Block info from the underlying block. Changes can still be made by entering them manually in the text boxes.
-
-
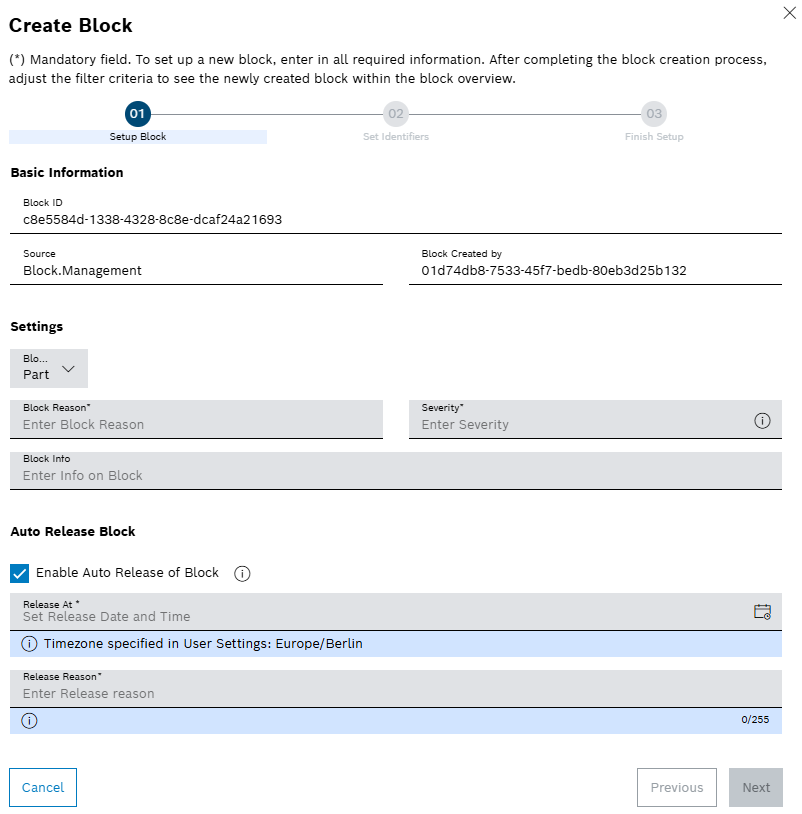
Select Block type from the drop-down list.
-
Enter the Reason for block, Severity and Block info.
-
Optionally define a release date in the Auto Release Block section to automatically release the block on the specified date.
-
Click Next.
-
If the block was created via
or , proceed as follows:-
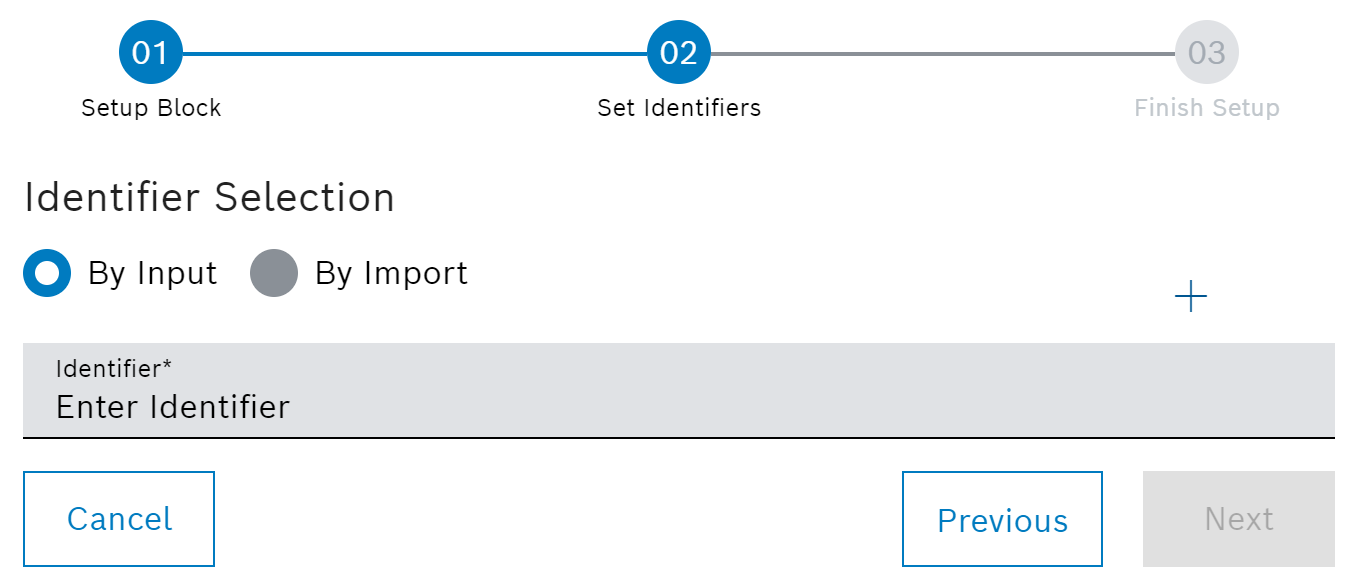
To enter the identifier manually, select the Via input radio button.
-
Enter the identifier in the text box.
-
To add text boxes for entering further identifiers, click on
 Add identifier.
To remove text boxes that are not required, click
 .
.Or :
-
To import an identifier list, select the Via import radion button.
-
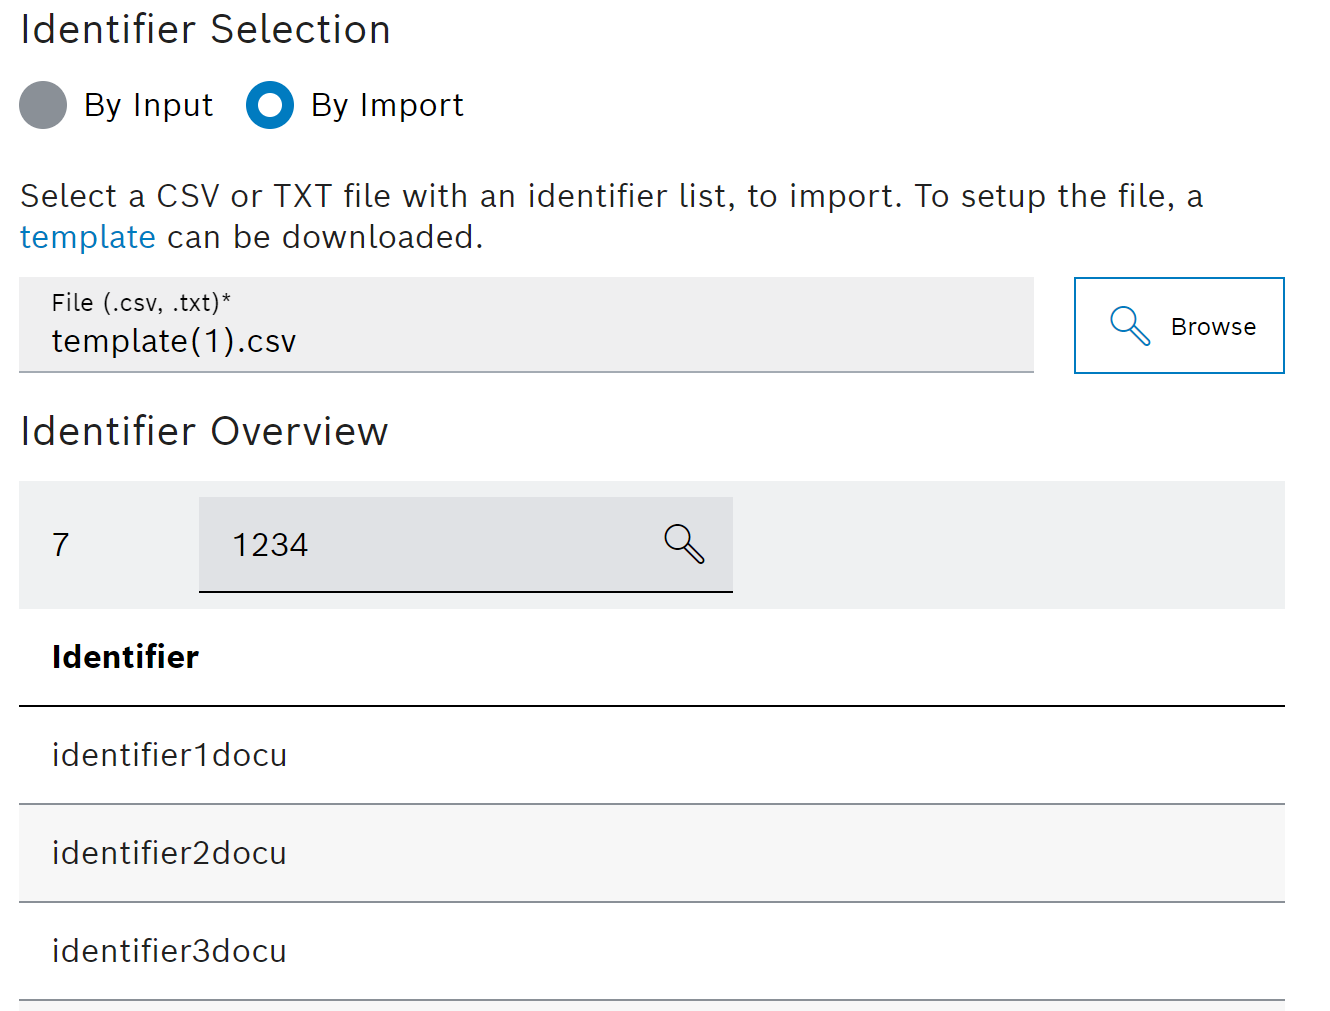
 Click Browse and select the desired file.
Identifier lists must be in .csv or *.txt format. Click *Template in the dialog window to download a template.
-
To select identifiers to be filtered from the identifier list, enter the identifiers to be filtered in the text box in full or in part and click
.
-
-
If the block was created via
Copy , proceed as follows: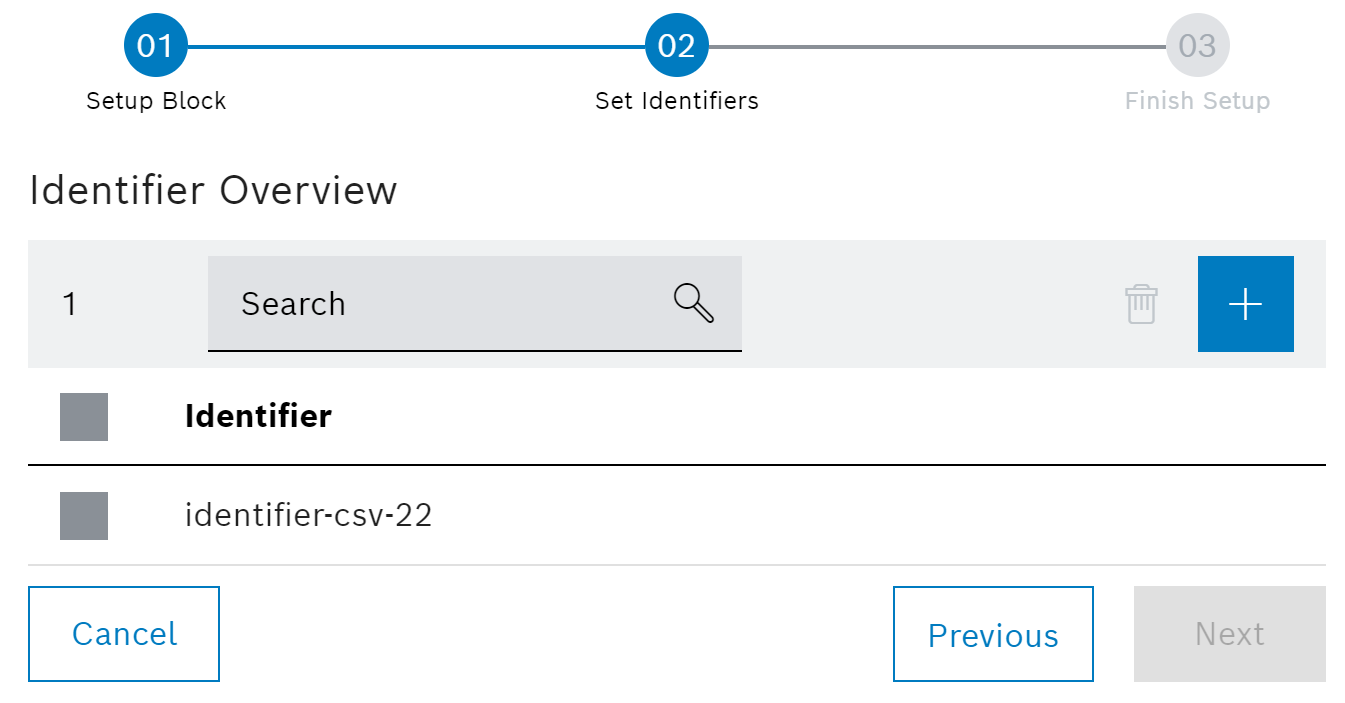
-
Deselect identifiers that are not to be applied from the selection list.
-
-
Click Next.
-
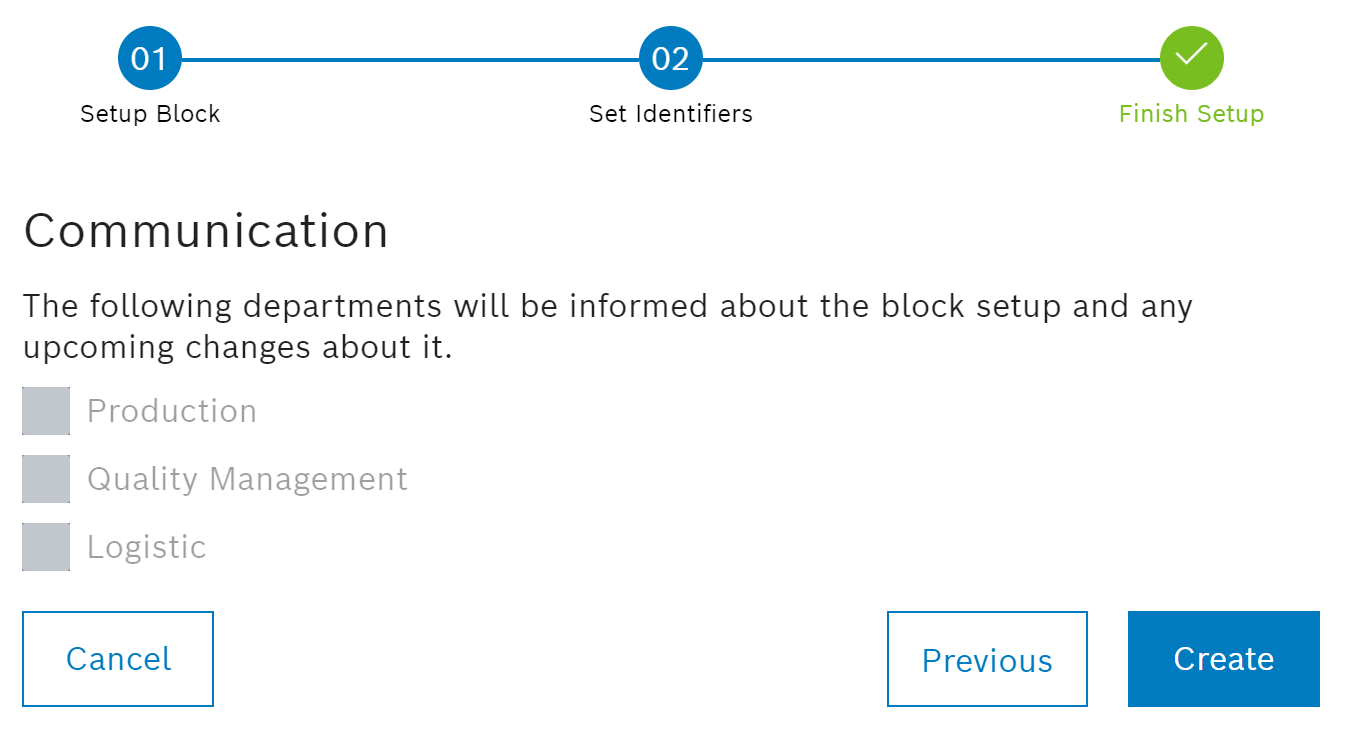
To notify departments of the block creation, select departments in the Communication drop-down list, if applicable.
-
Click Create.
The block is displayed in the result table under Blocking management > Blocking > Blocks > Overview.
Release blocks
Blocks are released after the cause of the block has been removed or the block has otherwise become superfluous. The way in which blocks are released differs depending on the view.
-
Call up Blocking management > Blocking > Blocks > Overview.
-
To release the block under
View > Sorted by block or Unsorted , click  .
.Or:
To release the block under
View > Sorted by identifier , click and select .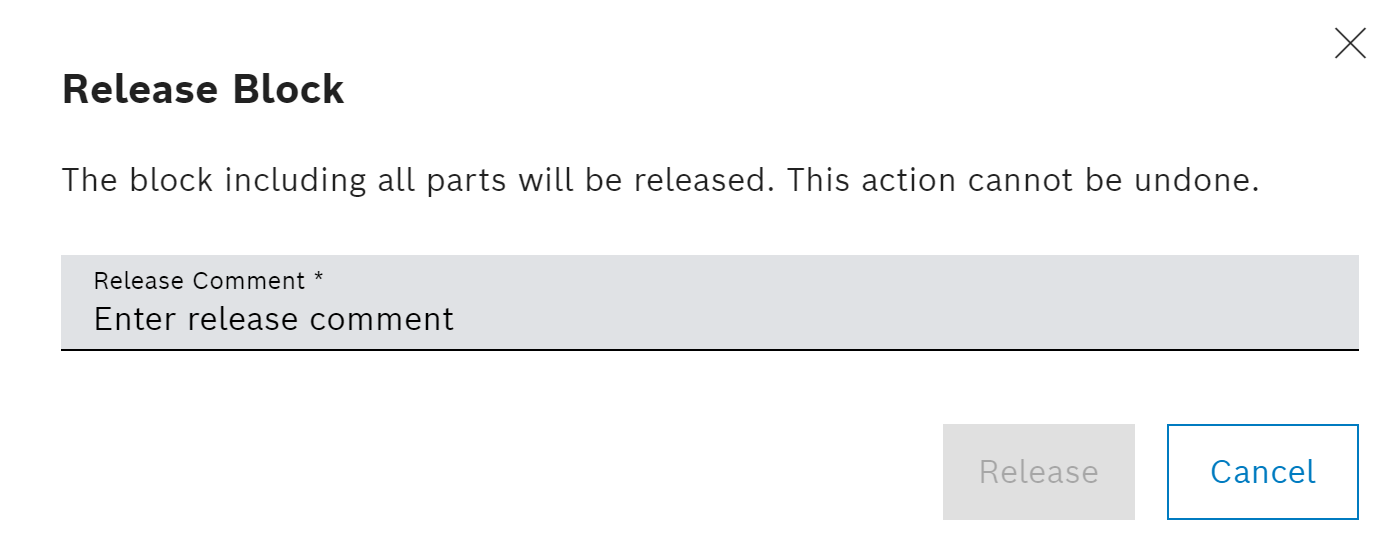
-
Enter the reason for the release in the Release comment text box.
-
Click Release.
The status of the block is changed from Blocked to Released. The block can now be found under Blocking management > Blocking > Blocks > Overview and Blocking Management > Blocking > Blocks > History.
|
Blocks cannot be restored once they have been released. To block released elements again, under Blocking Management > Blocking > Blocks > History , Filter by block. Then Create block from the filtered block. |
Block the released block again
The releasing of a block cannot be undone immediately. Instead, proceed as follows:
-
Call up Blocking management > Blocking > History.
-
To display the desired block, search for the released block with Filter by block.
-
To re-block the released block, continue with Create block.
The block that has been re-blocked can be filtered under Blocking management > Blocking > History.
Export blocks
To transfer the data for blocks to other programs or to archive it, the data for blocks can be exported. The export can be in *.xlsx or *.csv format.
-
To export an individual block, sort using
View > Sorted by block or Sorted by identifier , and in the result line, click  .
.
-
Click Export in the header.

-
-
Select whether the file should be exported in the Excel file or CSV file format (.xlsx/.csv) via the radio button.
-
Select the target directory on the file system.
-
Click Export.
The exported file is stored in the selected folder of the file system.