Device Details
The view can be called up by clicking on the respective device.
Depending on the device type, backups of the device software can also be created, which can also be used to restore the device software in the Device Portal.
The Software and Backup & Restore tabs are visible depending on the device type.
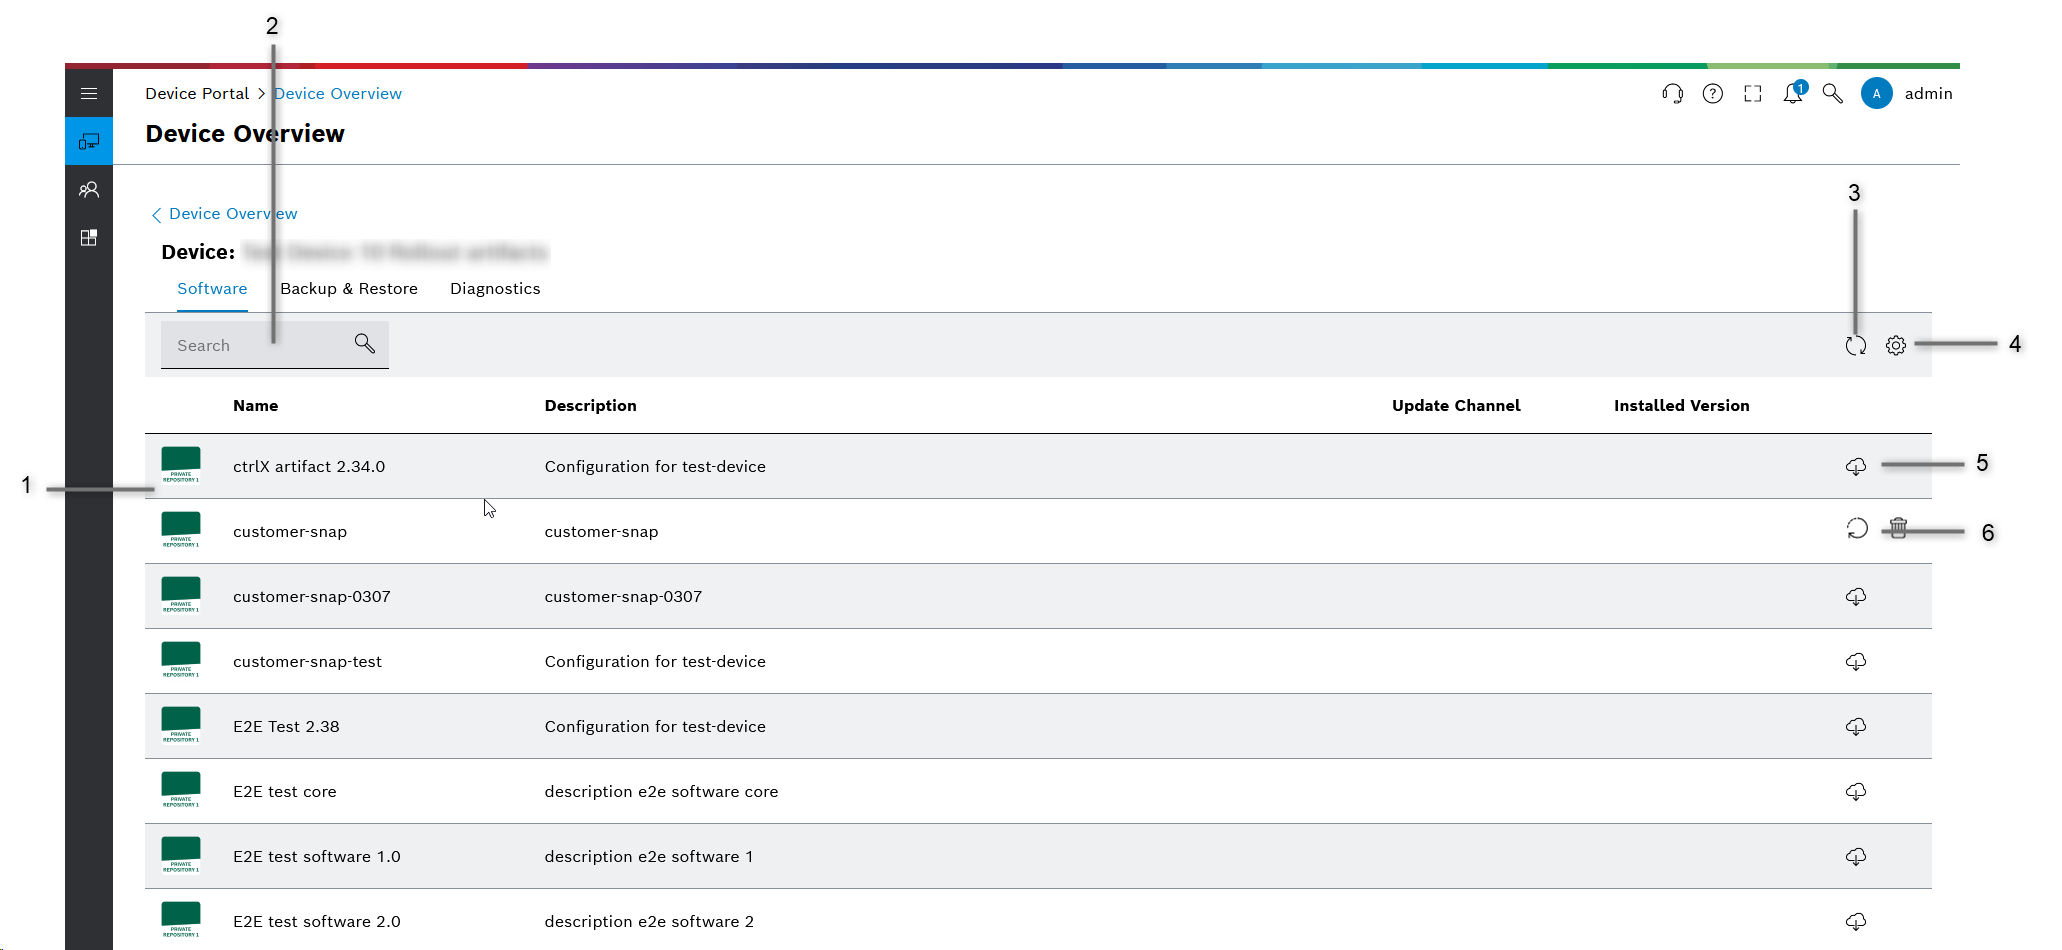
Software Tab
The software of the device can be managed here: Newly provided software from a connected Artifact Repository can be installed; existing software can be updated or deleted.
| No. | Description |
|---|---|
1 |
List of software that is on the selected device. |
2 |
Search |
3 |
Refresh the list. |
4 |
|
5 |
Install software There is new software that can be installed on the device. |
6 |
Update software There is a new version of installed software that can be updated on the device. |
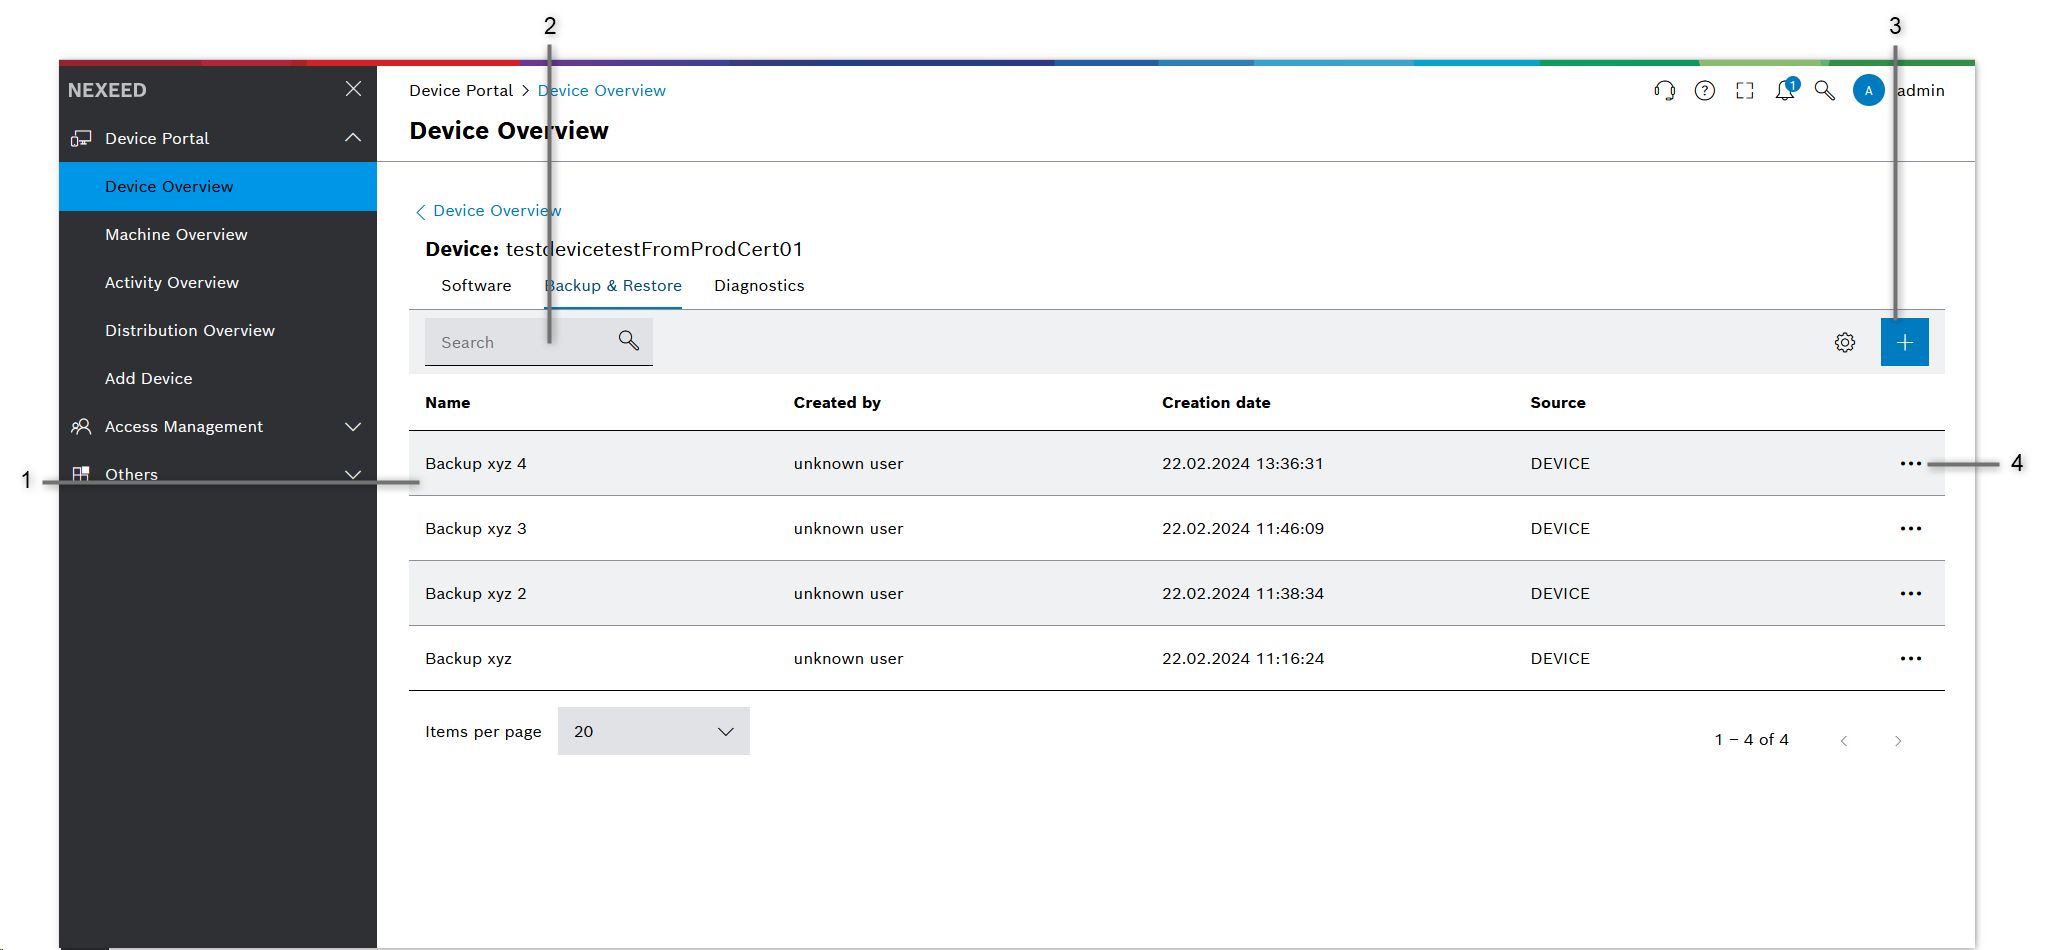
Backup & Restore Tab
Under the Backup & Restore tab, backups can be made for each device. The devices can be restored using the created backups if necessary.
| No. | Description |
|---|---|
1 |
List of available backups |
2 |
Search |
3 |
Perform a new backup for the selected device |
4 |
Options menu for backup:
|
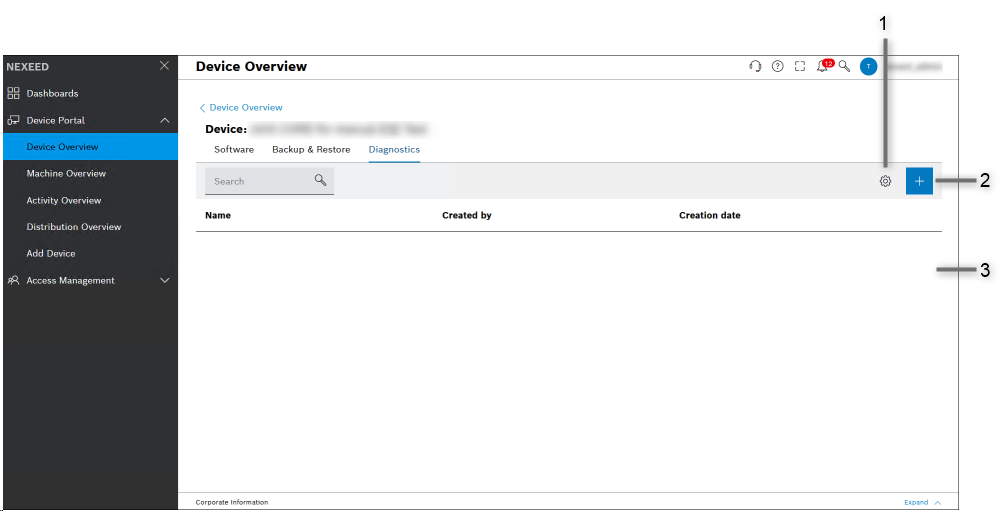
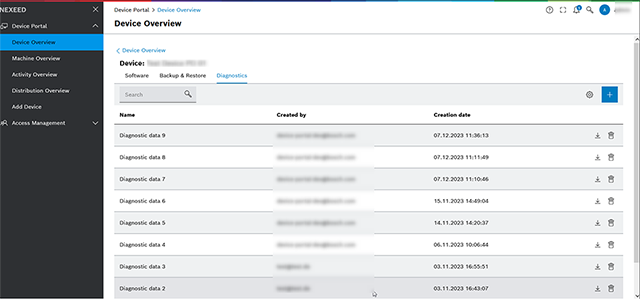
Diagnostics Tab
The device’s diagnostic data can be managed here: To do this, the desired diagnostic data can be uploaded from the device to the Device Portal Upload diagnostic data of a device and then saved locally Download diagnostic data of a device.
| No. | Description |
|---|---|
1 |
|
2 |
Upload new diagnostic data of the device |
3 |
List with max. 10 diagnostic data per device |
Uploading Diagnostic Data of a Device
Diagnostic data can be used to upload diagnostic information from the device to the Device Portal. The user can then download it again through the UI in order to analyze it locally.
-
Click on a device in the Device Overview to open the software overview for the device
-
image::233210.png[233210]
-
Click on the Diagnostics tab to open the overview page for the diagnostic files.
-
Click Add
 above the Diagnostics table to start a new upload of diagnostic data.
 -
Enter a name and an optional description in the Upload Diagnostic Data of Device window.

-
Name: Enter a name for the new diagnostic data to be generated.
-
Include Log Files: Enter the individual parameters of the device type for generating the diagnostic file. These may differ for each device type.
-
Description of Activity: Enter the reason for the upload. This will be displayed later in the Activity Overview.
-
-
Click Submit to initiate the upload of the diagnostic data to the Device Portal.
The request for uploading the diagnostic data is retrieved from the appropriate device and confirmed by this device. Once this has been done, the device sends the diagnostic data to the Artifact Repository, which then displays it in the table of the Diagnostics tab.
Downloading Diagnostic Data of a Device
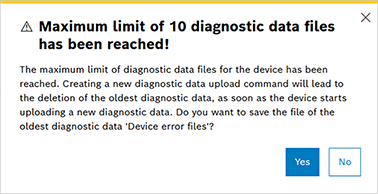
Diagnostic data previously uploaded to the device can be downloaded from the Device Portal and saved locally. The number of available diagnostic data of a device is limited to 10.
-
Click Download image::234862.png[234862] on the right side of the table to download the desired diagnostic data.
-
Click Delete image::234863.png[234863] on the right side of the table to delete the desired diagnostic data.
If the maximum number of diagnostic data for a device has been reached, the following dialog opens.
-
Clicking on Yes automatically saves the oldest diagnostic data locally and opens the dialog for uploading diagnostic data. As soon as new data has been created here, the oldest diagnostic data is deleted.
-
Clicking No results in the oldest diagnostic data not being saved automatically and opens the dialog for uploading diagnostic data. As soon as new data has been created here, the oldest diagnostic data is deleted.
-
Clicking on X cancels the entire process and closes the dialog.
-
The downloaded diagnostic data is now available locally in the Downloads folder for further processing.