Overview: Schedules Tab
Under Reporting > Schedules , the user-created schedules for time-controlled and scheduled module report generation are displayed. The list of schedules can be filtered.
The detailed view provides more information about individual schedules and the option to edit schedules. The detailed view is displayed by clicking on a schedule.
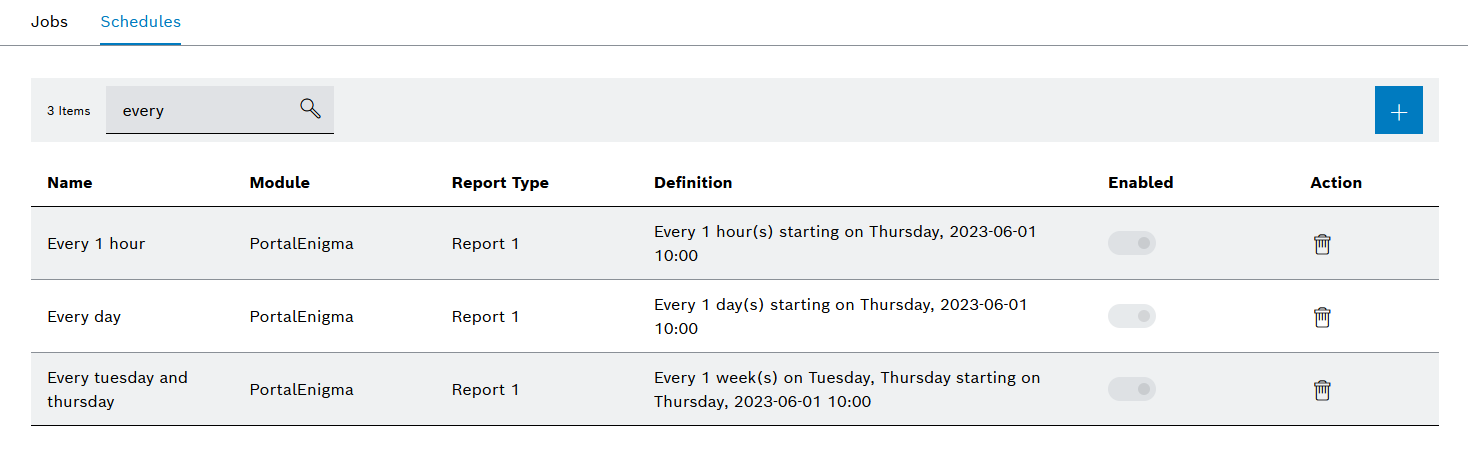
Header
| Element/icon/column | Description | |
|---|---|---|
|
||
Name |
Name of the schedule |
|
Module |
Module that generates the module report |
|
Report type |
Modules may generate different types of reports. This field displays the type of module report created. |
|
Definition |
Details of the creation time or scheduled creation |
|
Enabled |
Entry List
| Element/icon | Description |
|---|---|
|

Activate Schedule
Prerequisite
-
Reporting Management Userrole
Procedure
-
Go to the Reporting > Schedules tab.
-
In the table ( Overview: Schedules Tab ), activate the schedule to be activated using the switch
 .
.
The schedule is activated.
Deactivate Schedule
If schedules are deactivated, they remain in the table ( Overview: Schedules tab ). However, the execution of the associated module report is paused until the next activation.
Prerequisite
-
Reporting Management Userrole
Procedure
-
Go to the Reporting > Schedules tab.
-
In the table ( Overview: Schedules Tab ), deactivate the schedule to be deactivated using the
 switch.
The schedule is deactivated.
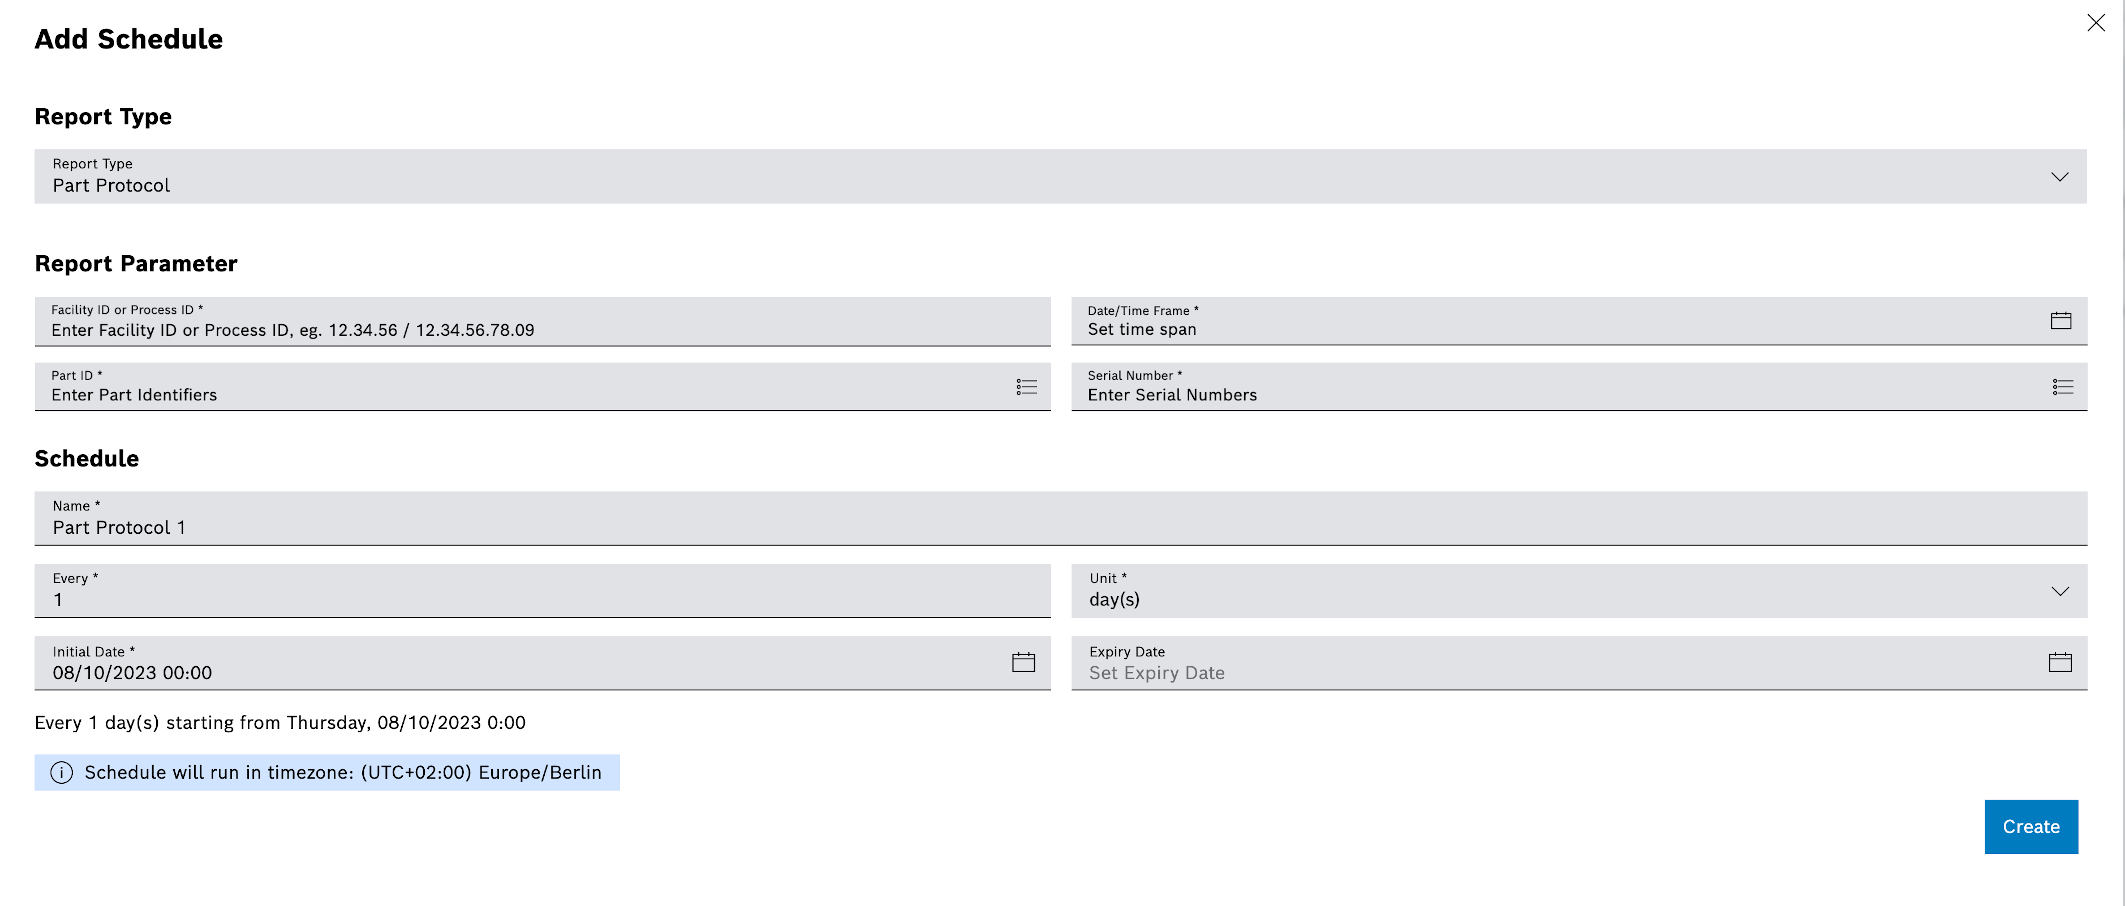
Add Schedule
Prerequisite
-
Reporting Management Userrole
Procedure
-
Go to the Reporting > Schedules tab.
-
In the header, click
 to add a new schedule.
The Add Schedule dialog window appears.
-
In the Report Type drop-down list, select the type of module report to be generated.
Fields marked with an asterisk (*) are mandatory and must be completed.
-
Fill in the Equipment ID or Process ID , Part ID and Serial Number input fields.
-
In the Date/Time Range field, click
 and select a time range for which you want to create the module reports, or adjust with
  or
or  .
. -
In the Name input field, enter the name under which the module report is listed in the job list.
-
Use the All and Unit fields to specify the interval at which the module report is to be generated.
The specified interval is displayed in the lower part of the dialog window. In the example, each (all: 1) day (unit: day(s)), a module report is generated.
-
In the Initial Date field, click
and select a start date for the first module report or adjust with or . -
In the Expiration Date field, set the end date of the last module report.
The specified start date is displayed in the lower part of the dialog window.
-
Click Create.
The schedule is created and displayed in the list of schedules ( Overview: Schedules Tab ).